
Desserts
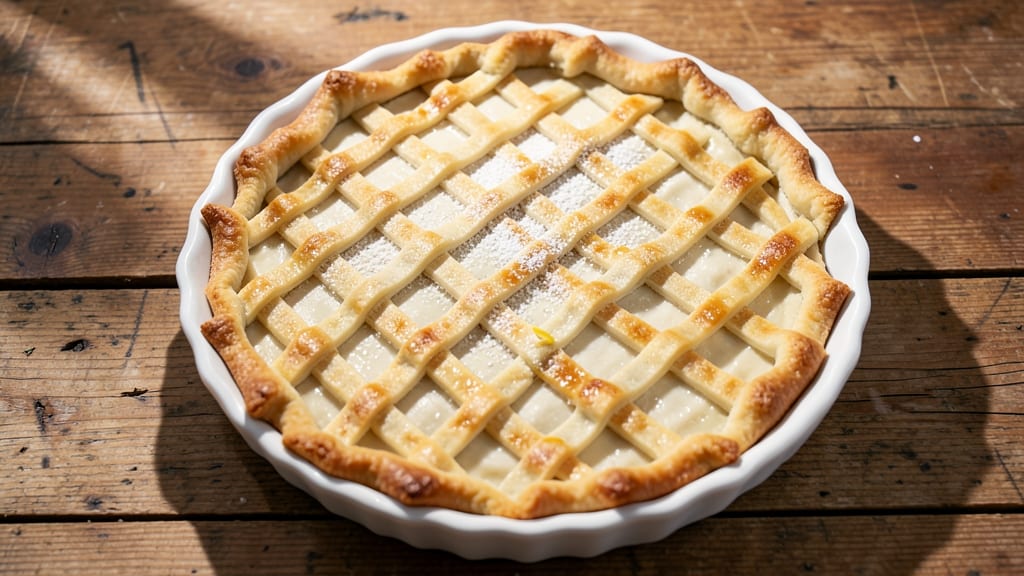
The Amish never-fail pie crust recipe delivers flaky, golden layers without shortcuts—just flour, lard, and cold butter. This time-tested method, handed down through generations, creates a crust so sturdy it holds even the juiciest fillings.
The secret lies in precise technique: chilling the dough thoroughly and handling it gently to prevent shrinking.
What sets this crust apart is its simplicity—no expensive ingredients or complicated steps. Traditional Amish cooks relied on lard for its high smoke point and rich flavor, but modern adaptations allow for butter or even vegan alternatives.
The key to success? Keeping everything cold and working quickly to avoid gluten development.
By the time you bake it, you’ll have a crust that’s crisp on the edges and tender inside, with a subtle golden hue that’s impossible to resist. Whether you’re making a classic apple pie, a rich pecan tart, or a savory quiche, this crust forms the perfect foundation.
The best part? It’s foolproof—no more soggy bottoms or cracked tops.
Ready to master this classic? Let’s break down the steps for a crust that’s as reliable as it is delicious.
Ingredients for amish never fail pie crust
Four simple ingredients create the legendary Amish crust—flour, lard, butter, and ice water.
| Ingredient | Amount | Notes |
|---|---|---|
| All-Purpose Flour 🌾 | 2 ½ cups | Sifted for light texture |
| Lard 🧈 | 1 cup | Chilled for flakiness |
| Unsalted Butter 🧈 | ½ cup | Cold, cubed |
| Ice Water 💧 | ¼ cup | Chilled to prevent gluten |
| Kosher Salt 🧂 | ½ tsp | Diamond Crystal preferred |
| Granulated Sugar 🍚 | 1 tbsp | For golden crust |
| White Vinegar 🍶 | 1 tsp | Enhances flakiness |
Lard is the traditional secret ingredient—Armour or Wilson's brands work best for that authentic Amish flavor and high smoke point. If you prefer butter, use European-style unsalted for better fat content. The flour should be King Arthur or Gold Medal for consistent results. Keep everything cold: store your lard and butter in the freezer until ready to use, and chill your mixing bowl and utensils. The ice water is non-negotiable—it prevents gluten development and keeps the dough from sticking.
No lard? Butter alone works (just add 1 tbsp extra), or use vegetable shortening for maximum flakiness. Vinegar can be swapped for lemon juice at half the amount. For a gluten-free version, use Bob's Red Mill 1:1 flour blend. The sugar is optional but helps with browning—skip it for savory pies. When measuring flour, use the spoon-and-level method for accuracy. Pre-sift your dry ingredients to avoid lumps in the dough.
This dough keeps for 3 days wrapped in plastic in the fridge or 3 months frozen in portions. For best results, chill the dough between rolls. Brush finished pies with egg wash or milk for that classic golden sheen. Leftovers? Roll out and freeze between parchment for quick future pies. The Amish method guarantees no soggy bottoms—just crisp, golden perfection every time.
Why You'll Love This Recipe
- No-Fuss Mixing: Between us, this crust comes together with three ingredients (flour, lard, butter) and ice water—no fancy techniques. I swear, I’ve made it while chatting on the phone, and it still holds up like a dream.
- Buttery-Lard Magic: That combo of cold lard and butter? It’s the secret. The lard gives it a flaky, almost melt-in-your-mouth texture, while the butter adds richness. Honestly, it’s the kind of crust that makes store-bought look sad.
- Weeknight to Holiday: I use this for apple pie on Tuesdays and pecan pie for Thanksgiving—same crust, zero stress. It’s the reliable friend you didn’t know you needed, whether you’re feeding your family or impressing guests.
- Budget-Friendly Staples: Flour, lard, butter—these are pantry basics that won’t break the bank. I’ve made dozens of pies with this recipe, and the cost per serving is laughably low. Plus, leftovers? Crust freezes like a champ for next month’s dessert.
Step-by-step instructions for Amish never-fail pie crust
This method delivers a flaky, golden crust even in cold kitchens—no warm water or tricky techniques required.
Cut in Cold Fat for Maximum Flakiness
Place the 2.5 cups All-Purpose Flour in a large bowl and add the 0.5 tsp Kosher Salt and 1 tbsp Granulated Sugar. Whisk lightly to distribute. Cut in the 1 cup chilled Lard and 0.5 cup cold cubed Unsalted Butter using a pastry cutter or two forks. Work quickly—you want pea-sized fat pieces, not a paste. If the mixture starts to look shaggy, chill the bowl for 5 minutes in the freezer to firm up the fat.
Here's the thing—Amish bakers swear by cold fat for flakiness. The key is keeping everything cold until the final mix-in. If your kitchen feels chilly, work in short bursts and let the bowl rest between cuts. You'll know you're on track when the mixture resembles coarse meal with visible fat pieces.
Mix in Vinegar and Ice Water Gradually
Add the 1 tsp White Vinegar first and mix with a fork until just combined. Then, add the 0.25 cup Ice Water 1 tablespoon at a time, mixing gently after each addition. The vinegar helps tenderize the gluten while the ice water binds everything without warming the dough. Stop mixing as soon as the dough comes together—overworking develops gluten and makes the crust tough.
This is where most recipes fail. Many call for warm water, but that activates the gluten and makes the crust tough. The ice water keeps everything cold, preventing gluten development while still providing enough moisture to hold the crust together. You'll know it's ready when the dough forms a loose clump that can be pressed into a ball.
Shape and Chill for Perfect Texture
Turn the dough onto a lightly floured surface and divide it into two equal portions. Shape each into a disk about 1.5 inches thick. Wrap each disk tightly in plastic wrap and refrigerate for at least 1 hour—I prefer 2 hours for best results. The longer it chills, the flakier the crust will be. Don't skip this step; cold dough prevents shrinking during baking.
When handling the dough, be gentle. Amish cooks press the dough between their palms rather than rolling it to avoid warming it. If your kitchen is particularly warm, place the wrapped dough on a baking sheet to prevent it from sticking to the fridge shelf. The goal is to keep everything cold until you're ready to roll.
Roll Out Without Warming the Dough
Remove one disk from the fridge and place it between two sheets of parchment paper. Roll it gently from the center outward, applying even pressure, until it reaches about 12 inches in diameter for a standard 9-inch pie. The dough should be about ⅛ inch thick at the edges and slightly thicker in the center. If it starts to resist, let it rest for 10 minutes in the fridge to firm up.
Here's a pro tip: Keep the dough cold by working quickly and using a rolling pin that's been chilled in the freezer for 10 minutes. If the dough feels sticky, dust lightly with flour—but don't overdo it, or you'll end up with a tough crust. The edges should be slightly jagged, which is perfect for creating those beautiful flaky layers when baked.
Blind-Bake for a Perfect Foundation
Transfer the rolled crust to a 9-inch pie dish and trim the edges to ½ inch. Press the edges up gently to create a ¼-inch rim. Line the crust with parchment paper, fill it with pie weights or dried beans, and bake at 375°F for 15 minutes. Remove the weights and bake for another 5-7 minutes until the edges are light golden brown and the bottom is just starting to crisp. Prick the bottom with a fork to prevent puffing.
This pre-baking step ensures your pie filling doesn't make the crust soggy. The crust should be firm enough to hold its shape but still slightly soft in the center—it'll finish cooking when you add the filling. If your oven runs hot, reduce the temperature to 350°F and check at the 12-minute mark. A perfectly blind-baked crust is the secret to a never-fail pie.
Pro Tips For Making Amish Never Fail Pie Crust
- Chill the Lard First: I learned this the hard way—room-temperature lard turns into a greasy mess when mixed with flour. Pop it in the fridge for 20 minutes before cutting it into the dough, and you’ll get that perfect crumbly texture without fighting sticky clumps.
- Cut Fat Fast with a Knife: Skip the food processor unless you’re in a hurry. Use a sharp chef’s knife to cut cold lard and butter into the flour in quick, choppy motions—think "pulse" but by hand. This creates more surface area for flaky layers without overworking the dough.
- Salt the Water Light: Too much salt in the ice water makes the crust taste flat. Use just ½ teaspoon for the full recipe, then add the rest to the filling. Trust me, the crust will still be flavorful, and your filling won’t get overwhelmed.
- Press the Dough Once: Resist the urge to roll it out thin right away. After shaping the crust, let it rest in the fridge for 30 minutes—this keeps it from shrinking when it bakes. Then roll it out just thick enough to hold its shape, no more. (Yes, even if it looks uneven.)
Best sauces and condiments for these flavors
Classic Apple Butter
This rich, spiced apple butter is the perfect topping for your Amish pie crust. Use 4 cups peeled, chopped apples (I love Granny Smith for tartness), ½ cup brown sugar, 1 tsp cinnamon, and ¼ tsp cloves.
Simmer in a saucepan for 45 minutes until thick and glossy. The natural pectin in the apples creates a velvety texture that pairs beautifully with the crust's flakiness. 🍏
Sweet Cream Cheese Filling
For a creamy alternative, blend 8 oz cream cheese, ½ cup powdered sugar, 1 tsp vanilla extract, and 1 egg yolk until smooth. Spread this luscious filling between two pie crust layers and bake at 350°F for 45 minutes.
The tangy cream cheese balances the buttery crust perfectly, creating a dessert that's both rich and light. 🧀
Spiced Caramel Sauce
Drizzle a warm caramel sauce over the top of baked pies for an elegant finish. Combine 1 cup granulated sugar, ½ cup heavy cream, and 1 tbsp unsalted butter in a saucepan.
Cook over medium heat until golden, then stir in ½ tsp cinnamon and ¼ tsp nutmeg. Let cool slightly before pouring over warm pies. This sauce adds a luxurious touch without overwhelming the crust's natural flavor. 🥄
Vanilla Bean Whipped Cream
No pie is complete without a dollop of whipped cream! Whip 1 cup heavy cream with 2 tbsp powdered sugar and 1 vanilla bean scraped until soft peaks form.
The vanilla enhances the crust's subtle sweetness while adding a light, airy contrast. For extra flair, dust with powdered sugar or a pinch of ground cinnamon before serving. ✨
Honey-Lemon Glaze
Brighten up your pie with a zesty honey-lemon glaze. Mix ½ cup honey, 2 tbsp lemon juice, and 1 tbsp cornstarch in a small saucepan. Cook over medium heat until thickened, then brush generously over the crust after baking.
The citrus cuts through the richness, making every bite refreshing. This glaze works especially well with berry pies or custard fillings. 🍯
Nutrition facts
Frequently asked questions
Why does the Amish recipe use lard instead of butter?
The traditional Amish crust relies on lard because it has a higher smoke point and creates more flaky layers than butter alone. Lard stays solid at cooler temperatures, preventing the crust from shrinking during baking. Modern versions often use butter or shortening for similar results, but lard delivers that authentic, rich flavor Amish cooks love.
Can I make this crust without a food processor?
The recipe works perfectly using just two forks or a pastry cutter. Cut the cold fat into the flour until pea-sized pieces remain—no need for a food processor. The key is working quickly and keeping everything cold to avoid developing gluten, which would make the crust tough.
What's the best way to prevent a soggy bottom?
Blind-baking is the secret! Pre-bake your crust with pie weights or dried beans for 15 minutes at 375°F before adding filling. This creates a sturdy base that won't absorb moisture from juicy fillings. For extra insurance, sprinkle a thin layer of cornstarch on the pre-baked crust before adding your filling.
How do I store leftover pie crust?
Wrap the dough tightly in plastic wrap and refrigerate for up to 3 days, or freeze for 3 months. For best results, thaw in the fridge overnight before using. You can also roll out and freeze the crust between parchment paper—just bake straight from frozen, adding 2-3 extra minutes to your baking time.
Can I use this crust for savory pies or quiches?
This crust works beautifully for savory dishes too! Skip the sugar and add 1 tbsp fresh herbs (like thyme or rosemary) or ½ tsp garlic powder to the dough. The buttery flavor pairs perfectly with spinach quiches, chicken pot pies, or even savory fruit combinations like caramelized onion and apple.