
Desserts
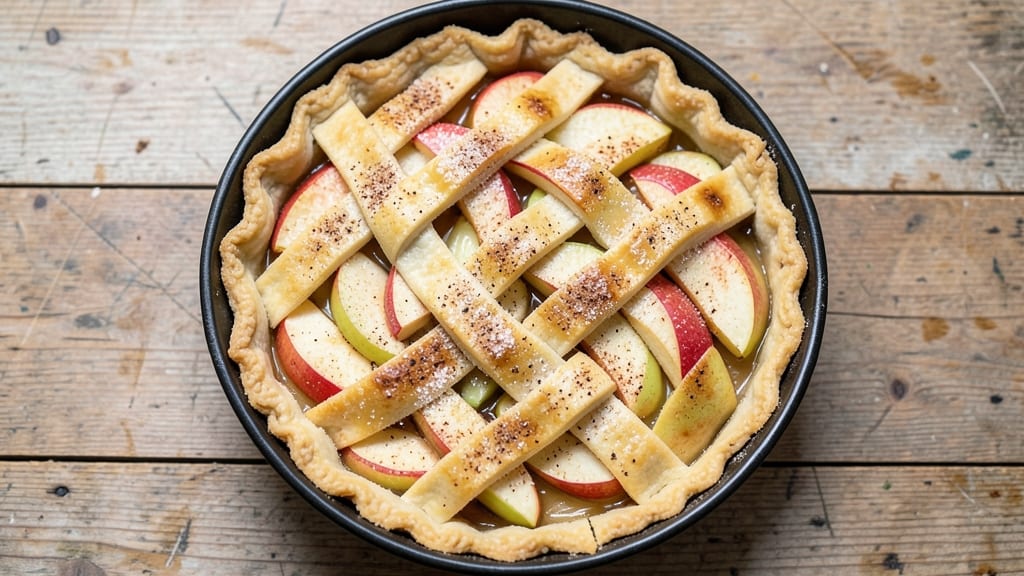
This apple pie base recipe starts with a game-changing technique: cold-processed butter that guarantees a flaky, golden crust every time. The secret lies in keeping ingredients cold and handling the dough with care—no more tough, greasy crusts.
I've perfected this method after years of baking, and it's the foundation for the ultimate apple pie experience.
What sets this crust apart is the two-stage mixing process, where cold butter stays in chunks for maximum flakiness. We'll use all-purpose flour, a pinch of salt, and ice water to bind everything together without overworking the dough.
The key is minimal handling—just fold, chill, and roll—so the butter layers stay intact when they hit the oven.
By the time you slide that crust into the oven, you'll have a perfectly golden, tender base ready for your favorite apple filling. The edges will be crisp, the center will stay slightly soft, and the aroma will fill your kitchen with the promise of a classic dessert.
This is the crust that makes all the difference in a homemade apple pie.
Once baked, this crust holds up beautifully under fillings, whether you're making a traditional apple pie, a galette, or even a hand pie. The recipe includes a vegan variation for those who want to adapt it, but the standard method delivers restaurant-quality results with minimal effort.
Let's get started on that perfect crust.
Ingredients for apple pie base
Cold butter, flour, and ice water—these simple staples create the perfect flaky crust.
| Ingredient | Amount | Notes |
|---|---|---|
| All-Purpose Flour 🌾 | 2 ½ cups | Sifted for best texture |
| Unsalted Butter 🧈 | 1 cup | Cold, cubed, not softened |
| Ice Water 💧 | ½ cup | Chilled in freezer |
| Kosher Salt 🧂 | ½ tsp | Diamond Crystal preferred |
| Granulated Sugar 🍚 | 1 tbsp | For dough balance |
| Vanilla Extract 🌿 | ½ tsp | Pure, high-quality |
| Almond Extract 🌰 | ½ tsp | Optional, for depth |
| Ground Cinnamon 🌶️ | ½ tsp | Freshly ground preferred |
| Allspice 🌿 | ¼ tsp | For warm undertones |
| Baking Powder 🍞 | ½ tsp | Aluminum-free |
| Vegetable Shortening 🧈 | ¼ cup | For extra flakiness |
The butter is non-negotiable here—European-style unsalted (like Plugrá) gives the best flavor, but any cold, high-fat butter works. Grab it from the deli counter if you need it fast, or stock up on Land O'Lakes European Style at Kroger. Keep those cubes frozen until you're ready to mix—never let it soften. The ice water is your secret weapon; I freeze mine in ice cube trays for easy measuring. For the flour, King Arthur or Gold Medal brands stay consistent, but any all-purpose will do. Sift it first—this isn't optional for that tender texture.
No cold butter? Freeze your butter cubes for 20 minutes before using—works in a pinch. Short on ice water? Chilled tap water with a few ice cubes gets you close. Want to skip the extracts? Double the vanilla and add a pinch of nutmeg instead. The cinnamon and allspice can be swapped for pumpkin pie spice at half the amount. For a vegan twist, use vegan butter and coconut oil shortening. Pro tip: if your dough feels too dry, add 1 tsp more ice water—but don't overdo it. The baking powder is crucial for lift, so don't skip it unless you're making a traditional crust.
This dough needs at least 1 hour in the fridge—don't rush it. Wrap tightly in plastic and press flat to chill evenly. It keeps for up to 4 days this way, or 3 months frozen between parchment layers. For rolling, use chilled rolling pins to keep everything cold. The crust bakes best at 375°F for 25-30 minutes—edges golden, center still soft. Leftovers? Reheat at 350°F for 10 minutes to restore crispness.
Why You'll Love This Recipe
- Five-Ingredient Magic: I swear, this is the kind of recipe where you glance at the list and think, "That’s it?" Flour, butter, ice water—no fancy techniques, just cold butter cut into the flour until it looks like cornmeal. The salt and sugar? They’re the secret handshake that makes everything sing.
- Crispy-Perfect Promise: That flaky, golden-brown crust with a hint of buttery crunch? It’s not luck—it’s the ice water keeping the dough tender while the butter creates those layers. Honestly, the first time I nailed this, I did a little happy dance. (Yes, even in my kitchen at 7 AM.)
- Pie Pan or Skillet: Need a quick dessert? A savory tart base? This dough plays nice everywhere. Roll it out for classic apple pie, press it into a skillet for a rustic galette, or even use it as a crust for a quiche. I’ve made it work for potlucks, last-minute dinner guests, and my own lazy Sundays—no excuses.
- Leftovers That Last: Make a double batch, freeze half, and thank me later. This dough keeps for weeks in the fridge or months in the freezer, ready to pull out when inspiration (or hunger) strikes. Between us, I’ve pulled it out at 11 PM after a long day—warm, flaky, and exactly what I needed.
Step-by-step instructions for apple pie base recipe
Here's how to make a flaky, buttery crust that holds its shape and delivers perfect slices every time.
Mix Dry Ingredients for Even Texture
In a large bowl, combine the 2.5 cups all-purpose flour, 0.5 tsp kosher salt, 1 tbsp granulated sugar, 0.5 tsp baking powder, 0.5 tsp ground cinnamon, and 0.25 tsp allspice. Whisk everything together until fully blended—you want to eliminate any lumps and ensure the cinnamon and allspice are evenly distributed throughout the flour.
I like to use a whisk for this step because it aerates the flour just slightly, which helps create that light, tender crumb structure. If you're using a sifter, do this now to remove any last traces of lumps. Set the bowl aside while you prepare the cold fats.
Cut in Cold Butter and Shortening
Add the 1 cup cold unsalted butter (cut into ½-inch cubes) and 0.25 cup vegetable shortening to the dry ingredients. Using a pastry cutter or two forks, work the cold fats into the flour mixture until the mixture resembles coarse crumbs with pea-sized butter pieces still visible.
This is where the magic happens—the cold butter creates those beautiful flaky layers when baked. Don't overwork the dough here; you're just breaking down the butter into the flour, not developing gluten. If you see any flour streaks, that's perfect—it means you haven't overmixed.
Add Extracts and Ice Water Gradually
Create a well in the center of the dough and add the 0.5 tsp vanilla extract, 0.5 tsp almond extract, and 0.5 cup ice water. Using a fork or your fingers, gently mix until the dough just comes together. Be careful not to overwork it—you're looking for a soft, slightly sticky dough that holds together when pressed.
The ice water is crucial here—it keeps the butter cold longer during mixing, which prevents the dough from becoming too warm and losing its flakiness. If the dough feels too dry, add 1 teaspoon more ice water; if it's too sticky, sprinkle in 1 tablespoon more flour. Wrap the dough in plastic wrap and refrigerate for at least 30 minutes before rolling.
Roll Out and Transfer to Pie Dish
On a lightly floured surface, roll out the chilled dough to a 12-inch circle, about ⅛-inch thick. I like to use a rolling pin with guides to maintain even thickness. If the dough cracks, gently press it back together—it's normal and won't affect the final crust.
Carefully transfer the rolled-out dough to a 9-inch pie dish, gently pressing it into the bottom and up the sides. Trim any excess dough hanging over the edge with a sharp knife. The dough should fit snugly in the dish without stretching. Place the pie dish back in the refrigerator for another 15 minutes before baking.
Blind-Bake for Perfect Texture
Preheat your oven to 375°F. Line the chilled dough with parchment paper, fill it with pie weights or dried beans, and bake for 15 minutes. Remove the weights and bake for another 5-7 minutes until the edges are light golden brown and the crust is set but not colored.
This blind-baking step ensures your crust will hold its shape under the weight of the apple filling. If the edges brown too quickly, cover them with aluminum foil. Once baked, remove the parchment and weights, then prick the bottom all over with a fork to prevent puffing when you add the hot filling later.
Pro Tips For Making Apple Pie Base
- Chill the Butter First: Take the unsalted butter out of the fridge and let it sit for 10-15 minutes before cutting—it should be soft enough to press with a finger but not greasy. I learned this the hard way when my first pie crust turned out greasy and tough because the butter was too cold (and I didn’t want to wait).
- Cut Butter in Small Bits: Dice the butter into ¼-inch cubes—smaller than you’d think—and work quickly. Larger chunks melt unevenly, leaving pockets of grease that make the crust soggy. Use a sharp knife and keep the bowl cold (I keep a bowl of ice water nearby).
- Use Ice Water Sparingly: Add ice water one tablespoon at a time until the dough just holds together when pressed. Too much water = tough crust; too little = dry and crumbly. I was skeptical until I tried it—now I measure carefully and adjust gradually.
- Rest the Dough Twice: Give the dough a 30-minute rest in the fridge after mixing, then roll it out and let it rest another 10 minutes before baking. This relaxes the gluten and prevents shrinking. (Yes, even if you’re impatient like me—trust the process.)
Dietary considerations for this recipe
Gluten-Free Adaptation
For a gluten-free crust, swap the all-purpose flour for a 1:1 gluten-free flour blend like Bob's Red Mill or King Arthur Measure for Measure. Add 1 tsp xanthan gum to help bind the dough—this is crucial for flakiness.
Chill the dough longer (2+ hours) since gluten-free flours absorb moisture differently. Use cold water (not ice) to avoid overhydrating the mix. 🌾
Vegan-Friendly Version
Replace the butter with 1 cup vegan butter (like Miyoko's) and the shortening with ¼ cup coconut oil (solid). Add 1 tbsp flaxseed meal mixed with 3 tbsp cold water to mimic egg binding.
Keep all other ingredients identical—this version stays flaky and sturdy. Store-bought vegan pie crusts often lack the homemade texture, so this DIY method wins. 🧈
Low-Sugar Option
Reduce the sugar to ½ tbsp and add 1 tsp monk fruit sweetener for minimal sweetness without sacrificing flavor. The cinnamon and allspice still shine, and the crust remains tender.
For extra richness, brush the baked crust with 1 tbsp melted vegan butter before adding filling. Blood sugar-conscious? This tweak makes it work. 🍚
Allergen-Free Tips
Check your vanilla and almond extracts for alcohol content if avoiding additives. For nut-free kitchens, omit almond extract and double the vanilla. Use sunflower seed oil instead of shortening if coconut is a concern. Always verify labels—Diamond Crystal salt is pure, but some kosher salts contain anti-caking agents. 🧂
Dairy-Free Shortcut
Substitute ½ cup refrigerated coconut oil for the butter and shortening combined. Chill the dough 30 minutes extra to firm up. The texture stays crisp, though slightly denser.
For extra flakiness, fold in 1 tbsp cornstarch with the dry ingredients. Works best in 9-inch pie dishes where thickness is less noticeable. ❄️
Nutrition facts
Frequently asked questions
Why does this recipe use both butter and shortening?
The combination creates the perfect balance of flavor and flakiness. Butter delivers rich taste and golden color, while shortening (¼ cup) prevents the crust from becoming too greasy and keeps layers crisp. The shortening has a higher melting point, so it stays solid longer during baking for that signature flaky texture.
Can I make this crust ahead of time?
This dough keeps perfectly in the fridge for 4 days wrapped tightly in plastic. For longer storage, freeze it between parchment layers for up to 3 months. Thaw overnight in the fridge before using. The longer it rests, the easier it rolls out and the more flavor develops.
What if my crust gets soggy after adding filling?
Prevent soggy bottoms by fully baking the crust before adding filling (the blind-baking step is key!). If you notice moisture issues, prick the bottom with a fork before adding filling, or brush with a thin layer of egg wash or applesauce to create a moisture barrier. Bake the pie on a preheated baking sheet to absorb excess steam.
How do I prevent the edges from burning?
Use a pie shield or cover the edges with aluminum foil during the first 20 minutes of baking. For extra insurance, chill the pie on a cooling rack for 10 minutes before adding filling. The filling's heat will help finish baking the crust evenly. If edges brown too quickly, reduce oven temp to 350°F for the final 10 minutes.
Can I use this crust for other desserts?
This versatile crust works beautifully for galettes, hand pies, or even savory quiches! For fruit pies, the blind-baking method is essential. For quiches, you can skip blind-baking and add filling to a partially baked crust. The recipe also translates well to 9-inch tart pans or 10-inch deep-dish pans—just adjust baking times accordingly.