
Desserts
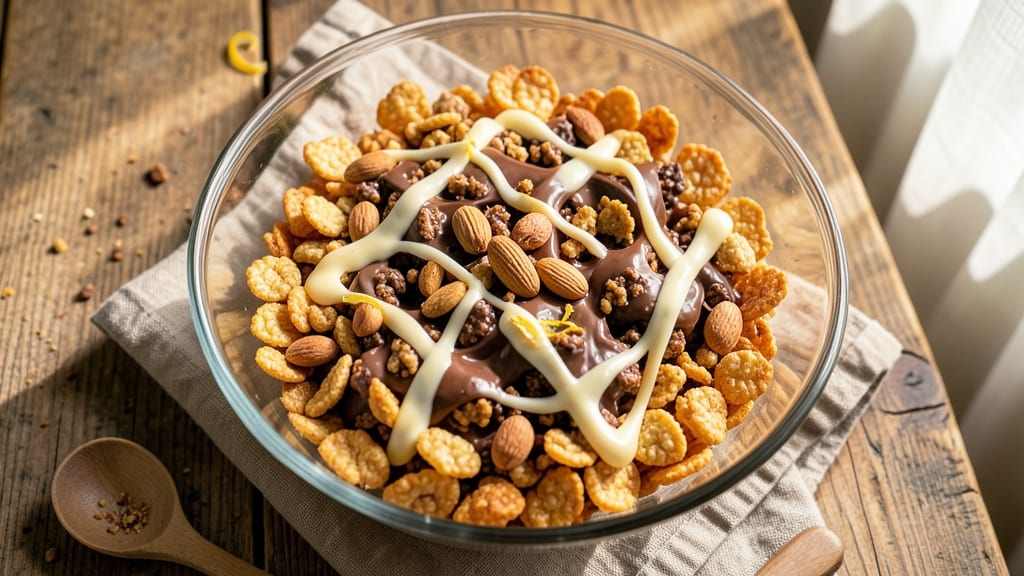
This Rice Krispie Rocky Road recipe transforms a childhood classic into a decadent dessert with layers of melty chocolate, gooey marshmallows, and crunchy nuts—all baked into crispy clusters. The secret lies in balancing the perfect ratio of ingredients so every bite delivers that nostalgic crunch and rich, chocolatey satisfaction.
I've perfected this version over years of testing, ensuring the treats stay crisp on the outside while remaining tender and packed with flavor inside.
The process is simpler than it sounds: melt chocolate and marshmallows together, mix in crushed Rice Krispies and chopped nuts, then press the mixture into a pan for that signature rocky road texture.
Baking at low heat ensures the treats don't overcook, while chilling in the fridge sets them into crispy, cluster-perfect bars. This isn't your basic Rice Krispie treat—it's a dessert that feels like a hug in every bite.
What makes this recipe stand out is the rich, fudgy chocolate layer that binds the marshmallows and nuts together, creating pockets of gooey goodness between every crispy cluster. The result is a dessert that's perfect for parties, potlucks, or satisfying a late-night sweet tooth.
Plus, it's customizable—add peanut butter for extra richness or swap in vegan chocolate for a dairy-free version.
Once you try this rocky road-inspired twist, you'll never go back to the basic Rice Krispie treat again. The combination of textures—crunchy, creamy, and chewy—makes it impossible to stop at just one piece. Ready to bake? Here's everything you need to create this crowd-pleasing dessert.
Ingredients for rice krispie rocky road
Here’s everything you need to create this nostalgic yet elevated dessert—rich, crunchy, and packed with flavor.
| Ingredient | Amount | Notes |
|---|---|---|
| Semi-Sweet Chocolate Chips 🍫 | 12 oz | High-quality for rich flavor |
| Large Marshmallows 🍡 | 14 oz | Mini marshmallows work too |
| Rice Krispies Cereal 🍚 | 6 cups | Crushed into clusters |
| Peanuts 🥜 | 1 cup | Chopped, or use pecans |
| Butter 🧈 | ½ cup | Unsalted, melted |
| Vanilla Extract 🌿 | 1 tsp | Pure extract preferred |
| Salt 🧂 | ¼ tsp | Kosher or sea salt |
| Heavy Cream 🥛 | ¼ cup | Optional for extra richness |
| Peanut Butter 🥜 | ½ cup | Creamy, optional |
| Powdered Sugar 🍚 | 1 tbsp | For dusting |
| White Chocolate Chips 🍫 | 4 oz | Optional for swirls |
| Cocoa Powder 🍫 | 1 tbsp | For garnish |
The chocolate is where the magic happens. Ghirardelli or Guittard chips melt beautifully, but any high-quality brand works. Marshmallows? Big, fluffy ones from the bulk section at Whole Foods or Trader Joe's are ideal—they don’t shrink as much. For the nuts, salted peanuts add a perfect crunch, but pecans or almonds take it to another level. If you’re feeling fancy, toast the nuts first for extra depth of flavor. The butter should be unsalted, and European-style brands like Plugrá melt smoother than others.
No semi-sweet chips? Dark chocolate (60%) works too, but reduce by 2 oz to balance sweetness. Short on marshmallows? Mini marshmallows at half the amount fit the same volume. Want extra richness? Swap the heavy cream for condensed milk—it adds a caramelized touch. The peanut butter is optional but creamy style blends better than crunchy. For a vegan twist, use dairy-free chocolate and marshmallows (like Dandies brand). And if you’re feeling playful, fold in crushed pretzels for a salty crunch—trust me, it’s genius.
This dessert stays fresh for 5 days in an airtight container, but the flavor peaks after 2-3 days—the marshmallows soften just enough to get gooey. For a crispier texture, store in the freezer for up to 3 months. I like to portion mine into individual servings right after baking—parchment-lined muffin tins work perfectly. If you’re making this for a crowd, double the recipe and use a 9x13-inch pan. The secret to serving? Dust with powdered sugar right before grabbing a piece—it makes everything feel extra special.
Why You'll Love This Recipe
- I’ll be real: this costs next to nothing to make, but it tastes like you spent hours slaving over it. A bag of chocolate chips, a box of marshmallows, and a cereal aisle staple—that’s it. And the best part? It feeds a crowd for less than $10, which means more dessert for everyone.
- Pantry Magic: I swear, this is the kind of dessert that makes me feel like a genius—just melt chocolate, toss in marshmallows and cereal, and boom, you’ve got something that tastes like a gourmet treat. No fancy equipment, no waiting for hours, just three bowls and a little elbow grease.
- Crunchy Creamy Bliss: That first bite—crispy Rice Krispies, gooey marshmallows, rich chocolate, and salty peanuts—it’s like a flavor party in your mouth. Honestly, I’ve made rocky road before, but this version? The peanuts add this perfect contrast that makes it ridiculously good.
- Party in a Box: Between us, this is my go-to for birthdays, potlucks, or just because I’m craving something sweet. It’s easy to double the recipe, and the leftovers? Still just as good the next day (if they last that long). Plus, it’s the kind of thing you can prep ahead and forget about until the last minute.
Step-by-step instructions for Rice Krispie rocky road
Here's how to create the perfect balance of gooey marshmallows, crispy cereal, and rich chocolate.
Melt the Chocolate and Butter
In a large microwave-safe bowl, combine the 12 oz semi-sweet chocolate chips and the 0.5 cup butter. Microwave in 30-second intervals, stirring between each, until completely melted and smooth. The mixture should be glossy with no visible chocolate chunks—this ensures a silky texture in your rocky road. If you prefer a swirl effect, set aside 4 oz white chocolate chips to melt separately.
While the chocolate melts, line a 9x13-inch baking dish with parchment paper, leaving an overhang for easy removal. Lightly grease the parchment to prevent sticking. The chocolate should reach about 110°F—just warm enough to coat but not so hot it melts the marshmallows prematurely when mixed.
Toast the Peanuts and Prepare the Cereal
In a dry skillet over medium heat, toast the 1 cup peanuts for 3-4 minutes until fragrant and lightly golden. Remove from heat and let cool slightly—this enhances their flavor without burning. While they toast, crush 6 cups Rice Krispies cereal into clusters by pressing them between your fingers or using a rolling pin. Larger clusters create that signature rocky road texture.
In a separate bowl, whisk together the 0.25 cup heavy cream, 1 tsp vanilla extract, 0.25 tsp salt, and 0.5 cup peanut butter (if using) until smooth. This mixture adds richness and balances the sweetness. If the peanut butter is thick, warm it slightly in the microwave to make blending easier.
Combine and Layer the Mixture
Pour the melted chocolate into the baking dish and spread it evenly with a spatula. Sprinkle half of the crushed Rice Krispies cereal over the chocolate, pressing down gently to create a base layer. This step prevents the cereal from floating to the top later. Scatter half of the toasted peanuts and 14 oz large marshmallows evenly over the cereal.
Drizzle half of the cream mixture over the marshmallows, then repeat the layering process with the remaining cereal, peanuts, and marshmallows. Top with the rest of the cream mixture and gently swirl it into the top layer using the spatula. If using the reserved white chocolate, drizzle it in zigzags over the top for a marbled effect.
Chill and Set for Perfect Texture
Refrigerate the baking dish for at least 4 hours, or until the mixture is firm to the touch. This chilling time is critical—it allows the chocolate to set while keeping the marshmallows soft and gooey. For a firmer texture, freeze for 2 hours, but I prefer the slightly softer consistency after refrigerating.
Once set, dust the top with 1 tbsp powdered sugar and sprinkle 1 tbsp cocoa powder for a decorative finish. Cut into squares or serve directly from the pan—either way, the contrast of crispy cereal, chewy marshmallows, and rich chocolate will be irresistible. Store leftovers in an airtight container in the fridge for up to 5 days or freeze for 3 months.
Pro Tips For Making Rice Krispie Rocky Road
- MELT CHOCOLATE LOW AND SLOW: I learned this the hard way—dumping chocolate chips into boiling butter turns them into a greasy mess. Instead, melt the butter first over medium-low heat, then add the chocolate chips and stir until it’s just smooth. The second the butter stops bubbling, take it off the heat. Chocolate burns faster than you think, and no one wants a bitter rocky road.
- TOAST THE PEANUTS: Skip the raw peanuts—toss them in a dry skillet over medium heat for 3-4 minutes until fragrant and lightly browned. This cuts through the marshmallow sweetness and adds a nutty depth. (Yes, even if you’re impatient like me—just don’t walk away.)
- WORK FAST WITH MARSHMALLOWS: Once the chocolate-butter mix is ready, add the marshmallows in batches and stir aggressively with a wooden spoon. They’ll start melting instantly, and if you linger, you’ll end up with a gluey, uneven texture. Think of it like folding hot cheese—get it done in 30 seconds or less.
- PRESS FIRM FOR CRISPY LAYERS: Don’t just dump the mix into the pan and call it a day. After spreading it out, press down hard with a greased spatula or the back of a spoon—this creates those satisfying crunchy layers. I used to skip this, and the result was a sad, mushy center. (Your future self will thank you.)
Pro cooking tips for perfect results
Chocolate Melting Mastery
Melt your chocolate in 30-second intervals to avoid overheating—this prevents graininess and ensures a silky texture. Use a microwave-safe bowl and stir vigorously between intervals. For a foolproof method, place a glass of water next to your bowl to create a makeshift double boiler effect in the microwave.
The chocolate should reach 110°F—test it by dipping a spoon in; it should coat the back smoothly. If you see any lumps, gently reheat and whisk until smooth. 🌡️
Cereal Cluster Perfection
Crush your Rice Krispies into clusters by pressing them between your fingers or using a rolling pin—this creates that signature rocky road texture. For extra crunch, toast the cereal lightly in a dry skillet for 1-2 minutes before crushing.
If you prefer a finer texture, pulse them briefly in a food processor, but don’t overdo it—you want those pockets of air for that classic crunch. 🍚
Layering Like a Pro
Press the first layer of cereal into the chocolate gently to create a solid base—this prevents it from floating to the top later. Alternate layers of cereal, marshmallows, and nuts, then drizzle the cream mixture evenly.
For a marbled effect, use a toothpick to swirl the white chocolate into the top layer. If your marshmallows are large, break them into smaller pieces for even distribution. This layering technique is what makes the texture so satisfying. 🌟
Chilling for Success
Refrigerate your rocky road for at least 4 hours—this is non-negotiable for the perfect texture. The chocolate needs time to set, while the marshmallows stay soft and gooey. If you’re in a hurry, freeze for 2 hours, but be prepared for slightly firmer marshmallows.
For even better results, let it chill overnight—the flavors meld beautifully, and the contrast between crispy and creamy becomes even more pronounced. ❄️
Toasted Nut Trick
Toast your peanuts or pecans in a dry skillet over medium heat for 3-4 minutes until fragrant. This step enhances their flavor without burning them—just watch closely to avoid over-toasting. Let them cool slightly before adding to the mixture.
For extra depth, sprinkle a pinch of cayenne pepper or smoked paprika over the toasted nuts before mixing. This adds a subtle warmth that pairs perfectly with the sweetness. 🥜
Serving with Flair
Dust the top with powdered sugar and sprinkle cocoa powder right before serving—this adds a professional touch and makes the dessert look even more enticing. For a fun presentation, cut into squares or serve directly from the pan with a side of vanilla ice cream.
If you’re making this ahead, portion into individual servings using parchment-lined muffin tins—they’re perfect for grab-and-go treats. 💫
Nutrition facts
Frequently asked questions
Can I make this recipe without marshmallows?
The marshmallows are what create that signature gooey texture, but you can substitute them with 1 cup of mini marshmallows or 1 cup of whipped cream for a lighter version. For a vegan option, use dairy-free marshmallows or coconut whipped cream. Just know the texture will be slightly different—less chewy, more airy.
Why did my Rocky Road turn out too soft or too hard?
Too soft? You likely didn't chill it long enough—4 hours minimum is key. Too hard? Over-chilling (especially freezing) makes the marshmallows rubbery. Aim for 110°F chocolate temp and let it set at room temp for 10 minutes before refrigerating. For extra insurance, use 1 extra tablespoon of butter to help bind the mixture.
What's the best way to store leftovers?
Wrap individual pieces tightly in plastic wrap or store in an airtight container with parchment paper between layers. Keep in the fridge for 5 days or freeze for 3 months. To prevent sogginess, let it sit at room temp for 10 minutes before serving. For a crispier texture, freeze and thaw only once.
Can I add other mix-ins like pretzels or cookies?
Try 1 cup crushed pretzels for a salty crunch or 1 cup chopped cookies (like Oreos or shortbread). For best results, toast them lightly first. Just reduce the cereal by 1 cup to maintain the right texture balance. Pro tip: Add mix-ins in the second cereal layer so they stay distributed.
How do I make this recipe gluten-free?
Use certified gluten-free Rice Krispies cereal and check your chocolate chips for gluten-free certification. Most marshmallows are naturally gluten-free, but verify the package. For the nuts, choose certified gluten-free brands. The rest of the ingredients (butter, vanilla, etc.) are typically safe. Always double-check labels!