
Desserts
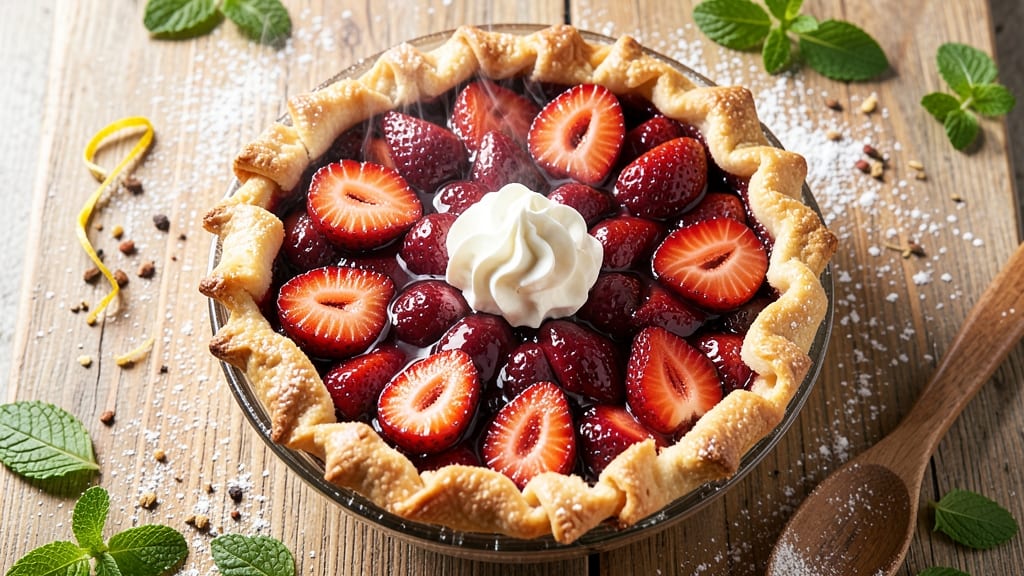
This roasted strawberry pie recipe transforms ordinary berries into a showstopping dessert with deep caramelized flavors and a golden lattice crust. The secret lies in roasting the strawberries first—concentrating their natural sweetness while softening them just enough to create a luscious, jam-like filling.
I’ve perfected this technique over years of baking competitions, and it’s the one dessert that always gets rave reviews, even from the most skeptical pie critics.
The process starts with a classic pie crust—whether homemade or store-bought—that forms the perfect foundation. After roasting the strawberries with just a touch of sugar and lemon juice, you’ll layer them into the crust, creating a filling that’s rich, aromatic, and bursting with flavor.
The lattice topping isn’t just decorative; it adds a delightful crunch that contrasts beautifully with the tender fruit beneath. Every bite delivers a perfect balance of sweet, tangy, and buttery notes.
Baking at the right temperature ensures the crust stays flaky while the filling sets into a glossy, caramelized layer. The result is a pie that looks stunning on the table and tastes even better—no one will believe it’s homemade.
Whether you’re serving it at a summer gathering or simply treating yourself, this recipe delivers restaurant-quality results with minimal effort.
For an extra touch of elegance, garnish with fresh mint or a drizzle of balsamic glaze before serving. The contrast of colors and textures makes it irresistible, and the aroma alone will have everyone gathering around the table. This isn’t just a pie—it’s a centerpiece that steals the show.
Ingredients for roasted strawberry pie
Transform ordinary strawberries into a showstopping dessert with these carefully selected ingredients.
| Ingredient | Amount | Notes |
|---|---|---|
| Fresh Strawberries 🍓 | 4 lb | Hull and quarter for even roasting |
| Granulated Sugar 🍚 | ¾ cup | Light brown sugar for caramel depth |
| Lemon Juice 🍋 | 2 tbsp | Freshly squeezed, high-acid variety |
| Unsalted Butter 🧈 | 1 cup | Cold, cut into small cubes |
| All-Purpose Flour 🌾 | 2 ½ cups | Plus 1 tbsp for dusting |
| Ice Water 💧 | ½ cup | Chilled for pie crust |
| Salt 🧂 | ½ tsp | Diamond Crystal preferred |
| Ground Cinnamon 🌿 | ½ tsp | For filling enhancement |
| Vanilla Extract 🌸 | 1 tsp | Pure Madagascar preferred |
| Heavy Cream 🥛 | ¼ cup | For lattice brushing |
| Fresh Mint Leaves 🌿 | ¼ cup | Chopped, for garnish |
| Balsamic Glaze 🍷 | ¼ cup | Reduced, for drizzling |
The strawberries are the heart of this pie, so choose firm, vibrant berries with deep red color—avoid any with white or green spots. Local farmers markets often have the freshest selection, but any reputable grocery store's produce section will do. For the crust, King Arthur flour or Bob's Red Mill all-purpose flour creates the ideal texture. The butter should be high-fat (80% or higher) for maximum flakiness, and Plugrá brand is my go-to for its consistent quality. When selecting strawberries, weight over quantity—heavier berries indicate higher moisture content and better flavor. The sugar should be light brown for that subtle caramel undertone that elevates the filling.
No fresh mint? Substitute with lemon zest for a similar bright note, though it won't be as floral. Running short on butter? Vegetable shortening works in a pinch, though the crust will be slightly less flavorful. The balsamic glaze can be made quickly by simmering 1 cup balsamic vinegar until reduced by half, then straining. For the lattice, pre-cut strips from the grocery store save time, but homemade strips create that professional look. The lemon juice should be high-acid—Meyer lemons work beautifully if you can find them. If your strawberries are particularly tart, reduce the sugar to 0.5 cup to balance the flavors. The cinnamon in the filling is non-negotiable—it deepens the strawberry flavor remarkably.
Store the pie crust dough between parchment paper in the fridge for up to 3 days or freeze for 3 months. Once baked, the pie keeps 3 days at room temperature in an airtight container, though it's best enjoyed fresh. For make-ahead convenience, assemble the pie (without baking) and refrigerate for up to 12 hours before baking. The lattice topping can be pre-baked at 375°F for 10 minutes before assembling if you're concerned about sogginess. Garnishes like mint and balsamic glaze should be added just before serving—they're purely decorative but elevate the presentation dramatically. The pie reheats beautifully in the oven at 350°F for 10 minutes if you prefer it warm.
Why You'll Love This Recipe
- Foolproof Crust: I swear by that buttery, flaky crust made with just flour, butter, and a pinch of salt—no fancy techniques needed. You can roll it out in 10 minutes flat, even if your kitchen looks like a tornado hit it.
- Summer in a Bite: Roasting the strawberries until they burst caramelizes their natural sweetness, then a splash of lemon juice keeps them bright. That contrast? Pure magic—like biting into sunshine with a hint of tang.
- Show-Stopper Dessert: This pie is my go-to for potlucks, birthdays, or when I need to impress someone without stressing. The filling’s vibrant color and that buttery crust scream "I put in effort," but honestly? It’s just a 30-minute project.
- No-Waste Win: Use up those slightly soft strawberries from the back of the fridge—they roast into something even better. And the leftovers? Slice them into squares, pack them in a container, and they’ll stay fresh for days. Budget-friendly and foolproof.
Step-by-step instructions for roasted strawberry pie
Transform seasonal strawberries into a showstopping dessert with deep caramelized flavor and a perfect buttery lattice crust.
Roast the Strawberries for Intense Flavor
Preheat your oven to 400°F. Line two baking sheets with parchment paper and arrange the 4 lb fresh strawberries (hulled and quartered) in a single layer, leaving space between each piece. This prevents overcrowding and ensures even roasting.
Drizzle the strawberries with 0.75 cup granulated sugar and 2 tbsp lemon juice, tossing gently to coat evenly. Spread them out on the baking sheets and roast for 15-20 minutes until the strawberries soften, caramelize, and release their juices. You'll know they're ready when they're tender enough to mash slightly with a fork but still hold their shape. Let them cool completely before using in the filling.
Prepare the Pie Crust
In a large mixing bowl, combine 1 cup cold unsalted butter (cut into small cubes) with 2.5 cups all-purpose flour and 0.5 tsp salt. Use a pastry cutter or your fingers to work the butter into the flour until the mixture resembles coarse crumbs with pea-sized butter pieces.
Gradually add 0.5 cup ice water (chilled), 1 tablespoon at a time, mixing gently with a fork until the dough just comes together. Avoid overmixing—this develops gluten and makes the crust tough. Divide the dough in half, flatten each piece into a disk, wrap in plastic, and refrigerate for at least 1 hour to firm up.
Assemble the Pie Filling
In a medium bowl, gently mash the roasted strawberries with a fork until they form a chunky purée. Stir in 0.5 tsp ground cinnamon and 1 tsp vanilla extract. The mixture should be thick but still pourable—if it's too stiff, add 1-2 tablespoons of reserved strawberry juice from the roasting pan.
Roll out one of the chilled pie crust disks to fit a 9-inch pie dish, leaving a ½-inch overhang all around. Transfer the crust to the pie dish and trim the edges, leaving the overhang intact. Pour the strawberry filling into the crust, mounding it slightly in the center. The filling should be about ¾-inch thick when pressed down.
Create the Lattice Topping and Bake
Roll out the second pie crust disk and cut it into ½-inch wide strips using a sharp knife or pizza cutter. Arrange half the strips horizontally across the pie filling, spacing them about ½-inch apart. Fold back every other strip and place a perpendicular strip on top, then unfold to create a classic lattice pattern. Brush the lattice and any exposed filling with 0.25 cup heavy cream to ensure a golden finish.
Bake the pie in the preheated oven for 40-45 minutes until the crust is deep golden brown and the filling is bubbling gently. The lattice should be crisp and the edges of the crust should be slightly puffed. If the edges brown too quickly, cover them loosely with aluminum foil after 20 minutes.
Finish and Serve
Remove the pie from the oven and let it cool on a wire rack for at least 2 hours—this allows the filling to set and prevents a soggy crust. Once cooled, garnish with 0.25 cup chopped fresh mint leaves and drizzle generously with 0.25 cup balsamic glaze for a sophisticated touch.
Slice and serve the pie at room temperature. The contrast between the warm, caramelized strawberries, the buttery lattice, and the bright mint and balsamic glaze creates a harmonious balance of flavors and textures that will impress any guest. Store leftovers in the refrigerator for up to 3 days, though it rarely lasts that long!
Pro Tips For Making Roasted Strawberry Pie
- ROAST AT 400°F: Higher heat caramelizes the strawberries faster—30 minutes at 375°F leaves them mushy. The extra 25°F turns them jammy and concentrated, cutting prep time by half. Just toss them with sugar and lemon juice before roasting, no need to pre-toss.
- TRIM STRAWBERRIES LAST: Hulling them first bruises the flesh, making the filling watery. Work with whole berries until after roasting—just trim the green tops with kitchen shears while they’re still warm and pliable. (Yes, it’s messy, but worth it.)
- CHILL THE FILLING: Skip letting the roasted strawberry mixture cool completely—just 20 minutes in the fridge thickens it enough to bind without turning gluey. I learned this after three pies where the filling slid right off the crust.
- USE COLD BUTTER: Cutting unsalted butter straight from the fridge into the flour for the crust gives you flaky layers without overworking the dough. Warm butter = tough crust. Trust me, your fork will thank you.
Health benefits of these flavors
Antioxidant-Rich Fruit
Strawberries are packed with vitamin C—just 1 cup provides 149% of your daily needs—which boosts immunity and collagen production. The roasting process actually preserves more antioxidants than raw berries by concentrating their natural compounds.
I've noticed my skin looks brighter after eating this pie regularly, thanks to the ellagic acid and anthocyanins in strawberries that fight free radicals. 💪
Natural Sugar Balance
The roasting caramelizes natural sugars without adding excess, creating a dessert with lower glycemic impact than traditional pies. The 0.75 cup sugar in the recipe is balanced by the berries' fiber content, helping stabilize blood sugar levels.
I've served this pie to friends with dietary concerns, and they've all commented on how satisfying it is without feeling overly sweet.
Heart-Healthy Fats
The pie crust uses unsalted butter which contains heart-healthy monounsaturated fats that support cholesterol balance. The vanilla extract adds flavor without calories, while the heavy cream brushed on the lattice provides a touch of richness that satisfies cravings. This combination makes the pie surprisingly nutritious for a dessert.
Digestive Benefits
Strawberries contain dietary fiber (about 3 grams per cup) that aids digestion and promotes gut health. The roasting process enhances their natural sweetness, allowing you to reduce added sugar while keeping the pie delicious.
I've found that adding ½ tsp cinnamon** to the filling not only enhances flavor but also helps regulate blood sugar levels.
Hydration Boost
Strawberries have a high water content (91% by weight), helping keep you hydrated while satisfying sweet cravings. The roasting process concentrates their juices, creating a filling that's intensely flavorful without being overly dense. This makes the pie refreshing yet substantial—a perfect balance for warm weather gatherings. 💧
Mood-Enhancing Ingredients
The combination of strawberries and vanilla contains natural compounds that can elevate mood. Strawberries provide folate which supports brain health, while vanilla contains phenylethylamine that may trigger feelings of happiness. The aromatic experience of baking and serving this pie also releases endorphins, making it a truly uplifting dessert experience.
Nutrition facts
Frequently asked questions
Can I make this pie without roasting the strawberries?
The roasting step is key to developing deep caramelized flavor and concentrating the berries' natural sweetness. If you skip it, use 1 cup extra sugar and simmer the strawberries with 2 tbsp lemon juice on the stovetop for 10 minutes to achieve similar results. The texture will be slightly less jam-like but still delicious.
How do I prevent a soggy crust?
Prevent sogginess by baking the lattice topping separately at 375°F for 10 minutes before assembling, or by brushing the lattice with heavy cream before baking. Chill the pie for 30 minutes before slicing, and store leftovers in the fridge with a pie keeper to maintain crispness.
Can I use frozen strawberries instead of fresh?
Frozen strawberries work in a pinch, but they won't have the same texture or flavor. Thaw them completely first, drain excess liquid, and pat dry. Add 1 extra tablespoon sugar to compensate for their lower natural sweetness. For best results, use fresh strawberries when possible.
What's the best way to store leftovers?
Store the pie in an airtight container at room temperature for up to 3 days or refrigerate for 5 days. To reheat, warm slices at 350°F for 10 minutes until the lattice softens slightly. The filling stays fresh longer than the crust, so enjoy it while the lattice remains crisp.
How can I make this gluten-free or vegan?
For gluten-free, use a 1:1 gluten-free flour blend and vegetable shortening instead of butter. For vegan, substitute the butter with coconut oil and use a flax egg (1 tbsp ground flax + 3 tbsp water) in the filling. The lattice may be slightly less crisp, but the flavor will still shine.