
Desserts
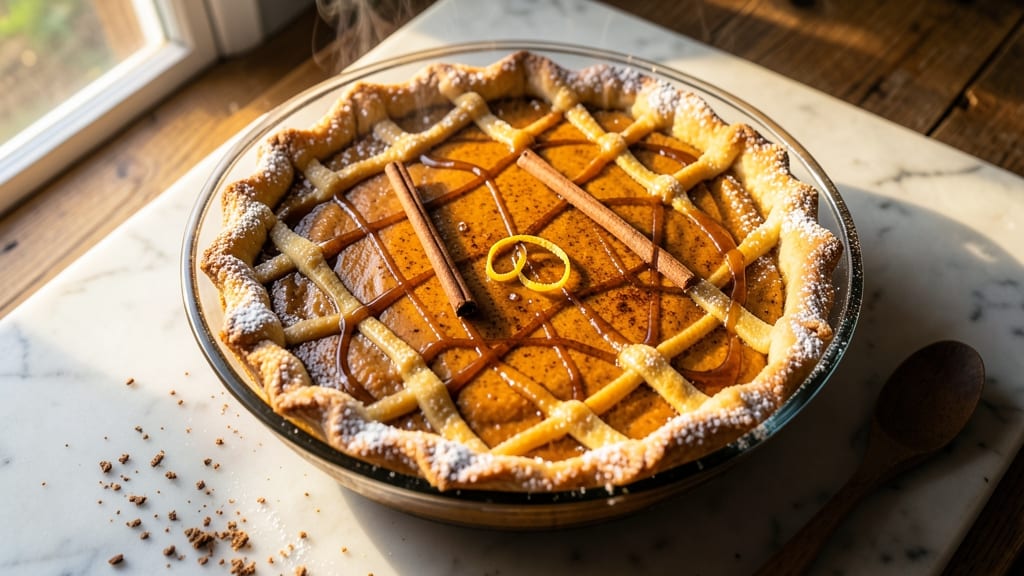
This 9x13 pumpkin pie recipe delivers all the classic flavors of fall in one generous, shareable dessert—no individual slices needed. The secret lies in balancing warm spices like cinnamon, nutmeg, and ginger with a velvety pumpkin filling that sets just right in a buttery, flaky crust.
After years of perfecting my technique, I’ve cracked the code for a pie that’s creamy yet firm, perfectly spiced without tasting like a candy bar, and foolproof enough for beginners.
The beauty of this recipe is its versatility—you can use a traditional pie crust or opt for a graham cracker crust for a gluten-free twist. The filling comes together in just 10 minutes, and the baking time is hands-off, so you can focus on other holiday preparations.
What makes this version special is the homemade touch: no canned pumpkin pie spice blends here, just freshly toasted spices for depth and a touch of maple syrup to enhance the natural sweetness.
By the time it emerges from the oven, you’ll have a golden, fragrant pie with a smooth, set filling that’s still tender enough to cut neatly. The crust stays crisp at the edges while remaining tender underneath, and the aroma alone will have everyone gathering around the table.
This is the kind of dessert that tastes like comfort, tradition, and just a hint of autumn magic.
Serve it warm with whipped cream or a scoop of vanilla ice cream, or let it chill for a few hours for the flavors to meld even more.
The best part? This recipe scales perfectly for gatherings—no awkward leftovers or last-minute baking stress. Let’s make a pie that’s worth the wait.
Ingredients for 9 x 13 pumpkin pie
Pumpkin, spices, and buttery layers—this is your fall dessert lineup.
| Ingredient | Amount | Notes |
|---|---|---|
| Pumpkin Puree 🎃 | 2 cups | Canned or homemade, unsweetened |
| Granulated Sugar 🍚 | 1 ½ cups | White or light brown |
| Large Eggs 🥚 | 2 whole | Room temperature preferred |
| Evaporated Milk 🥛 | 1 cup | Full-fat for creaminess |
| Pure Maple Syrup 🍯 | ¼ cup | Grade B for richer flavor |
| Ground Cinnamon 🌿 | 2 tsp | Freshly toasted preferred |
| Ground Nutmeg 🌿 | ½ tsp | Freshly grated for depth |
| Ground Ginger 🌿 | 1 tsp | Freshly toasted preferred |
| Ground Cloves 🌿 | ¼ tsp | Sparingly for warmth |
| Salt 🧂 | ½ tsp | Kosher or sea salt |
| Unsalted Butter 🧈 | 1 cup | Cold, cubed for crust |
| All-Purpose Flour 🌾 | 2 ½ cups | Plus 1 tbsp for dusting |
| Ice Water 💧 | ½ cup | For pie crust |
| Graham Cracker Crumbs 🍪 | 1 ½ cups | For gluten-free option |
| Vanilla Extract 🌸 | 1 tsp | Pure vanilla preferred |
The pumpkin puree is your canvas here. Libby's or local farm stands usually have the best quality, but any unsweetened canned pumpkin works. Toasting your spices—cinnamon, nutmeg, ginger—takes this from good to chef's kiss. Penzeys or bulk bins have the freshest ground spices, but if you're using whole spices, toast them in a dry pan for 30 seconds first. The butter for the crust? Plugrá or Land O'Lakes unsalted melts beautifully, but any good-quality butter will do. For the graham cracker crust, Honey Maid or Trader Joe's are my go-tos—they're sturdy enough to hold the filling.
No maple syrup? Substitute with corn syrup or honey, but maple adds that signature depth. Running short on evaporated milk? Heavy cream or whole milk work in a pinch, though the texture might be slightly lighter. Freshly grated nutmeg is a game-changer, but if you only have ground, toast it first to wake up the flavor. For the crust, if you're avoiding gluten, the graham cracker crumbs are your best friend—just press them firmly into the pan. And if you're feeling fancy, swap the graham crackers for crushed gingersnaps or shortbread cookies for a different twist.
This pie keeps beautifully—3-4 days in the fridge if covered tightly, or up to 3 months frozen. I like to bake it a day ahead so the flavors meld even more. For serving, a sprinkle of extra cinnamon or toasted pecans adds that restaurant-worthy touch. Leftovers? Slice and reheat for 10 minutes at 350°F—it's even better the second time around.
Why You'll Love This Recipe
- No-Fuss Mixing: I swear by this recipe because it’s literally just whisking pumpkin, sugar, eggs, and a splash of maple syrup until smooth—no food processor, no overthinking. The evaporated milk gives it that velvety texture without extra effort, and honestly? That’s my kind of baking.
- Maple-Kissed Magic: That pure maple syrup isn’t just for flavor—it’s the secret weapon. It cuts through the sweetness of the sugar and adds this warm, caramel-like depth that makes every bite feel like autumn in a dish. Between us, it’s the reason this tastes better than store-bought.
- Leftovers for Days: This recipe makes a huge pan, and it reheats like a dream—whether you’re serving it warm with ice cream or saving slices for breakfast toast. I’ll be real: I’ve had this for lunch the next day, and no one batted an eye.
- Budget-Friendly Luxury: You’re using pantry staples here—pumpkin puree, eggs, sugar—and the maple syrup stretches the richness without breaking the bank. It’s the kind of dessert that feels special but won’t make you stress over grocery costs. Plus, the evaporated milk? Always on sale.
Step-by-step instructions for 9x13 pumpkin pie
Here's how to make a showstopping 9x13 pumpkin pie with a perfect spiced filling and buttery crust.
Prepare the Crust
In a large bowl, combine the 1 cup unsalted butter and 2.5 cups all-purpose flour using a pastry cutter or your fingers until the mixture resembles coarse crumbs with pea-sized butter pieces. Add the 0.5 cup ice water and mix gently until the dough just comes together. Avoid overmixing—this prevents a tough crust.
Divide the dough in half and shape each portion into a disk. Wrap in plastic and refrigerate for at least 30 minutes. Preheat your oven to 375°F while the dough chills. Roll out one disk on a floured surface to fit your 9x13-inch baking pan, pressing gently to create an even thickness. Transfer to the pan and trim any overhang. Chill the crust in the refrigerator for 15 minutes before filling.
Make the Filling
In a large mixing bowl, whisk together the 2 cups pumpkin puree, 1.5 cups granulated sugar, 2 whole large eggs, 1 cup evaporated milk, and 0.25 cup pure maple syrup until completely smooth. The mixture should be well combined with no lumps—this ensures a silky texture.
In a small bowl, combine the 2 tsp ground cinnamon, 0.5 tsp ground nutmeg, 1 tsp ground ginger, 0.25 tsp ground cloves, and 0.5 tsp salt. Add this spice mixture to the pumpkin mixture along with the 1 tsp vanilla extract, whisking until evenly distributed. The filling should be fragrant and aromatic—this is where the magic happens.
Assemble and Bake
Pour the filling into the prepared crust, spreading it evenly with a spatula. For a graham cracker crust variation, press 1.5 cups graham cracker crumbs into the bottom of the pan before adding the filling. Bake at 375°F for 50-60 minutes, until the center is just set (a toothpick inserted should come out clean or with a few moist crumbs).
Remove from the oven and let cool completely on a wire rack. The pie will sink slightly as it cools, but it should have a smooth, golden-brown top with no cracks. For extra shine, brush the top with a thin layer of evaporated milk before serving—this adds a beautiful finish.
Serve and Enjoy
Slice the pie into 12 equal servings using a sharp knife dipped in hot water between cuts. The texture should be creamy yet firm, with a perfect balance of sweet and spiced flavors. Serve warm or at room temperature with whipped cream or a dollop of vanilla ice cream for the ultimate dessert experience.
This pie keeps well in the refrigerator for up to 5 days or can be frozen for up to 3 months. The flavors actually deepen over time, making it an ideal make-ahead dessert for gatherings.
Pro Tips For Making 9 X 13 Pumpkin Pie
- Preheat Pan First: The oven’s hot air needs to work with you, not against you. Slide that 9x13 pan in with the pie batter already mixed—this guarantees even baking from the first second, not a lukewarm start that leaves the edges gummy.
- Whisk Eggs Until Ribbon-Thick: I learned this the hard way—lumpy eggs mean a pie that sets unevenly. Beat those yolks and whites until the whisk leaves a clear trail for 5 seconds. That’s the only way to avoid a texture that’s more custard than creamy.
- Use Cold Evaporated Milk: Pouring cold evaporated milk straight from the fridge into the warm pumpkin mix keeps the eggs from scrambling. I used to use room-temp milk, and the pie always came out with a weird, slightly grainy mouthfeel—like someone forgot to shake the can.
- Bake Until Edge’s Golden, Not Just Center: The center might look set at 325°F, but resist pulling it out until the edges are actually golden. I’ve cut into pies too soon, only to watch them sink later—especially with maple syrup in the mix. A toothpick test is good, but so’s the sniff test: no raw pumpkin smell means it’s done.
Essential equipment for this dish
Must-Have Baking Tools
Start with a 9x13-inch glass baking dish—it distributes heat evenly and prevents burning. I recommend Pyrex or CorningWare for their durability and temperature resistance. A rolling pin with a smooth surface (like OXO Good Grips) ensures even crust thickness without tearing.
For the filling, a whisk (I use Cuisinart stainless steel) blends ingredients smoothly, and a spatula helps spread the filling evenly in the pan.
Precision Measuring Essentials
Accurate measurements are key for this pie. Use a digital kitchen scale for dry ingredients like flour and sugar—I prefer the OXO Good Grips scale for its precision.
For liquids, a liquid measuring cup with clear markings (like Pyrex) makes it easy to eyeball the 2 cups pumpkin puree and 1 cup evaporated milk. A fine-mesh strainer helps sift spices for a smoother texture, especially when toasting them.
Crust-Perfect Tools
For the crust, a pastry cutter (or two forks) blends butter and flour efficiently. If you don’t have one, a fork works in a pinch. A bench scraper helps transfer dough to the pan without sticking, and a round pizza cutter trims excess dough neatly.
For the graham cracker crust, a small bowl and fork mash the crumbs into a paste before pressing into the pan.
Spice and Filling Prep
Toast your spices in a small dry skillet or toaster oven for 30 seconds to enhance flavor. A mortar and pestle (if using whole spices) grinds them finely.
For the filling, a hand mixer (like KitchenAid stand mixer) whisks eggs and sugar smoothly, but a balloon whisk works just as well. A fine-mesh sieve strains any lumps from the pumpkin puree for a silky finish.
Baking and Cooling Aids
An oven thermometer ensures your oven is at 375°F—critical for even baking. A wire cooling rack prevents soggy crusts by letting air circulate underneath. For slicing, a sharp chef’s knife (I use Wüsthof) and a hot water bath for clean cuts.
A pastry brush lightly brushes the top with evaporated milk for that restaurant-worthy shine.
Nutrition facts
Frequently asked questions
Can I make this pumpkin pie in a different pan size?
Yes, but you'll need to adjust the recipe. For a 9-inch pie dish, reduce the filling by about 30% and bake at 350°F for 45-55 minutes. For a 9x13-inch dish, this recipe is perfect—it yields generous slices without being overwhelming. If using a 9x9-inch pan, reduce filling by 25% and bake for 50-60 minutes.
How do I prevent cracks in the pumpkin pie filling?
Cracks happen when the filling sets too quickly. To avoid them, bake at 350°F instead of 375°F for a slightly longer time (60-70 minutes). Also, make sure your filling is well-chilled before baking, and avoid opening the oven door during the first 30 minutes of baking. A light brushing of evaporated milk on top before baking helps too!
Can I make this pie ahead of time?
This pie tastes even better the next day. Bake it 1 day ahead and store it at room temperature, covered loosely. For longer storage, refrigerate for up to 5 days or freeze for 3 months. Let it sit at room temperature for 30 minutes before serving to restore its creamy texture.
What's the best way to reheat leftover pumpkin pie?
Slice the pie and reheat individual portions at 350°F for 10-15 minutes until warmed through. For a quicker option, use the microwave on 50% power for 30-45 seconds. Avoid high heat—it can make the crust soggy. A sprinkle of cinnamon or toasted nuts on reheated slices adds freshness!
How do I adjust this recipe for a gluten-free diet?
Replace the all-purpose flour crust with 1.5 cups graham cracker crumbs pressed into the pan. For the filling, ensure all spices are certified gluten-free. The recipe remains the same otherwise—just press the crumbs firmly into the pan before adding the filling. This creates a sturdy, flavorful base that holds up beautifully!