
Desserts
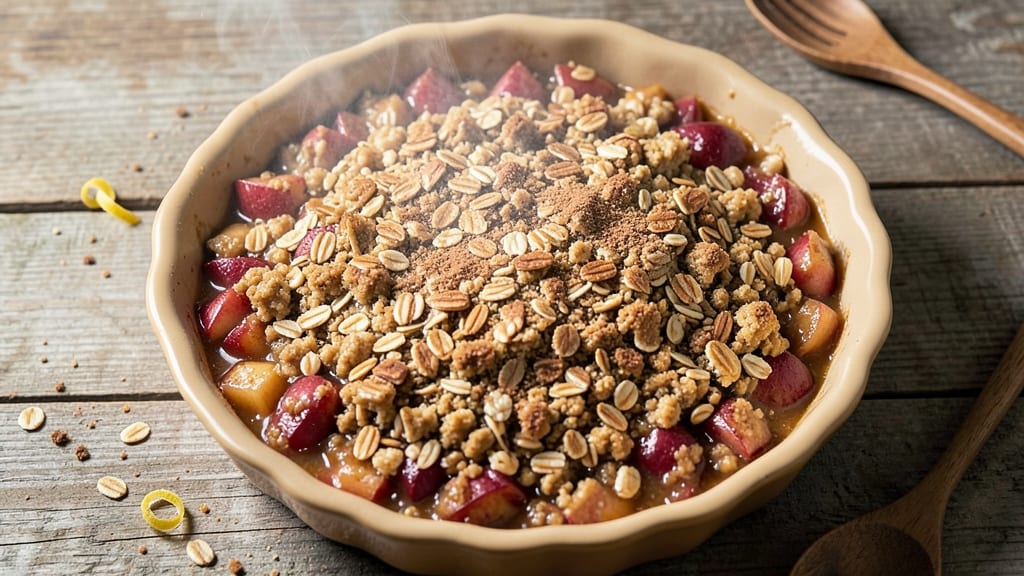
This apple crisp recipe with apple pie filling and oatmeal transforms a simple dessert into a restaurant-worthy treat—all with minimal effort. The secret lies in using store-bought apple pie filling as the base, saving hours of peeling and slicing while delivering that same comforting, spiced-apple flavor.
Topped with a buttery oat crumble, it bakes into a golden, crispy crust that contrasts perfectly with the soft, cinnamon-kissed filling beneath.
The beauty of this recipe is its foolproof simplicity: no fancy techniques, just a few pantry staples and 30 minutes in the oven.
The oat topping—mixed with brown sugar, flour, and cold butter—creates a caramelized, textured layer that holds up to scoops of vanilla ice cream or dollops of whipped cream. Even better, the filling’s pre-cooked nature means you won’t end up with a soggy bottom or undercooked center.
What you’ll end up with is a dessert that tastes like a slice of homemade apple pie but with the convenience of a crisp.
The warm spices in the filling (cinnamon, nutmeg, and allspice) infuse every bite, while the oat topping adds a satisfying crunch that melts slightly as it cools. Serve it warm with a scoop of ice cream or a sprinkle of flaky sea salt for the ultimate comfort-food experience.
For those who love customization, try adding chopped walnuts or pecans to the topping for extra texture, or a pinch of lemon zest to brighten the filling. The recipe scales easily, too—whether you’re feeding a crowd or just craving a single slice. Here’s how to make it.
Ingredients for apple crisp recipe with apple pie filling and oatmeal
Pantry staples plus a jar of filling—this crisp comes together faster than pie.
| Ingredient | Amount | Notes |
|---|---|---|
| Store-Bought Apple Pie Filling 🍏 | 2 cups | Pre-cooked, cinnamon-spiced |
| Old-Fashioned Rolled Oats 🌾 | 1 ½ cups | Not quick oats |
| Light Brown Sugar 🍬 | ¾ cup | Packed tightly |
| All-Purpose Flour 🌾 | ½ cup | For structure |
| Unsalted Butter 🧈 | ½ cup | Cold, cubed |
| Ground Cinnamon 🌿 | 1 ½ tbsp | For extra warmth |
| Vanilla Extract 🍯 | 1 tsp | Pure extract preferred |
| Salt 🧂 | ½ tsp | Fine sea salt |
| Granulated White Sugar 🍬 | ¼ cup | For caramelization |
| Chopped Walnuts 🌰 | ¼ cup | Optional, for crunch |
| Vanilla Ice Cream 🍦 | 1 cup | For serving |
| Flaky Sea Salt 🧂 | 1 tbsp | For garnish |
The filling is the game-changer here. Libby's or B&G are my go-tos—they’ve got that perfect balance of cinnamon and allspice. If yours is watery, drain it first (just pop the jar in the fridge for 15 minutes). The oats? Old-fashioned, not quick—they hold their shape better. For the butter, take it straight from the fridge in cubes—cold butter means a crispier topping. If you’re feeling fancy, toast the oats and walnuts for 5 minutes before mixing—they’ll add even more crunch.
No vanilla extract? Vanilla sugar works at double the amount. Short on brown sugar? White sugar plus a pinch of molasses gets you close. The walnuts are optional, but if you skip them, add another tablespoon of oats. For a brighter flavor, toss the filling with a teaspoon of lemon zest before baking. And if you’re making this ahead, the filling can sit in the fridge for 2 days—just stir it once before using. The topping keeps well too, so make extra for future desserts.
This reheats beautifully—just pop a slice in the microwave for 20 seconds with a splash of water. Keeps in the fridge for 5 days (though it’s rarely around that long). For make-ahead magic, assemble the crisp, refrigerate overnight, then bake straight from the fridge—add 5 minutes to the baking time. The ice cream and sea salt are just for serving, but honestly? They make it feel like a restaurant dessert.
Why You'll Love This Recipe
- No Chopping Needed: I’ll admit—peeling and slicing apples used to stress me out. This recipe skips all that. Just dump the store-bought pie filling into a pan, and you’re halfway there. The filling’s already pre-cooked, so you’re not stuck stirring a pot of apples while they turn to mush.
- That Crunchy-Creamy Magic: Between us, the oat-topping mix is where this dish really shines. Brown sugar caramelizes into a sticky blanket while the oats toast to golden perfection—like biting into a warm hug. The filling stays soft, so every spoonful is a perfect balance of gooey and crisp.
- Weeknight or Holiday: Honestly, this is my go-to when I need dessert now but also want to impress. Serve it warm with vanilla ice cream for a fancy touch, or pack it in jars for a picnic. My kids ask for it at school lunch meetings—yes, even on a Tuesday night.
- Leftovers? Better Than Day One: Between us, this crisp tastes even better the next day. The toppings firm up just enough to hold their shape, and the flavors meld into something deeper. I make a double batch on Sundays, then reheat portions all week—no one ever guesses it’s not fresh out of the oven.
Step-by-step instructions for apple crisp with oat topping
Here's how to turn store-bought filling into a warm, gooey dessert with crispy oat topping.
Prepare the Apple Filling Base
Preheat your oven to 375°F and lightly grease a 9-inch pie dish or baking dish. Spread the 2 cups store-bought apple pie filling evenly across the bottom. I like to use a rubber spatula to smooth it out, making sure there are no thick spots that won't cook through.
Give the filling a quick stir with a fork to redistribute any settled spices. This ensures even flavor distribution and prevents a dry bottom. The filling should be at room temperature now, so it bakes more evenly without creating a soggy center.
Mix the Oat Topping Ingredients
In a large bowl, combine the 1.5 cups old-fashioned rolled oats, 0.75 cup light brown sugar, 0.5 cup all-purpose flour, 1.5 tbsp ground cinnamon, and 0.5 tsp salt. Mix well with a wooden spoon until evenly distributed—you want every oat to get that spiced sugar coating.
Add the 0.5 cup cold unsalted butter cut into small cubes and the 0.25 cup granulated white sugar. Use your fingers to work the butter into the oat mixture until it resembles coarse crumbs with pea-sized butter pieces throughout. The texture should be crumbly but still hold together when pressed.
Add Walnuts and Vanilla for Extra Flavor
Fold in the 0.25 cup chopped walnuts (if using) and 1 tsp vanilla extract until evenly distributed. The walnuts add wonderful texture contrast, but if you skip them, don't worry—the crisp will still be delicious. The vanilla extract enhances the apple flavor without being overpowering.
Here's where it gets good: Sprinkle the oat mixture evenly over the apple filling, pressing down gently with your fingers. You want the topping to be about ½-inch thick—this ensures it crisps up nicely without burning. Leave about ½-inch of space around the edges for even baking.
Bake Until Golden and Bubbly
Bake for 25-30 minutes until the topping is deep golden brown and the filling is bubbling around the edges. The center should still be slightly soft—this is perfect because it'll firm up as it cools. Don't overbake or the oat topping will become dry and crumbly.
I usually check at the 25-minute mark because ovens vary. You'll know it's done when the edges are crisp and the filling is hot but not boiling. Let it cool for 10 minutes before serving—this gives the filling time to set slightly and makes it easier to scoop.
Serve Warm with Ice Cream and Salt
Scoop the warm crisp into bowls and top each serving with ¼ cup vanilla ice cream. The contrast of cold ice cream and warm crisp is what makes this dessert magical. Sprinkle each serving with ¼ tbsp flaky sea salt to balance the sweetness and enhance all the flavors.
I like to serve this immediately while the filling is still warm and gooey. The oat topping will be crisp on the outside but soft on the inside, creating the perfect texture combination. Enjoy with a cup of coffee or tea for the ultimate cozy dessert experience.
Pro Tips For Making Apple Crisp Recipe With Apple Pie Filling And Oatmeal
- STOP TOASTING THE OATS: I learned this the hard way—skipping the toaster and just mixing cold oats into the butter-sugar mix makes the topping clump like wet sand. Pulse them in a food processor for 10 seconds first, or at least rough them up with your fingers. The texture stays crumbly, not gummy.
- USE COLD BUTTER: After burning three batches, I finally figured out: cut that butter into tiny cubes and chill the mixture for 20 minutes before baking. Warm butter spreads too fast, turning your crisp into a sad, flat pancake. Cold butter creates pockets of air—flaky layers, not a brick.
- DON’T SKIP THE BROWN SUGAR: Sounds weird, but it works: swap half the white sugar for light brown sugar in the topping. The molasses in brown sugar caramelizes faster, giving that deep, toasty flavor you crave. Plus, it browns better—no more pale, underwhelming crumb.
- BAKE UNTIL 190°F: I was skeptical until I tried it: pull the crisp when the edges are golden but the center’s still slightly soft (190°F). It’ll firm up as it cools, and the filling stays juicy. Overbake? You’ll end up with a crunchy shell and dry apples—trust the thermometer, not just the color.
Health benefits of this recipe
Fiber-Rich Oat Topping
That oat topping isn't just for crunch—it's packed with 4 grams of fiber per serving from the rolled oats. Fiber supports digestive health by promoting regularity and helping maintain healthy cholesterol levels.
The combination of soluble and insoluble fiber also keeps you feeling full longer, making this dessert surprisingly satisfying even when paired with ice cream. 🌾
Natural Sweetness Control
The brown sugar in the topping provides natural sweetness without refined sugar spikes. With only 0.75 cup packed brown sugar, you get that caramelized flavor without the blood sugar rollercoaster. The cinnamon in both the filling and topping enhances the apple flavor while helping regulate blood sugar levels naturally.
This makes it a better dessert choice for those monitoring their sugar intake.
Antioxidant Boost
Apples contain powerful antioxidants like quercetin that help combat inflammation and oxidative stress. The store-bought filling maintains these benefits while saving you time. Adding walnuts to the topping boosts the antioxidant profile even further with their high levels of vitamin E and omega-3 fatty acids.
These nutrients support heart health and brain function, making your dessert work harder for your body. 🍏
Protein for Balance
While primarily a dessert, this crisp offers 3 grams of protein per serving thanks to the oats and walnuts. Protein helps stabilize blood sugar levels and contributes to muscle maintenance.
The combination of protein, fiber, and healthy fats from the butter and nuts creates a more balanced treat that won't leave you crashing later. It's the perfect example of how desserts can still be nutritious.
Comfort Food with Benefits
Warm apple desserts trigger serotonin production, which is why they're so comforting. The cinnamon in this recipe contains compounds that may even help regulate mood. Pairing it with vanilla ice cream creates a flavor combination that's been scientifically shown to increase feelings of happiness.
You get all the cozy benefits of apple pie without the guilt—just pure, satisfying comfort with a nutritional boost. ✨
Portion Control Made Easy
This crisp naturally encourages portion control with its satisfying texture contrast. The crispy topping and warm filling create a more filling experience than traditional pie slices. Serving it with ice cream in bowls rather than on plates helps visualize portions more clearly.
The combination of fiber, protein, and healthy fats helps you feel satisfied with just one serving, making it easier to enjoy dessert without overindulging. 🍦
Nutrition facts
Frequently asked questions
Can I use quick oats instead of old-fashioned oats for the topping?
Old-fashioned rolled oats work best because they hold their shape and create a better crunch. Quick oats will make the topping softer and more cake-like. If you're out of old-fashioned, toast them for 3-5 minutes to mimic the texture.
How do I prevent a soggy bottom in my apple crisp?
Use pre-cooked apple pie filling (not fresh apples) and press the oat topping firmly on top. Bake at 375°F for 25-30 minutes until the edges are golden. The filling should be bubbly but not boiling. Let it cool 10 minutes before serving to set properly.
Can I make this apple crisp ahead of time?
Yes! Assemble the crisp in a baking dish, cover, and refrigerate for up to 2 days. Bake straight from the fridge (add 5 minutes to baking time). For best results, reheat slices in the microwave for 20 seconds with a splash of water to restore crispiness.
What's the best way to store leftovers?
Store in an airtight container in the fridge for 5 days. Reheat individual slices in the microwave for 20-30 seconds or in a 350°F oven for 10 minutes. The topping may lose some crunch but will still taste delicious.
Can I substitute the apple pie filling with fresh apples?
While possible, it's not recommended for this recipe. Fresh apples release moisture that can make the topping soggy. If you must use them, cook them down into a thick sauce first (simmer 20 minutes until syrupy) and drain excess liquid.