
Desserts
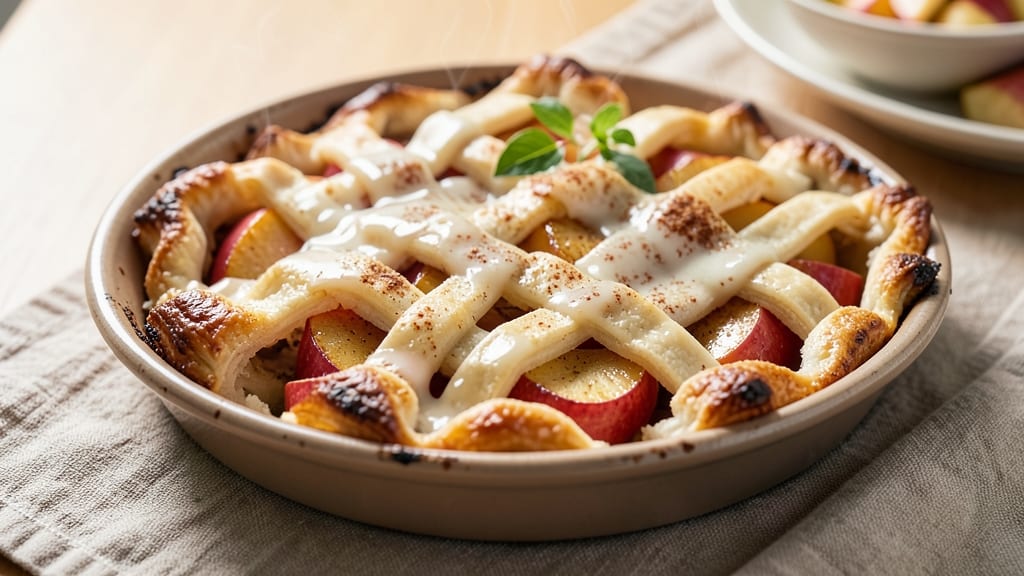
This apple pie bites recipe from scratch transforms classic dessert into bite-sized perfection—flaky crusts hugging spiced apple filling, all sealed in foil for foolproof baking. 🍏 The secret lies in a simple crust that yields tender, golden shells and a filling so fragrant with cinnamon and nutmeg, it tastes like autumn in every bite.
I developed this recipe after years of perfecting pie crusts, and these handheld versions deliver the same comforting flavors without the mess of a full pie.
The process begins with a 5-ingredient crust that comes together in minutes, then forms delicate cups that hold the filling without crumbling. While the apples cook down into a fragrant, lightly caramelized mixture, the crust bakes to a tender golden finish.
What makes these bites special is the foil seal—it ensures the filling stays moist and the crust stays crisp, even when you're not watching the oven. This is the kind of dessert that disappears quickly, but the recipe scales easily for parties or holiday gatherings.
By the time you're done, you'll have a tray of mini apple pies with all the warmth of a classic dessert but in a convenient, shareable format. The filling is perfectly spiced—cinnamon, nutmeg, and brown sugar sing together—while the crust adds just the right amount of buttery contrast.
These bites are ideal for potlucks, family gatherings, or when you want a taste of comfort without the commitment of a full pie.
For an extra touch, brush the baked bites with a light honey glaze or dust with powdered sugar. Serve warm with vanilla ice cream or whipped cream for the ultimate handheld dessert experience.
The best part? Every step is designed to be simple, so you can focus on enjoying the process—and the delicious results. Let's get started!
Ingredients for apple pie bites recipe from scratch
Five simple ingredients make the perfect flaky crust, while spiced apples transform into bite-sized dessert magic.
| Ingredient | Amount | Notes |
|---|---|---|
| All-Purpose Flour 🌾 | 2 ½ cups | Sifted for light texture |
| Unsalted Butter 🧈 | 1 cup | Cold, cubed for crust |
| Granulated Sugar 🍚 | ¼ cup | For crust sweetness |
| Ice Water 💧 | ½ cup | Chilled for mixing |
| Salt 🧂 | ½ tsp | Fine sea salt preferred |
| Apples 🍏 | 3 medium | Honeycrisp or Granny Smith |
| Brown Sugar 🍚 | ½ cup | Packed, light variety |
| Ground Cinnamon 🌿 | 2 tbsp | Freshly ground preferred |
| Ground Nutmeg 🌿 | ½ tsp | Freshly grated for warmth |
| Lemon Juice 🍋 | 1 tbsp | Freshly squeezed |
| Aluminum Foil 📄 | 1 sheet | Heavy-duty for sealing |
| Powdered Sugar 🍚 | 2 tbsp | For dusting after baking |
The apples are non-negotiable—Honeycrisp or Granny Smith hold their shape best during baking. Local farmers markets often have the freshest, but the grocery store works too. Look for firm apples with no bruises. I always buy a few extra for snacks, and the cores make great apple cider. For the crust, cold butter is crucial—cut it into small cubes and chill the dough before shaping. The flour? King Arthur or Gold Medal brands are my go-tos for consistent results. If you're short on time, you can use a food processor for the crust, but I prefer mixing by hand for that tender texture.
No honeycrisp apples? Gala or Fuji work in a pinch, but they'll be slightly softer. Running out of brown sugar? White sugar plus a pinch of molasses mimics the flavor. The nutmeg can be skipped if you're sensitive to strong spices, but trust me—freshly grated is worth it. For the foil sealing, heavy-duty foil is key—regular foil might tear when pressing down. If you're making these for a party, double the batch and freeze the unbaked bites—they keep for 2 months in the freezer. The crust mix can also be prepped ahead and stored in the fridge for 2 days.
Baked bites reheat beautifully—just pop them in a 350°F oven for 5-10 minutes until warmed through. Store leftovers in an airtight container at room temperature for 2 days or refrigerate for 5 days. The foil seal keeps them fresh longer, but if you prefer, you can transfer them to a container once cooled. For a festive touch, brush the tops with a light honey glaze before serving. These freeze perfectly too—just bake from frozen, adding 5-7 minutes to the total time.
Why You'll Love This Recipe
- No-Roll Crust Magic: I swear by that cold butter and ice water trick—it’s the secret to a flaky crust without the fuss. No food processor, no chilling time, just mix, press, bake. (Yes, even my kids can help with the pressing.)
- Taste Like Grandma’s: That buttery crust meets warm, spiced apples—it’s the kind of flavor that makes you pause mid-bite. The sugar caramelizes just enough to give it that classic apple pie depth, but in a handheld, mess-free package.
- Party in a Pinch: Bring these to a potluck and watch them disappear. They’re perfect for holiday gatherings, game days, or even a last-minute dessert when you’ve got guests over. (Pro tip: dust with cinnamon sugar before serving—everyone loses their minds.)
- Budget-Friendly Comfort: Flour, butter, sugar—these are pantry staples that won’t break the bank. Plus, they reheat beautifully, so you can make a big batch and enjoy them all week. No sad, dried-out leftovers here.
Step-by-step instructions for apple pie bites
Here's how to make perfect handheld apple pie bites with flaky crusts and spiced filling.
👨🍳 Step 1: Make the Crust Dough
In a large bowl, combine the 2.5 cups all-purpose flour and 0.5 tsp salt. Cut in the 1 cup cold, cubed unsalted butter using a pastry cutter or your fingers until the mixture resembles coarse crumbs with pea-sized butter pieces remaining. This texture is crucial for flaky layers.
Add the 0.25 cup granulated sugar and mix until evenly distributed. Slowly pour in the 0.5 cup ice water while stirring with a fork. The dough will come together—don't overmix. Form into a disk, wrap in plastic, and chill for 30 minutes. This resting time relaxes the gluten for easier rolling.
🍳 Step 2: Prepare the Apple Filling
Peel, core, and finely dice the 3 medium apples (about 3 cups total). Toss with 0.5 cup brown sugar, 2 tbsp ground cinnamon, 0.5 tsp ground nutmeg, and 1 tbsp lemon juice. The lemon brightens the apples while the spices create that classic pie flavor. Let this mixture sit while you roll out the dough.
Real talk: don't skip the lemon juice. It prevents the filling from turning mushy during baking and adds a subtle tang that balances the sweetness. You'll notice the apples release some liquid—this is normal and will thicken as they bake.
🥘 Step 3: Assemble the Pie Bites
Preheat your oven to 375°F. On a lightly floured surface, roll out the chilled dough to 1/8-inch thickness. Cut into 2-inch circles using a round cutter—you should get about 24 pieces. Press each circle gently into the bottom of a greased mini muffin tin.
Fill each crust with about 1 tablespoon of the apple mixture, pressing down lightly. The filling should be packed but not overflowing. Cover each muffin tin with aluminum foil (cut to fit), sealing tightly to prevent spillage. Bake for 20-25 minutes until the crust is golden brown and the filling bubbles through the foil.
⏰ Step 4: Finish and Serve
Remove the foil carefully and bake for an additional 5-7 minutes until the crust is deeply golden. Let cool in the pan for 10 minutes—this prevents the filling from leaking when you remove them. Dust with 2 tbsp powdered sugar while still warm for that classic pie bite finish.
Here's the thing—these bites are best served warm. The crust stays crisp while the filling remains just soft enough to ooze slightly. If you need to store them, keep in an airtight container for up to 3 days or freeze for 2 months. Reheat in a 350°F oven for 5 minutes to restore that bakery-fresh texture.
Pro Tips For Making Apple Pie Bites Recipe From Scratch
- CHILL THE DOUGH: Cut the cold butter into flour fast—then stop. Let the mixture sit for 10 minutes before adding ice water. I used to rush this, and my bites always turned out greasy. Give the flour time to absorb some of the fat’s sharpness, or you’ll regret it when the crust loses its flaky layers.
- USE GRANULATED SUGAR SPARINGLY: Sprinkle just 1 tablespoon over the dough scraps before baking—no more. Too much sugar caramelizes into a sticky mess, and your bites will stick to the pan. Trust me, the filling’s sweetness carries the flavor just fine.
- PRESS THE DOUGH UNIFORMLY: Don’t eyeball it. Roll the dough to ¼-inch thickness—any thicker and the bottom won’t crisp up, any thinner and it’ll burn before the edges cook. Use a ruler or measuring cup to check; consistency is everything for even baking.
- BAKE IN STAGES: Start at 375°F for 12 minutes, then drop to 350°F for the last 8–10. The high heat sets the crust, while the lower temp prevents overbrowning. I learned this after watching my first batch turn into hockey pucks—now they’re golden and tender.
Flavor customization for this dish
Spice Level Boost
For a warm kick, add ½ tsp ground cardamom or ¼ tsp cayenne pepper to the filling. Cardamom pairs beautifully with cinnamon, adding floral notes that complement the apples.
If you like heat, a pinch of cayenne (about ¼ tsp) will give these bites a subtle spicy edge without overpowering the sweetness. Trust me, the contrast is amazing! 🌶️
Sweet Variations
Swap the brown sugar for maple syrup or honey (about ¼ cup) in the filling for a deeper, more complex sweetness. Maple syrup adds a caramel-like richness, while honey brings a floral note that pairs perfectly with the apples.
For a richer flavor, mix ¼ cup melted butter into the filling before baking.
Tart Twist
Add 1 tbsp grated lemon zest or 1 tbsp blackberry jam to the filling for a bright, tangy contrast. The zest enhances the lemon juice already in the recipe, while the jam adds bursts of fruitiness.
Both options keep the bites balanced and prevent them from tasting too heavy. The jam also adds a nice texture contrast to the creamy apples.
Nutty Crunch
Sprinkle chopped pecans or walnuts (about 2 tbsp total) over the filling before sealing with foil. Toast the nuts in a dry pan for 2-3 minutes until fragrant, then chop them finely.
This adds a delightful crunch that cuts through the soft filling. For extra richness, drizzle with 1 tsp melted butter after baking.
Boozy Infusion
Add 1 tbsp bourbon or apple brandy to the filling for a sophisticated twist. The alcohol cooks off during baking, leaving behind a warm, aromatic depth.
For a non-alcoholic version, use 1 tbsp apple cider instead. This works especially well if you're serving these bites at a holiday gathering or dinner party.
Herbaceous Touch
Stir in 1 tsp fresh thyme leaves or ½ tsp dried rosemary** into the filling for an earthy, herbal note. These herbs complement the apples beautifully and add a subtle complexity.
If using fresh herbs, finely chop them before adding. This variation is perfect if you love savory-sweet desserts with depth.
Nutrition facts
Frequently asked questions
Can I make these apple bites without a muffin tin?
Use a mini tart pan or even a mini phyllo tart pan for a different texture. For no specialized equipment, press the dough into 1.5-inch circles on a parchment-lined baking sheet, fill, and seal with foil. Bake at 375°F for 20-25 minutes—just watch them closely to prevent over-browning.
Why does my crust turn out tough instead of flaky?
Overworking the dough or using warm butter are the most common culprits. Always keep your butter cold and cut it into the flour using a pastry cutter or your fingers—never mix it with a spoon. Also, avoid over-rolling the dough and let it rest 30 minutes before shaping.
Can I prepare these bites ahead of time?
Yes! Assemble the bites (with foil sealed) and refrigerate for up to 24 hours before baking. For freezing, shape the unbaked bites and freeze them on a tray before transferring to a bag. Bake from frozen, adding 5-7 extra minutes to the total time. The foil seal keeps everything fresh!
What's the best way to store leftovers?
Keep them in an airtight container at room temperature for 2 days or refrigerate for 5 days. For longer storage, freeze for up to 2 months. To reheat, pop them in a 350°F oven for 5-10 minutes until warmed through—this restores that bakery-fresh texture!
How can I make these bites gluten-free?
Swap the all-purpose flour for a 1:1 gluten-free baking flour blend (like Bob's Red Mill) and add ½ tsp xanthan gum if your blend doesn't contain it. Use chilled water and handle the dough gently—gluten-free crusts can be more delicate. The filling remains the same, but you may need to bake for 2-3 extra minutes.