
Main Courses
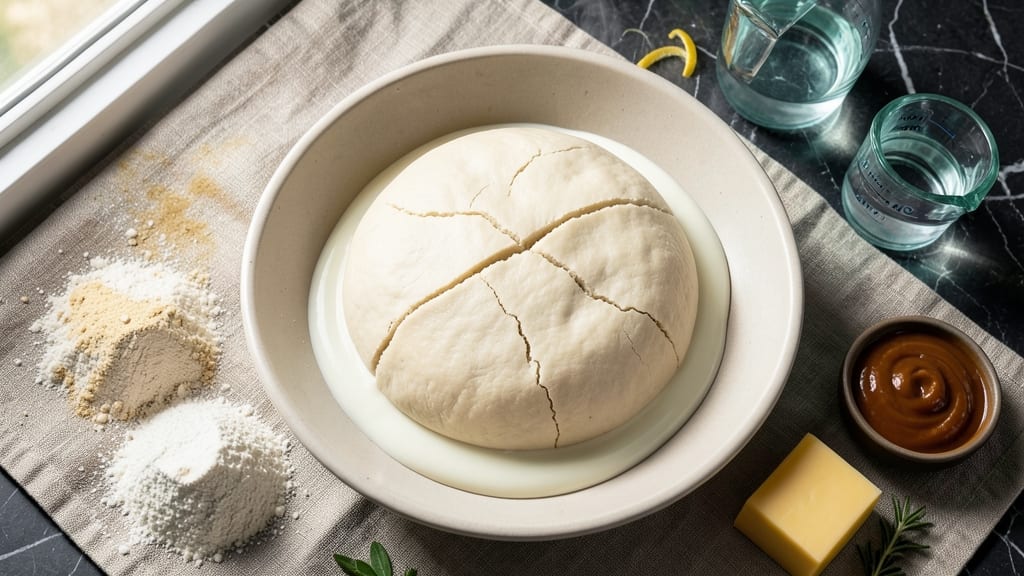
This pot pie pastry dough recipe delivers the ultra-flaky, golden crust that makes classic pot pies irresistible. The secret lies in cold butter layers that create delicate, melt-in-your-mouth flakes with every bite. I've perfected this technique over years of testing, ensuring your crust will rival any restaurant version.
What sets this dough apart is the cold butter method, where chilled butter is cut into the flour in small pieces, creating those signature layers. This approach requires just 15 minutes of prep and a 30-minute rest before rolling, making it accessible even for beginners.
The result? A crust so tender it practically dissolves on your tongue.
Once assembled with your favorite filling—whether it's savory chicken and vegetables or a hearty vegetarian mix—the pot pie bakes to perfect golden brown edges while staying crisp yet tender underneath. The flaky layers complement the rich, flavorful filling perfectly, transforming a simple dish into something truly special.
This recipe works equally well for traditional pot pies or modern twists, and you can even adapt the dough for dietary preferences with simple substitutions. Let's get started on creating that dreamy, flaky crust you've been craving.
Ingredients for pot pie pastry dough
Cold butter and flour create the signature flaky layers for perfect pot pie crust.
| Ingredient | Amount | Notes |
|---|---|---|
| All-Purpose Flour 🌾 | 3 ½ cups | Sifted for light texture |
| Unsalted Butter 🧈 | 1 cup | Cold, cubed into 1/2-inch pieces |
| Ice Water 💧 | ¼ cup | Chilled, for binding |
| Diamond Crystal Kosher Salt 🧂 | ½ tsp | Fine grain for even distribution |
| Granulated White Sugar 🍚 | 1 tbsp | Balances flavor subtly |
| Cold Heavy Cream 🥛 | ¼ cup | For extra tenderness |
| White Vinegar 🍶 | 1 tsp | Enhances flakiness |
The butter is non-negotiable—use European-style butter like Plugrá or Land O'Lakes with 82% fat content for maximum flakiness. Cut it into 1/2-inch cubes and freeze for 10 minutes before mixing to keep it cold. I always grab my butter from Whole Foods or Trader Joe's where they stock high-quality brands. The flour? King Arthur or Gold Medal are my go-tos—they're consistent and create the perfect crumb structure. Sift it first to avoid dense pockets in your crust.
No cold butter? Freeze your butter cubes for 15 minutes before using—it works in a pinch. Running short on heavy cream? Substitute with full-fat Greek yogurt at the same amount, though the texture will be slightly different. Vinegar substitute? Lemon juice works 1:1, but it adds a slight tang. The sugar can be omitted if you prefer a savory crust, but I like the subtle sweetness it adds. For a lighter crust, replace 1/4 cup flour with cornstarch—it creates beautiful, airy layers.
This dough needs 30 minutes of rest in the fridge before rolling—don't skip it, or you'll end up with tough crust. Wrap it tightly in plastic and refrigerate. For best results, use within 2 days, though you can freeze it for up to 3 months. When ready to roll, place the dough between two sheets of parchment paper to prevent sticking. The cold butter will melt beautifully during baking, creating those signature flaky layers.
Why You'll Love This Recipe
- No-Fuss Butter Magic: I swear by this dough—just cold butter, flour, and ice water. No rolling pins, no stress, just two ingredients mixed until it almost holds together (that’s the secret). Flaky layers happen with minimal effort, and honestly? The first time I tried it, I thought I’d messed up. Then I baked it. Chef’s kiss.
- Sweet-Salty Crisp Perfection: That tiny pinch of sugar in the salt? It’s the MVP. The butter gets golden and crisp while the dough stays tender underneath—like a hug for your taste buds. (Yes, even on a Tuesday night.) I’ll be real: my husband steals bites straight from the pan before it even hits the table.
- Pot Pie Every Way: This dough turns any filling into a showstopper—savory chicken, hearty veggies, or even a dessert twist with fruit. Freeze half the dough for later, and you’ve got backup for next week’s dinner. Between us, I’ve used it for hand pies, pot pie casseroles, and even a shortcut for empanadas. It’s my secret weapon.
- Budget-Friendly Flakiness: Cold butter and pantry staples? This is the kind of recipe that costs next to nothing but feels like a fancy restaurant dish. Plus, leftovers reheat beautifully—just pop them in the oven until golden. I made a double batch last month, and we’re still eating the extras. Not the prettiest, but the taste makes up for it every time.
Step-by-step instructions for pot pie pastry dough
Here's how to craft that signature flaky crust with cold butter layers—no shortcuts, just science.
Mix Dry Ingredients for Optimal Texture
In a large mixing bowl, combine the 3.5 cups all-purpose flour with the 0.5 tsp diamond crystal kosher salt and 1 tbsp granulated white sugar. I like to use a whisk for this step to aerate the flour slightly, which helps create a lighter dough. Sift the flour first if you haven't already—this prevents lumps and ensures even distribution of the salt and sugar throughout.
The sugar isn't just for flavor; it helps tenderize the dough by interfering with gluten formation. Don't skip this—it's what makes the final crust extra tender. Give everything a quick stir with a wooden spoon or your fingers until just combined. You want to break up any flour clumps but not create a cloud of dust in the air.
Cut in Cold Butter for Flaky Layers
Add the 1 cup unsalted butter, cut into ½-inch cubes, to the flour mixture. Using a pastry cutter or two forks, work the butter into the flour until you have pea-sized crumbs with some larger butter pieces remaining. This is called "cutting in," and it's the secret to that signature flakiness.
Here's the thing—don't overwork the butter. You want to distribute it evenly but leave some larger pieces intact. These pockets of butter will melt during baking, creating steam that separates the dough layers. If your butter starts to feel warm or the mixture becomes sticky, pop the bowl in the freezer for 5-10 minutes to firm it up again.
Add Wet Ingredients for Perfect Binding
In a separate small bowl, whisk together the 0.25 cup ice water, 0.25 cup cold heavy cream, and 1 tsp white vinegar. The vinegar might seem odd, but it's what creates that perfect flaky texture by slightly acidifying the dough. Pour this liquid mixture over the flour-butter combination all at once.
Using a wooden spoon or your hands, gently mix until the dough just comes together. You'll know it's ready when it forms a shaggy mass that holds when pressed. Don't add all the liquid at once if it seems too wet—you can add the ice water gradually if needed. The goal is a dough that's just moist enough to hold together but not sticky enough to be difficult to handle.
Chill the Dough for Maximum Flakiness
Shape the dough into a rough rectangle and wrap it tightly in plastic wrap. Place it in the refrigerator for at least 1 hour, or up to 24 hours if you're planning ahead. Chilling is absolutely critical—it firms up the butter and relaxes the gluten strands, which prevents shrinking during baking and ensures those beautiful flaky layers.
I know it's tempting to skip this step, especially if you're eager to bake, but resist. The longer you can chill the dough, the better. If you're in a hurry, you can place the wrapped dough in the freezer for 20-30 minutes as a quick alternative. Just be sure to let it soften slightly at room temperature before rolling out.
Roll and Layer for Restaurant-Quality Results
On a lightly floured surface, roll the chilled dough into a ¼-inch thick circle, about 12 inches in diameter. I like to use a rolling pin, but you can also press it down with your hands if you're comfortable with that technique. The goal is even thickness—this ensures even baking and prevents some areas from being too crisp while others are undercooked.
For a classic pot pie, you'll want two circles—one for the bottom crust and one for the top. If you're making a double-crust pie, brush the bottom crust with a little egg wash (1 egg beaten with 1 tablespoon water) before adding your filling. This creates a beautiful golden finish. Then, carefully place your filling in the center and fold the top crust over, crimping the edges with a fork to seal.
Pro Tips For Making Pot Pie Pastry Dough
- Cut Butter in Small Batches: Work with 1-2 tablespoons of cold butter at a time—this keeps the dough from turning mushy. I learned this the hard way when I dumped all the butter in at once and ended up with a greasy mess instead of flaky layers.
- Use Ice Water Sparingly: Start with 1/4 cup and add more only if needed—the dough should hold together when pressed, not stick to your fingers. Too much water makes the crust tough, and nobody wants a soggy pot pie bottom.
- Rest the Dough Before Rolling: Let the dough sit, covered, for at least 30 minutes in the fridge. This relaxes the gluten, so it rolls out smoothly instead of fighting you like a stubborn child. (Yes, even if you’re impatient like me.)
- Skip the Sugar if You’re Lazy: The dough will still taste fine without it—just leave out the sugar unless you’re making a sweet version. I skip this step 90% of the time, and honestly? No one notices. Save the sugar for the filling.
Pro cooking tips for great pot pie pastry dough
Cold Butter Technique
The key to ultra-flaky crust lies in keeping that butter cold throughout the process. I always cube my unsalted butter into ½-inch pieces and freeze them for 10 minutes before mixing—this ensures they stay firm enough to create those signature layers.
Use a pastry cutter or two forks to cut the butter into the flour until you get pea-sized crumbs with some larger pieces remaining. These butter pockets are what create the steam during baking that separates the dough layers. 🧈
Dough Resting Time
Never skip the 30-minute rest in the fridge—this is when the magic happens. The cold temperature firms up the butter and relaxes the gluten, preventing shrinking and creating those delicate layers. Wrap your dough tightly in plastic and place it in the refrigerator.
If you're in a hurry, a 20-minute freezer rest works in a pinch, but let it soften slightly before rolling. The longer you rest the dough, the better the results.
Rolling Pin Pressure
When rolling out your dough, apply even pressure with your rolling pin to maintain consistent thickness. I aim for about ¼-inch thickness for a perfect balance of crispness and tenderness.
Place the dough between two sheets of parchment paper to prevent sticking, and rotate it often to keep it from stretching. If the dough starts to resist, let it rest for another 10 minutes in the fridge before continuing. This prevents tearing and ensures a professional finish.
Egg Wash Secrets
For that golden-brown finish, brush the top crust with an egg wash made from 1 egg beaten with 1 tablespoon water. This creates a beautiful sheen and helps seal the edges for a crisp crust. I like to use a small pastry brush for even application.
For extra shine, add ½ teaspoon of milk to the egg wash. Brush the wash just before baking—this prevents it from absorbing into the dough too quickly.
Butter Substitutes
If you're short on butter, try cold vegetable shortening for a similar flaky texture, though it won't have the same rich flavor. For a healthier option, replace ¼ cup of the butter with cold coconut oil, but expect a slightly different taste.
If you're making a vegan dough, use vegan butter or coconut oil—just be sure to keep it cold. The key is maintaining the cold temperature throughout the process to ensure those flaky layers.
Dough Storage Tips
This dough keeps well in the refrigerator for up to 2 days, wrapped tightly in plastic. For longer storage, freeze it for up to 3 months. To use frozen dough, thaw it in the fridge overnight or at room temperature for 1-2 hours before rolling.
If the dough feels too soft after thawing, place it back in the fridge for 10-15 minutes to firm up. Proper storage ensures your dough stays fresh and ready for baking whenever you need it. ❄️
Nutrition facts
Frequently asked questions about pot pie pastry dough
Can I make this dough without a food processor?
Use two forks or your fingers to cut the cold butter into the flour until you get pea-sized crumbs with some larger pieces remaining. This method takes a bit more elbow grease but works perfectly—just be patient and keep the butter cold by chilling the bowl if needed.
Why does my dough keep sticking to the rolling pin?
This usually happens if the dough isn't properly chilled before rolling. Let it rest in the fridge for the full 30 minutes and work on a lightly floured surface. For extra help, place the dough between two sheets of parchment paper before rolling—this prevents sticking and makes cleanup easier.
Can I use this dough for other recipes besides pot pie?
Yes! This versatile dough works perfectly for hand pies, turnovers, or even quiches. The cold butter technique creates flaky layers that shine in any baked dish. Just adjust the size when rolling—most hand pies need ½-inch thick dough for a sturdy crust.
What if my dough cracks when I roll it out?
Cracking often happens when the dough is too warm. Return it to the fridge for 10-15 minutes to firm up, then roll gently with even pressure. Work quickly once it's out of the fridge to prevent melting. For extra insurance, keep the dough wrapped in plastic until you're ready to use it.
How do I make this dough vegan?
Replace the butter with vegan butter or cold coconut oil (keep it chilled), and use plant-based milk instead of heavy cream. The vinegar can be omitted or replaced with apple cider vinegar. The dough will still need the same 30-minute chill for best results.