
Desserts
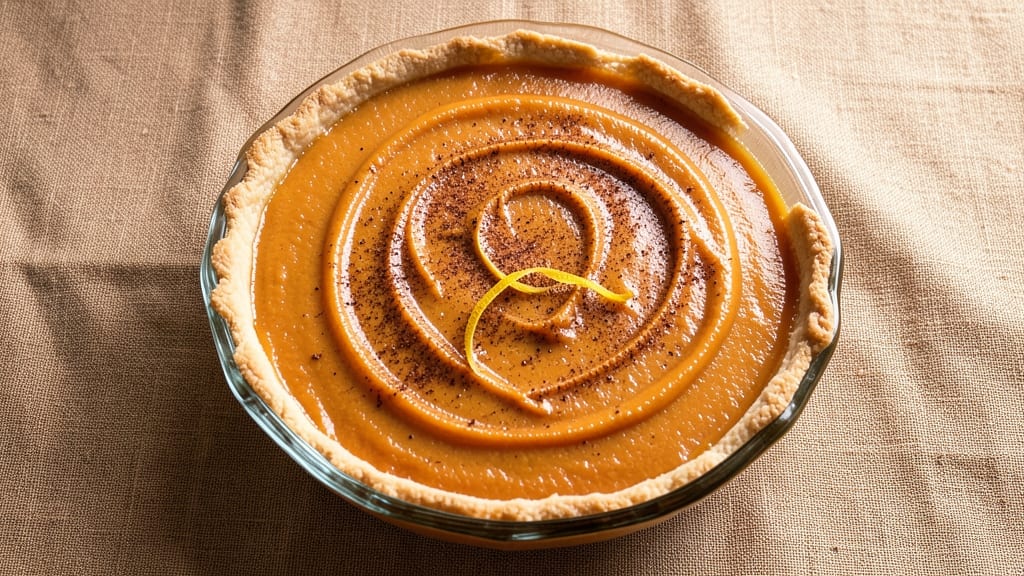
This pumpkin pie filling recipe without eggs delivers that signature silky-smooth texture and warm spice we all crave—perfectly balanced in just 15 minutes. The secret lies in a simple cornstarch slurry that binds the filling without eggs, creating a velvety consistency that rivals traditional recipes.
I developed this version after realizing how easy it is to adapt classic pumpkin pie for dietary needs while keeping that comforting, homey flavor.
The beauty of this recipe is its versatility—use it straight in a pie crust, swirl it into yogurt for a breakfast parfait, or even spoon it over ice cream for a decadent dessert.
The spice blend is carefully calibrated: cinnamon for warmth, nutmeg for depth, and ginger for a subtle kick, all harmonizing with the pumpkin’s natural sweetness. No eggs means no risk of curdling, and the filling stays creamy even after baking.
What sets this apart is how effortlessly it achieves that restaurant-quality finish without the fuss. The cornstarch slurry does the heavy lifting, ensuring a smooth texture that holds up whether you bake it into a pie or serve it chilled.
Plus, it’s naturally vegetarian-friendly, so everyone at the table can enjoy it without compromise. The result? A filling so rich and flavorful, no one will guess it’s egg-free.
Ready in 15 minutes, this recipe is perfect for last-minute gatherings or when you want to impress without stress. The filling’s vibrant orange hue and fragrant spices will have your kitchen smelling like autumn, while the silky texture guarantees every bite is pure comfort.
Let’s get started—your pie crust (or dessert bowl) is waiting.
Ingredients for pumpkin pie filling recipe without eggs
Pantry staples meet autumn spices—this egg-free filling is smoother than you'd expect.
| Ingredient | Amount | Notes |
|---|---|---|
| Canned Pumpkin Puree 🎃 | 2 cups | Unsweetened, 100% pumpkin |
| Cornstarch 🌾 | ¼ cup | For silky texture |
| Granulated Sugar 🍚 | 1 cup | Adjust to taste |
| Light Corn Syrup 🍯 | ½ cup | Or honey for depth |
| Evaporated Milk 🥛 | 1 cup | Full-fat preferred |
| Ground Cinnamon 🌿 | 2 tsp | Freshly ground |
| Ground Nutmeg 🌶️ | ½ tsp | Freshly grated nutmeg |
| Ground Ginger 🌿 | 1 tsp | Freshly ground |
| Ground Cloves 🌶️ | ¼ tsp | Or pinch of whole cloves |
| Salt 🧂 | ½ tsp | Kosher or sea salt |
| Vanilla Extract 🌸 | 1 tsp | Pure vanilla preferred |
The pumpkin puree is non-negotiable here—Libby's 100% pumpkin is my go-to, but any unsweetened canned variety works. The cornstarch slurry is the secret weapon: whisk it with cold water first to avoid clumping, then stir into the warm filling. For the spices, Penzeys or bulk bins have the freshest ground options, but pre-ground works fine. Pro tip: toast your whole spices (nutmeg, cloves) for 30 seconds in a dry pan to deepen their flavor—trust me, it makes a difference. The evaporated milk adds richness without curdling, and full-fat gives the best texture.
No cornstarch? Arrowroot powder at the same amount works too. Swap honey for corn syrup if you prefer—it adds a subtle floral note. Fresh nutmeg is ideal, but if you only have pre-ground, double the amount for maximum punch. Want more depth? Add a pinch of allspice or cardamom. The vanilla extract can be imitation, but pure Madagascar bourbon vanilla takes this to restaurant-level. For a lighter filling, reduce the sugar by 2 tablespoons and add an extra splash of milk. And if you're making this ahead, store the dry ingredients separately until ready to use.
This filling keeps beautifully—5 days refrigerated or 3 months frozen. For freezing, portion into airtight containers with a thin layer of water on top to prevent freezer burn. Thaw overnight in the fridge before using. The best part? It reheats perfectly—just warm through on the stove or microwave. I always make a double batch: one for pie, one to swirl into yogurt for a breakfast treat. The spices mellow slightly when reheated, so add a pinch of fresh nutmeg if serving chilled. Perfect for last-minute gatherings or when you need that pumpkin flavor fix.
Why You'll Love This Recipe
- No Egg Hunt Needed: I’ll be real—skipping the eggs means no cracking, no separating, no mess. Just dump in the canned pumpkin, stir in that cornstarch slurry (trust me, it’s foolproof), and let the evaporated milk do its magic. The filling thickens like a dream without any fuss.
- Sweet-Spiced Perfection: That combo of sugar and light corn syrup? It’s what turns this from "pie filling" to "oh-my-gosh-I-need-seconds" filling. The pumpkin stays velvety smooth while the cornstarch gives it that just-right set—not too jiggly, not too stiff. Honestly, it’s the kind of flavor that makes you forget it’s egg-free.
- Pie or Pudding? Yes.: This isn’t just for pies—dump it into ramekins for instant pumpkin pudding, swirl it into oatmeal for a cozy breakfast, or even use it as a glaze for roasted chicken. The evaporated milk keeps it creamy no matter how you serve it. (Yes, even on a Tuesday night.)
- Pantry Staples Only: No special ingredients, no last-minute grocery runs. You’re probably already stocked with canned pumpkin, sugar, and cornstarch—this is the kind of recipe that works when you’re low on time and low on patience. Plus, the leftovers? They last days in the fridge, so you’re not stuck making a whole pie if you only need a cup.
Step-by-step instructions for eggless pumpkin pie filling
Here's how to make a velvety-smooth filling that's perfect for pies or individual servings.
Whisk Together Wet Ingredients for a Smooth Base
In a large mixing bowl, combine the 2 cups canned pumpkin puree, 1 cup granulated sugar, 0.5 cup light corn syrup, and 1 cup evaporated milk. Use a whisk to blend everything until the sugar and corn syrup dissolve completely. This step ensures no lumps remain, which is crucial for that signature silky texture. Stir in the 1 teaspoon vanilla extract and set the bowl aside for now.
Here's the thing—this mixture should look like a thick, smooth custard. If you see any graininess, give it another quick whisk. The pumpkin puree is already cooked, so no need to heat it further at this stage. Just make sure all ingredients are fully incorporated before moving on.
Create a Smooth Cornstarch Slurry
In a small bowl, mix the 0.25 cup cornstarch with 2 tablespoons of the evaporated milk from the wet ingredients mixture. Whisk vigorously until the cornstarch is completely dissolved and the mixture looks like a thin, creamy paste. This slurry is what will thicken your filling beautifully without making it gummy.
I always use a separate bowl for this step because it prevents clumping when added to the larger mixture. If you see any dry cornstarch clinging to the sides, just add a splash more milk and whisk again. The goal is a completely smooth consistency—this ensures your filling will have that perfect, jiggly texture.
Combine and Cook on Medium Heat
Pour the cornstarch slurry into the pumpkin mixture and whisk vigorously for 1-2 minutes until fully combined. Then, transfer everything to a medium-sized saucepan and place it over medium heat. Stir constantly with a wooden spoon or silicone spatula, scraping the bottom to prevent sticking.
Watch carefully as the mixture begins to thicken. It should take about 5-7 minutes until it reaches a consistency similar to pudding—thick enough to coat the back of a spoon but still smooth. Here's the key: you want it to be hot but not boiling. If it starts to bubble vigorously, reduce the heat slightly to maintain gentle simmering.
Add Spices and Simmer to Perfection
Once the mixture is thickened, remove it from the heat and stir in the 2 teaspoons ground cinnamon, 0.5 teaspoon ground nutmeg, 1 teaspoon ground ginger, 0.25 teaspoon ground cloves, and 0.5 teaspoon salt. Mix well to distribute the spices evenly throughout the filling. Let it sit for 2-3 minutes to allow the spices to bloom and infuse their flavors.
Here's where the magic happens: the spices should be fully incorporated, giving your filling that warm, comforting aroma that makes fall feel even cozier. If you're using freshly grated nutmeg, you'll notice its bright, citrusy notes complement the other spices beautifully. Taste the filling now—adjust the sugar if needed, but remember, it'll thicken more as it cools.
Cool and Use Immediately
Transfer the filling to a clean bowl and let it cool to room temperature, stirring occasionally to prevent a skin from forming. This cooling process is important because it allows the flavors to meld and the texture to set properly. Once cooled, your filling should be thick, smooth, and ready to use in your pie crust.
If you're making a pie, pour the cooled filling into your pre-baked crust immediately. For individual servings, you can store the filling in an airtight container in the refrigerator for up to 5 days or freeze it for up to 3 months. The beauty of this recipe is that it's just as delicious straight from the fridge as it is fresh out of the oven.
Pro Tips For Making Pumpkin Pie Filling Recipe Without Eggs
- STIR CONSTANTLY AT FIRST: The moment you mix in the cornstarch, dump the whole can of pumpkin in, and add the sugar, put that whisk to work—aggressively. I used to let it sit for even 30 seconds, and the filling would clump like glue. Keep it moving until everything’s smooth, then ease up to a gentle stir. That first minute is when lumps decide to form or not.
- WEIGH THE CORNSTARCH: Stop eyeballing that cornstarch. Use a kitchen scale for 2 tablespoons—not the fluffy scoop from the box. Too much, and your filling turns into a gluey slab; too little, and it’ll be watery. I learned this after serving a pie that wobbled like Jell-O. Measure it by weight, then level it off. No guesswork.
- WARM THE EVAPORATED MILK: Cold evaporated milk in hot pumpkin mix? That’s a recipe for curdling. Microwave it for 20 seconds or warm it in a small saucepan until just steaming—not boiling. The temperature difference is what causes the filling to split. Smooth consistency starts with warm milk.
- THICKEN IT LOW AND SLOW: Bring the mix to a gentle simmer, then reduce heat to medium-low. If you crank it to high, the cornstarch burns before the filling thickens, leaving a bitter aftertaste. I used to rush it, and the filling would taste like burnt sugar. Keep it at a low bubble, stir occasionally, and let it thicken naturally—about 5-7 minutes. Patience here makes all the difference.
Serving suggestions for this pumpkin pie filling recipe without eggs
Pie Crust Pairings
Use this filling with a pre-baked pie crust for classic pumpkin pie. I love a homemade flaky crust with butter and lard for that perfect balance of crispness and tenderness. For extra flair, sprinkle crushed pecans or candied ginger on top before baking.
A graham cracker crust adds a nutty, slightly sweet contrast that pairs beautifully with the spiced filling. 🎃
Yogurt Parfaits
Turn your filling into a breakfast or dessert parfait by layering it with Greek yogurt and granola. Start with a thick layer of yogurt, then add a spoonful of cooled filling, followed by granola. Repeat until your glass is full.
Top with a drizzle of maple syrup or caramel sauce for extra decadence. This is perfect for meal prep—just assemble in mason jars and store in the fridge for up to 3 days.
Ice Cream Topping
Spoon this silky filling over vanilla ice cream for a no-bake dessert that feels like a restaurant treat. I like to add a sprinkle of sea salt and a few chopped toasted walnuts for crunch.
For a boozy twist, drizzle with bourbon or rum before serving. Serve immediately so the ice cream doesn’t melt too quickly. This combo is a crowd-pleaser at holiday gatherings! 🍦
Cheesecake Swirl
For a unique twist, swirl this filling into a pumpkin cheesecake. Mix the cooled filling with cream cheese and sour cream, then layer it into a graham cracker crust. Bake at 325°F for 45-50 minutes until set.
The spiced filling adds a warm, aromatic layer that complements the creamy cheesecake perfectly. Chill for at least 4 hours before slicing for the best texture.
Toasted Bread Topping
Warm up a slice of sourdough or brioche bread, spread with a thin layer of cream cheese, and top with a generous spoonful of filling. Broil for 2-3 minutes until the edges are golden and bubbly.
Finish with a sprinkle of cinnamon sugar for a sweet, crunchy contrast. This makes a fantastic breakfast or after-dinner treat—easy and impressive! 🍞
Cream Cheese Spread
Mix the cooled filling with 8 oz softened cream cheese and 1 tablespoon maple syrup for a spreadable dip. Spread it on apple slices or pretzel rods for a sweet-savory snack. You can also use it as a filling for cinnamon rolls or muffin tops.
Store in an airtight container in the fridge for up to 5 days. The cream cheese balances the sweetness and adds a tangy richness. 🧀
Nutrition facts
Frequently asked questions
Why does this recipe use cornstarch instead of eggs?
Cornstarch creates a silky, creamy texture without the risk of curdling that eggs can cause when overheated. The slurry method (mixing cornstarch with cold milk first) ensures smooth thickening, while eggs would require precise temperature control to avoid graininess. Plus, it's naturally egg-free and works perfectly for both baked and chilled desserts!
Can I make this filling ahead of time?
Store the cooled filling in an airtight container in the fridge for 5 days or freeze it for 3 months. Thaw overnight in the fridge before using—no need to reheat unless you're baking it into a pie. The flavors actually deepen when stored, making it perfect for last-minute gatherings.
What if I don't have evaporated milk?
Use whole milk + 1 tablespoon powdered milk per cup as a substitute. For extra richness, add 2 tablespoons heavy cream to the mixture. The filling will still turn out creamy, though evaporated milk's slight sweetness and thickness are ideal for balancing the spices.
How do I adjust the sweetness for kids?
Reduce the sugar by 2 tablespoons and add 1 extra tablespoon of pumpkin puree for natural sweetness. The corn syrup already adds subtle sweetness, so taste as you go—the filling will thicken more as it cools, so err on the slightly less sweet side initially.
Can I use this filling in a no-bake cheesecake?
Yes! Swirl the cooled filling into a no-bake cheesecake layer for a spiced twist. Mix equal parts filling with softened cream cheese, then layer between graham cracker crusts. Chill for 4+ hours—the spices will infuse beautifully without needing baking.