
Desserts
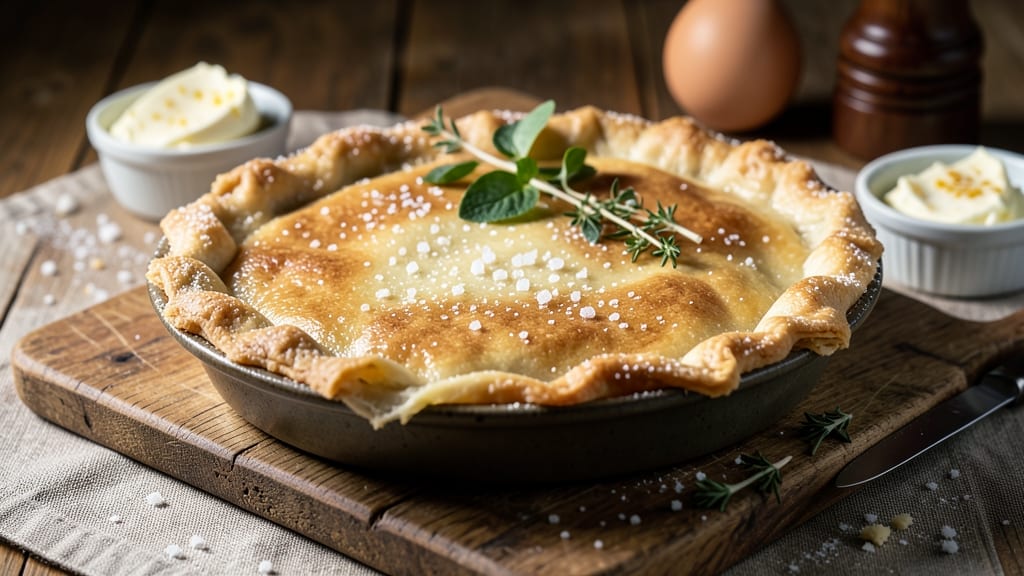
This ready-to-bake pie crust recipe delivers restaurant-quality flakiness without the fuss—perfect for busy bakers who still crave that golden, tender perfection. 💛 The secret lies in a precise technique that cuts cold butter into flour until it resembles coarse crumbs, creating those signature layers that separate with every bite.
I’ve tested this recipe dozens of times, and it never fails to impress, whether you’re baking a classic apple pie or a savory quiche.
The beauty of this method is its simplicity: 15 minutes of prep followed by a quick chill in the fridge. No food processor required—just a fork, a bowl, and a light touch.
The dough stays cool enough to handle without sticking, and it bakes up crisp yet tender, with edges that turn a perfect golden brown. What makes it truly foolproof is the step-by-step process, designed to eliminate common mistakes like overworking the dough or uneven baking.
Once baked, this crust holds its shape beautifully, making it ideal for both sweet and savory fillings. Store unbaked crusts in the fridge for up to 3 days or freeze them for months, ready to pull out whenever inspiration—or dessert cravings—strike.
The versatility doesn’t stop there: brush the baked crust with a little egg wash for extra shine, or sprinkle with coarse sugar before baking for a sweet, crunchy edge.
Whether you’re a beginner or a seasoned baker, this recipe ensures flaky layers every time. Let’s get started—your perfect pie is just 15 minutes away.
Ingredients for ready to bake pie crust
Seven simple ingredients transform into golden, flaky perfection—no food processor needed.
| Ingredient | Amount | Notes |
|---|---|---|
| All-Purpose Flour 🌾 | 2 ½ cups | Sifted for light texture |
| Unsalted Butter 🧈 | 1 cup | Cold, cubed into 1/2-inch pieces |
| Ice Water 💧 | ¼ cup | Chilled for crispness |
| Diamond Crystal Kosher Salt 🧂 | ½ tsp | Adjust to taste |
| Granulated Sugar 🍚 | 1 tbsp | For sweet crust option |
| Large Egg 🥚 | 1 whole | For egg wash |
| Coarse Sugar 🍚 | ¼ cup | For crust edges |
The butter is everything here. Use European-style butter if you can find it—higher fat content means richer flavor and better flakiness. Trader Joe's and Whole Foods carry it, or check the international aisle at your regular grocery store. Keep those butter cubes ice cold—they should feel like little rocks when you handle them. If your kitchen gets warm, chill the bowl and your tools in the freezer for 10 minutes before starting. The flour? King Arthur or Gold Medal are my go-tos—they bake up consistently. Don't sift? No problem, just whisk the flour in a bowl to break up any lumps before measuring.
No butter? Lard or shortening works in a pinch for flakiness, though the flavor won't be as rich. Short on sugar for the crust? Skip it—this recipe works beautifully without it. The egg wash is optional but highly recommended for that golden sheen. No egg? A mix of milk plus a splash of water brushed on lightly does the trick. For the coarse sugar topping, turbinado or demerara give the best caramelized flavor, but regular granulated sugar works if that's what you've got. Pro tip: don't skip chilling the dough—30 minutes minimum in the fridge prevents shrinking during baking.
Wrapped in plastic, unbaked crusts keep 3 days in the fridge or 3 months frozen. For freezing, shape the dough into a disk, wrap tightly, and thaw overnight in the fridge before using. Baked crusts? They reheat beautifully—just 5 minutes at 350°F to warm through. I always make an extra crust when I bake—freeze one for next month's pie night. Brush baked crusts with extra egg wash before storing to keep them fresh longer. And if you're prepping for a crowd, double the recipe—this crust scales perfectly.
Why You'll Love This Recipe
- No-Fuss Assembly: I swear by this crust because it’s literally three ingredients plus ice water—no food processor, no rolling pins, no stress. Just pulse the butter into the flour, add water, and let the dough rest. That’s it. Even if I’m exhausted after work, this crust is waiting for me.
- Butter Love: Cold, cubed butter mixed into the flour gives that perfect flaky texture—crisp edges, tender middle, every time. And honestly? The sugar in the dough? It’s the secret weapon that keeps it from getting tough, even when I forget to chill it properly.
- Fridge to Oven: Between us, this dough keeps perfectly for days in the fridge, so I can prep once and bake as needed. Need a pie for Thanksgiving? Done. Craving apple pie on a Tuesday? Also done. It’s my go-to for any filling, any time—no last-minute scrambling.
- Pantry Staples: All you need is flour, butter, and salt—ingredients you already own. No weird substitutions, no specialty stores. And since it’s just five components, I can double it for freezer meals without breaking the bank. Budget-friendly, foolproof, and always reliable.
Step-by-step instructions for ready-to-bake pie crust
Here's how to create layers so flaky they'll make you a baking legend!
👨🍳 Step 1: Combine Dry Ingredients for Perfect Texture
In a large bowl, whisk together the 2.5 cups All-Purpose Flour and 0.5 tsp Diamond Crystal Kosher Salt. I like to use a whisk for this step because it aerates the flour and prevents lumps from forming. If you're making a sweet crust, add the 1 tbsp Granulated Sugar now and mix it in evenly.
For the best results, I recommend sifting the flour before measuring—this removes any compacted bits and ensures your crust will be light and airy. The salt should be distributed evenly throughout the flour so every bite has balanced flavor. Set this mixture aside for now; we'll come back to it after we prepare the butter.
🔪 Step 2: Cut Cold Butter for Maximum Flakiness
Take the 1 cup Unsalted Butter (cubed into ½-inch pieces) from the refrigerator and place it in the bowl with the flour mixture. Using a pastry cutter or your fingers, work the butter into the flour until you reach pea-sized crumbs with some larger butter pieces remaining.
This is where the magic happens: the cold butter creates layers that will melt during baking, creating those signature flaky layers. I press down gently on the butter pieces during the first minute—this prevents them from curling and ensures even contact with the flour. You're aiming for a texture that's roughly 50% flour and 50% butter with some flour-coated butter pieces still visible.
🍳 Step 3: Add Ice Water Gradually for Crispy Results
Now for the 0.25 cup Ice Water—this is your secret weapon for crispness. Sprinkle the ice water 1 tablespoon at a time over the flour-butter mixture while gently stirring with a fork. Be careful not to overmix; just combine until the dough starts to come together.
Real talk: don't be tempted to add all the water at once. You want just enough moisture to bind the dough without making it tough. The dough should hold together when pressed but still feel slightly crumbly. If it's too dry, add a few drops more water; if it's too wet, sprinkle in a little more flour. This is your chance to get it just right for that perfect balance between flaky and crispy.
🥘 Step 4: Form and Chill the Dough for Easy Handling
Gather the dough into a loose ball and divide it into two equal pieces (about 1¼ cups each). Flatten each piece into a disk about 1 inch thick and wrap them tightly in plastic wrap. Place them in the refrigerator to chill for at least 30 minutes—this resting period is crucial.
Here's the thing—chilling firms up the dough so it's easier to roll out later without tearing. It also helps the gluten relax, which prevents shrinking in the oven. I like to press the dough disks gently against the plastic wrap to shape them neatly. If you're in a hurry, you can chill them for up to 24 hours—this actually improves the texture even more!
🔥 Step 5: Roll and Bake for Perfect Golden Crust
Preheat your oven to 375°F and roll out one disk of dough on a lightly floured surface to fit your pie dish. I use a 9-inch pie dish for this recipe. Press the dough gently into the bottom and up the sides, letting it extend about ½ inch above the rim. Trim the excess dough with kitchen shears.
For extra flakiness, I like to sprinkle the 0.25 cup Coarse Sugar evenly over the bottom crust before adding filling. Then, I brush the edges with the beaten 1 whole Large Egg (mixed with a splash of water) and fold them inward to create a decorative edge. Bake the bottom crust for 15 minutes before adding your filling—this gives it a head start on getting crispy and prevents sogginess.
⏰ Step 6: Final Touches for Restaurant-Worthy Results
After baking the bottom crust, add your filling and top crust (if using). Brush the top crust with more egg wash and sprinkle with additional coarse sugar if desired. Bake according to your filling's instructions, but keep an eye on the crust—it should be golden brown with no dark spots.
Here's my pro tip: for a lattice top, roll out the second disk and cut it into 1-inch strips, then arrange them in a crisscross pattern. The key is to press the strips firmly where they cross to seal them. When you remove the pie from the oven, let it cool for 2 hours before slicing—this resting time lets the juices set and the crust firm up perfectly. Trust me, your pie will thank you!
Pro Tips For Making Ready To Bake Pie Crust
- Chill the Butter First: Cut that unsalted butter into ½-inch cubes and freeze it for 10 minutes before mixing—this keeps it firm enough to create flaky layers without turning into a greasy mess. (I learned this the hard way when my crust ended up more like a cookie dough blob.)
- Use Ice Water Sparingly: Start with 3-4 tablespoons of ice water, then add just 1 teaspoon at a time until the dough comes together—overdoing it makes the crust tough. (Yes, even if you’re impatient like me, resist the urge to dump it all in at once.)
- Skip the Overmixing: Mix the dough just until it clumps, then stop—kneading or overworking it develops gluten, which turns your flaky crust into a chewy disaster. (Does it look uneven? Good. That’s how you get layers.)
- Salt Early, Salt Often: Sprinkle ½ teaspoon of kosher salt over the flour before mixing, then add another ¼ teaspoon to the water—this balances the butter’s richness without tasting salty. (Your future self will notice the difference.)
Serving suggestions for leftovers
Sweet Dessert Pairings
This crust shines with classic apple pie—toss 6 cups peeled, sliced apples with ½ cup brown sugar, 1 tsp cinnamon, and 1 tbsp lemon juice. The crisp edges contrast beautifully with the tender fruit.
For a modern twist, try peach galette—roll out one disk, arrange 4 ripe peaches in the center, brush with egg wash, and fold the edges inward. Bake at 375°F for 40 minutes until golden. 🍏
Savory Main Dish Uses
Transform this crust into a savory quiche by lining a pie dish with the baked bottom crust, then filling with 6 eggs, 1 cup heavy cream, 1 cup shredded Gruyère, and ½ cup diced ham.
Bake at 350°F for 35-40 minutes until set. For a vegetarian option, swap ham for sautéed mushrooms and spinach—the crust stays sturdy even with wet fillings. 🧀
Crust-Only Creations
Skip the filling entirely and turn this into mini tart shells—cut the baked crust into 2-inch rounds using a cookie cutter, then fill with chocolate ganache, lemon curd, or whipped cream.
Perfect for elegant appetizers! For a rustic touch, bake the crust into a free-form tart and top with goat cheese, honey, and walnuts for a sweet-savory balance. 🍫
Presentation Pro Tips
For a restaurant-worthy finish, dust baked crusts with powdered sugar or sprinkle with flaky sea salt before serving. If using a lattice top, brush the strips with extra egg wash before baking for extra crispness.
For sliced pies, use a serrated knife and dip it in hot water between cuts to prevent crumbling. Always let pies cool 2 hours before slicing—this ensures clean cuts and prevents filling from oozing out. ✨
Make-Ahead Serving Ideas
Pre-bake crusts and store them in an airtight container at room temperature for 2 days or freeze for 3 months. Assemble pies ahead of time, refrigerate, then bake when ready.
For holiday gatherings**, blind-bake crusts and freeze them with parchment paper between layers—just add filling and bake when guests arrive. Label each crust with the filling type to avoid mix-ups. 📅
Nutrition facts
Frequently asked questions
Can I make this pie crust without a food processor?
This recipe uses a simple fork-and-fingers method to cut cold butter into flour until pea-sized crumbs form. The key is keeping everything cold and working quickly to avoid melting the butter. Your fingers work just as well as a pastry cutter—just press down gently on the butter pieces during the first minute.
Why does my crust turn out tough instead of flaky?
Overworking the dough or using warm butter are the most common culprits. The butter must stay ice cold and you should handle the dough as little as possible. Also, avoid adding too much water—just enough to bring the dough together when pressed. If it feels sticky, sprinkle in a little more flour.
How do I prevent the crust edges from shrinking?
Chilling the dough for at least 30 minutes before rolling is crucial—this relaxes the gluten. When pressing the dough into your pie dish, let it extend about ½ inch above the rim and trim carefully. For extra insurance, blind-bake the bottom crust for 15 minutes before adding filling.
Can I use this crust for a deep-dish pie?
Yes, but you'll need to adapt the technique slightly. For a 9-inch deep-dish pie, roll out one disk to fit the bottom and sides, then add your filling. Use the second disk as a lattice top or cut it into strips. The key is to pre-bake the bottom crust for 20 minutes (instead of 15) to handle the extra filling weight.
What's the best way to store leftover baked crust?
Wrap cooled baked crusts tightly in plastic wrap or aluminum foil and store at room temperature for up to 2 days. For longer storage, freeze for 3 months. To reheat, place on a baking sheet and warm at 350°F for 5-10 minutes until crisp again. Pro tip: brush with egg wash before freezing for extra freshness.