
Desserts
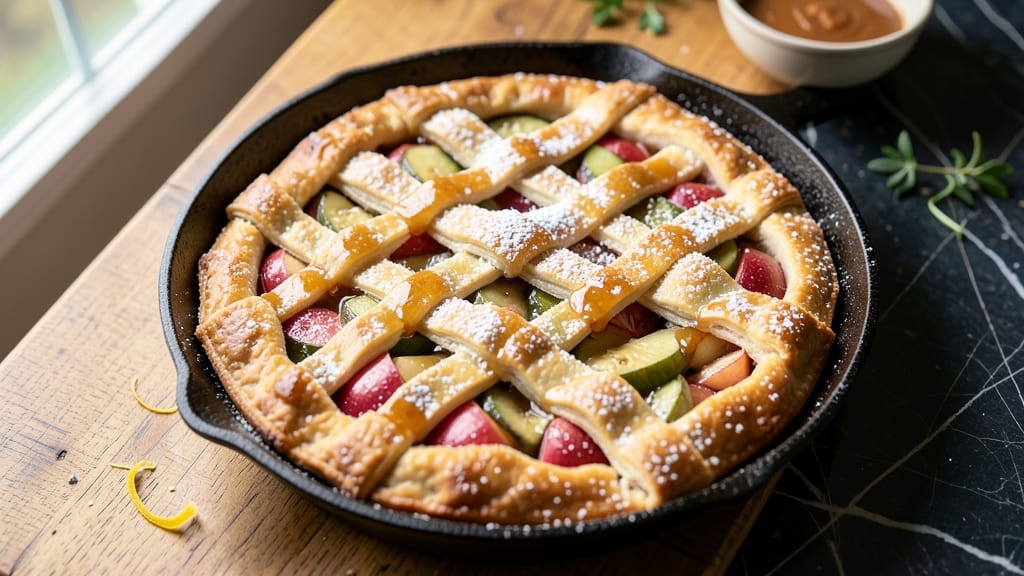
This real apple pie recipe delivers the kind of homemade crust that stays perfectly golden and flaky—no shortcuts, just classic technique. The secret lies in cold butter and proper dough handling, ensuring every bite has that signature crispness.
I’ve baked this pie for holiday tables and family gatherings, and it never disappoints.
The filling balances tart and sweet apples with a touch of cinnamon and brown sugar, creating caramelized pockets that make each slice irresistible. You’ll use a lattice crust for that rustic charm, but the dough method is simple enough for beginners.
No pre-baking the crust here—just a sturdy base that holds up to the juicy filling.
By the time it emerges from the oven, you’ll have a pie with a flaky, golden crust and tender, spiced apples that practically melt in your mouth.
The aroma alone will bring everyone to the table. This is the kind of dessert that tastes like home, made with care and tradition.
Perfect for Thanksgiving, Christmas, or any occasion that calls for a showstopping dessert. Let’s get started on creating a pie that will be the star of your meal.
Ingredients for real apple pie
Classic pie ingredients that deliver that perfect golden crust and tender filling.
| Ingredient | Amount | Notes |
|---|---|---|
| All-Purpose Flour 🌾 | 4 cups | Sifted for flaky crust |
| Unsalted Butter 🧈 | 1 cup | Cold, cubed for flakiness |
| Granulated Sugar 🍚 | ¾ cup | For crust and filling |
| Salt 🧂 | 1 tsp | Kosher or sea salt |
| Ice Water 💧 | ½ cup | Chilled for dough binding |
| Granny Smith Apples 🍎 | 6 medium | Peeled, cored, sliced thin |
| Brown Sugar 🍚 | ½ cup | Packed for caramelization |
| Ground Cinnamon 🌿 | 2 tbsp | Freshly ground preferred |
| Lemon Juice 🍋 | 2 tbsp | Freshly squeezed |
| Large Eggs 🥚 | 1 whole | For egg wash |
| All-Purpose Flour 🌾 | 1 cup | Extra for dusting |
| Granulated Sugar 🍚 | 1 tbsp | For egg wash |
The butter is non-negotiable here—cold cubes are key for flaky layers. Grab European-style butter if you can find it (like Plugrá or Bergère), but regular unsalted works too. Flour matters too: King Arthur or Bob’s Red Mill are reliable for consistent results. The apples? Granny Smiths
No Granny Smiths? Fuji or Gala work in a pinch, but they’ll be sweeter. The cinnamon can be swapped for pumpkin pie spice at half the amount if you’re feeling festive. Lemon juice is critical—it keeps the apples from browning and adds brightness. Short on time? Store-bought pie crust is fine, but trust me on the homemade version. For the lattice, just cut strips from a single sheet of dough—no fancy knife skills required. The egg wash? Separate the yolk if you want extra shine, but the whole egg works perfectly fine. This dough keeps for 2 days wrapped in plastic in the fridge, or 3 months frozen. The filling can sit overnight too—flavors meld beautifully. For the lattice, cut your strips about 1/2-inch wide and weave them like a basket. Bake at 375°F3-4 days in the fridge, or freeze slices for 2 months.
Why You'll Love This Recipe
- No-Fuss Dough: I swear by this butter-and-flour crust—just mix, chill, roll. No food processor, no overworking, just cold butter cutting into flour until it looks like crumbs the size of peas. That’s it. Honestly, my first attempt was lumpy, but now it’s my go-to because it actually works.
- Crispy-Creamy Magic: The sugar in the filling caramelizes just enough to give that perfect balance—tender apples with a hint of sweetness, but not cloying. And that crust? Golden edges with a flaky shatter when you cut it. (Yes, even on a Tuesday night.)
- Leftovers for Days: This pie holds up for ages—better the second day, honestly. I’ve reheated slices in the oven with a sprinkle of cinnamon, turned them into breakfast pastries, or just grabbed one straight from the fridge. No sad, soggy bottoms here.
- Budget-Friendly Classic: Five ingredients, zero shortcuts. You’re not using fancy apples or pie weights—just what’s in season and a little patience. Between us, this is the kind of pie you can make without stressing over $12 apples or specialty tools. It’s the real deal.
Step-by-step instructions for homemade apple pie
Here's how to build a golden, flaky crust and tender apple filling that stays juicy.
Make the Crust with Cold Butter for Flakiness
In a large bowl, combine the 4 cups all-purpose flour and 1 tsp salt. Cut in the 1 cup cold, cubed unsalted butter using a pastry cutter or your fingers until the mixture resembles coarse crumbs with pea-sized butter pieces. This texture is crucial—it ensures those beautiful flaky layers when baked.
Gradually add the 0.5 cup ice water, 1 tablespoon at a time, mixing gently with a fork until the dough just comes together. The dough should hold when pressed but not be sticky. If it's too dry, add a teaspoon more water; if too wet, sprinkle in a little more flour. Wrap the dough tightly in plastic and refrigerate for 30 minutes—this resting period relaxes the gluten for a tender crust.
Roll Out and Assemble the Pie
Divide the dough in half and roll out one portion on a lightly floured surface to fit a 9-inch pie dish, keeping the edges slightly thicker for a sturdy rim. Transfer the rolled dough to the pie dish and trim the edges, leaving a ½-inch overhang. Press the dough gently against the sides to create a deep dish.
In a large bowl, toss the 6 medium Granny Smith apples (peeled, cored, and sliced thin) with the 0.5 cup brown sugar, 2 tbsp ground cinnamon, 2 tbsp lemon juice, and 0.25 cup granulated sugar. The lemon juice prevents browning while adding brightness. Pour the apple mixture into the crust, mounding it slightly in the center. Roll out the second dough half, cut into strips, and weave over the filling for a lattice top.
Create the Egg Wash for Golden Color
Whisk the 1 whole large egg with 1 tbsp granulated sugar in a small bowl until smooth. Brush this mixture evenly over the lattice top and the crust edges. The sugar in the wash caramelizes during baking, giving you that classic golden-brown finish. Sprinkle any extra flour from the 1 cup all-purpose flour over the lattice to prevent sticking.
Place the pie on a baking sheet (to catch drips) and bake in a preheated 375°F oven for 50-60 minutes, until the crust is deep golden brown and the filling bubbles around the edges. The filling should be tender but not mushy—you want that perfect balance of juicy apples and caramelized sugar.
Rest and Serve for Maximum Flavor
Let the pie cool on a wire rack for at least 2 hours before slicing. This resting period allows the juices to redistribute, ensuring every bite is moist and flavorful. The crust will firm up slightly as it cools, making it easier to slice without falling apart.
Serve warm with a scoop of vanilla ice cream or whipped cream. The contrast of cold and warm will make every forkful even more delicious. Store leftovers in the refrigerator for up to 3 days or freeze for 3 months for fresh apple pie anytime you crave it.
Pro Tips For Making Real Apple Pie
- Chill Your Butter: I learned this the hard way—pulling cold butter straight from the fridge and cutting it into flour always makes a tough crust. Let that butter sit at room temp for 30 minutes before mixing, but don’t overdo it (it shouldn’t be greasy). Warm butter blends better and gives you that perfect flaky layer.
- Cut Butter in Fast: Use a pastry cutter or two forks, but work quickly. Small, pea-sized chunks of butter get evenly distributed in 20 seconds—any longer and you’ll end up with a dense mess. The goal is cold butter bits, not a greasy paste.
- Skip the Overmixing: Once the dough starts coming together, stop. The second you see clumps forming, resist the urge to keep kneading. Overworking the flour turns it into glue, and that’s how you get a tough, chewy crust. Just press it into a disc, wrap it, and refrigerate.
- Preheat Your Pan: A cold pie dish means a soggy bottom. Slide your unbaked pie into a preheated oven (425°F) for the first 15 minutes. The shock of the heat helps set the crust before the filling even goes in. Trust me, your crust will thank you.
Make-ahead tips for leftovers
Prep Ahead Like a Pro
Start your pie dough the night before—it chills perfectly in the fridge overnight, saving you time on baking day. I always make mine in the evening and let it rest until morning.
This also gives the gluten time to relax, making rolling easier. Wrap it tightly in plastic and store it flat in an airtight container. 💫
Filling Prep in Advance
The apple filling can sit overnight in the fridge, and the flavors actually deepen. Toss the sliced apples with sugar, cinnamon, and lemon juice, then store them in an airtight container.
This prevents browning and makes assembly a breeze. I like to prep this the night before so I can focus on baking the next day.
Freeze the Crust
If you're really ahead of the game, freeze the rolled-out crust before baking day. Place the dough-wrapped pie dish on a baking sheet, cover it with plastic, and freeze for up to 3 months.
On baking day, thaw it in the fridge for 2 hours before filling and baking. This is my go-to trick for holiday pies when I'm swamped.
Lattice Shortcut
Skip the lattice entirely if you're short on time—just roll out the second dough half, cut it into a circle, and place it on top of the filling. Brush it with egg wash and poke a few slits for steam to escape.
It won't look as fancy, but it still tastes amazing. I've done this for last-minute gatherings, and no one ever noticed!
Make Mini Pies
Divide your dough and filling into 4-inch pie pans for individual servings. Bake them at 375°F for 30-35 minutes—they're perfect for potlucks or meal prep. Store them in airtight containers for up to 3 days in the fridge or freeze for 2 months.
These are great for quick desserts when you don't want to slice a whole pie. 🍎
Weeknight Assembly
For a faster version, use store-bought pie crust and assemble everything the night before. Cover the filled pie with plastic and refrigerate until morning. Bake it straight from the fridge—no thawing needed. This cuts your active prep time by half while still delivering that homemade taste.
I've done this for busy weeknights when I craved pie but didn't have time to make it from scratch.
Nutrition facts
Frequently asked questions
Why does my homemade apple pie crust turn out tough instead of flaky?
The key to flaky crust lies in cold butter and proper handling. If your dough feels warm or the butter melts during mixing, the layers won't separate properly. Always use cold butter cubes and keep everything chilled. Also, avoid overworking the dough—just mix until it comes together. Overmixing develops gluten, which makes the crust tough. Let it rest for 30 minutes before rolling too!
Can I use frozen apples instead of fresh for the filling?
Yes, but you'll need to thaw and drain them first. Frozen apples work well, but they contain more water than fresh ones. After thawing, pat them completely dry with paper towels to prevent a soggy filling. You may also need to reduce the lemon juice slightly since frozen apples already contain some natural preservatives.
How do I fix a pie crust that shrinks during baking?
Shrinking crust happens when the dough isn't properly chilled or when it's too wet. For next time, make sure your butter is ice cold and your dough is firm but not sticky. If you're working with a pre-made crust, blind-bake it for 10 minutes at 375°F before adding filling. For an already-baked pie, you can't fully reverse it, but brushing the edges with extra egg wash and baking for 5-10 minutes will help set them again.
What's the best way to store apple pie leftovers?
Store your pie in an airtight container at room temperature for up to 2 days, or refrigerate for 3-4 days. For longer storage, wrap individual slices in plastic wrap and place them in a freezer bag for up to 3 months. To reheat, bake at 350°F for 10-15 minutes until warm. The crust will crisp up beautifully when reheated!
Can I make this pie without a lattice top?
For a simpler version, roll out the second dough half and place it directly on top of the filling. Brush with egg wash and cut a few slits for steam to escape. This creates a classic "top crust" pie that's just as delicious. If you're short on time, even a pre-made crust works perfectly—just follow the same assembly instructions. The flavor won't suffer at all!