
Desserts
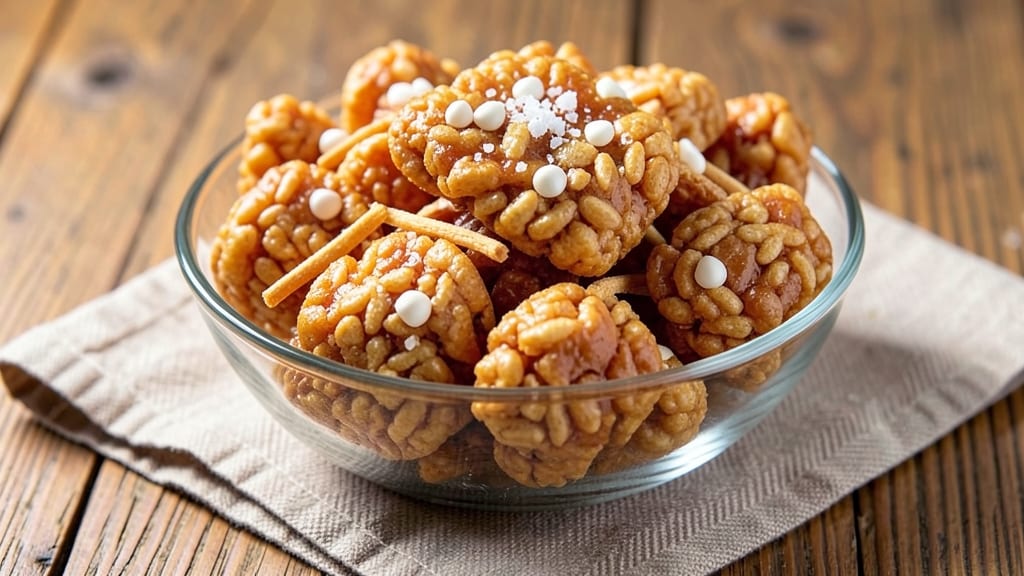
This Rice Krispie Clusters recipe delivers the nostalgic crunch of childhood in just 10 minutes—no baking required. 🔥 The secret lies in perfectly melted marshmallows and butter that bind crispy Rice Krispies into golden, bite-sized clusters that disappear faster than you can say "s'mores."
I've made these for holidays, parties, and last-minute cravings, and they always get rave reviews. What makes this recipe foolproof is the 3:1 ratio of marshmallows to butter, which creates a glossy, sticky base that coats every cereal piece evenly. The key technique?
Working quickly while the mixture is hot ensures those signature clusters form without sticking. No fancy equipment needed—just a pot, a spoon, and a bowl. By the time you're done, you'll have a tray of light, airy, and irresistibly crunchy clusters that taste like a warm hug.
The texture is what makes them special: crispy outside, soft inside, with just enough sweetness to satisfy any craving. They're perfect for holiday gifts, potlucks, or sneaking extra treats into lunchboxes. Store them in an airtight container for up to a week, though they rarely last that long.
Let's make these clusters!
Ingredients for rice krispie clusters
Six cups of crispy cereal plus marshmallow butter magic for nostalgic clusters everyone will love.
| Ingredient | Amount | Notes |
|---|---|---|
| Rice Krispies Cereal 🍚 | 6 cups | Original or lightly salted variety |
| Large Marshmallows 🍬 | 12 oz | Standard size, not mini |
| Unsalted Butter 🧈 | 4 tbsp | Cold, cut into small cubes |
| Vanilla Extract 🌿 | ½ tsp | Pure, high-quality preferred |
| Salt 🧂 | ¼ tsp | Fine sea salt for balance |
| White Chocolate Chips 🍫 | ½ cup | Optional for extra flavor |
| Mini Chocolate Chips 🍫 | ¼ cup | Optional for extra crunch |
The Rice Krispies are the star here—original flavor gives the best texture, but lightly salted works too. Trader Joe's and Costco sell the cereal in bulk, which saves money for holiday batches. Marshmallows matter: standard size (not mini) melts perfectly for that glossy coating. Butter should be cold when you add it—this keeps the clusters light and crispy. I always grab Kirkland Signature butter for the best flavor without being overly salty. For extra richness, add vanilla extract—it's subtle but makes a difference.
No marshmallows? Dried mango or pineapple works in a pinch (soak in warm water first), though texture will differ. Butter substitute? Coconut oil gives a similar melt, but it has a distinct flavor. Want extra flavor? Toss in white chocolate chips for creaminess or mini chocolate chips for crunch. Enjoy Life brand chips are my go-to—they're allergy-friendly and melt beautifully. If you're making these for a party, double the batch. The clusters keep well for 5-7 days in an airtight container, though they rarely last that long.
These clusters are best made fresh, but they reheat beautifully—just 20 seconds in the microwave restores that warm, gooey texture. Store in an airtight container with parchment paper between layers to keep them crispy. For gifting, portion into clear cellophane bags tied with ribbon. Freeze for up to 3 months if you're prepping ahead. The key to success? Work quickly while the mixture is hot—those clusters form fast once you start stirring!
Why You'll Love This Recipe
- Three-Ingredient Magic: I swear by this combo—Rice Krispies, marshmallows, butter. That’s it. No fancy gadgets, no measuring cups that make you question your life choices. Just melt, mix, and stir until it’s golden perfection.
- Crunchy-Creamy Bliss: The contrast is chef’s kiss—crispy cereal edges hugging gooey marshmallow centers, all tied together with vanilla butter. It’s the kind of snack that makes you pause mid-bite just to savor it.
- Party in a Bowl: Honestly, this is my go-to for movie nights, last-minute gifts, or when I forget to buy cookies. Drizzle with melted chocolate or sprinkle with sea salt, and suddenly you’ve got a crowd-pleaser that costs next to nothing.
- Zero Guilt Leftovers: Between us, these keep way too well. I’ve had them last a week in an airtight container—still crispy, still delicious. And if you burn a batch? Toss them in oatmeal. No regrets.
Step-by-step instructions for perfect Rice Krispie clusters
Here's how to make these nostalgic treats—crispy, gooey, and ready in under 10 minutes.
🍳 Step 1: Melt Butter and Marshmallows Together
In a large, heavy-bottomed pot, combine the 12 oz Large Marshmallows and 4 tbsp Unsalted Butter over medium-low heat. Stir gently with a wooden spoon until the butter melts completely and the marshmallows begin to soften—this takes about 3-4 minutes. You'll know it's ready when the mixture looks glossy and smooth, with no visible marshmallow chunks.
Here's the thing—don't rush this step. If the heat is too high, the marshmallows will burn before melting. Keep the heat low and stir constantly to prevent sticking. Once fully melted, remove from heat and stir in the 0.5 tsp Vanilla Extract and 0.25 tsp Salt. This is where the magic happens—the vanilla adds depth, and the salt balances all that sweetness.
👨🍳 Step 2: Mix in Chocolate Chips (If Using)
If you're using the optional 0.5 cup White Chocolate Chips and 0.25 cup Mini Chocolate Chips, add them now to the warm marshmallow-butter mixture. Stir gently until the white chocolate melts completely—this should take about 1 minute of stirring. The mini chocolate chips will stay intact for that perfect crunchy surprise in every cluster.
I know it seems weird to add chocolate chips to a hot mixture, but trust me—they'll melt just enough to create pockets of gooey white chocolate while keeping those mini chips crisp. If you're skipping the chocolate, just move straight to the cereal. Either way, keep the mixture warm but not boiling.
🥘 Step 3: Combine with Rice Krispies Cereal
Working quickly, add the 6 cups Rice Krispies Cereal to the pot in batches, stirring constantly. You'll see the cereal immediately start to clump together—this is what we want! Keep stirring until all the cereal is coated in the marshmallow mixture. The clusters should form naturally as you stir, creating those perfect, bite-sized treats.
Here's where it gets fun—don't be tempted to rush this. The cereal needs time to absorb the marshmallow mixture completely. If it looks dry in spots, add a few extra spoonfuls of the melted marshmallow mix. You're aiming for clusters that hold together when you pick them up, but still have that signature crispy exterior.
⏰ Step 4: Shape and Cool the Clusters
Using a greased spoon or spatula, scoop the mixture into clusters and shape them into balls or irregular shapes on a parchment-lined baking sheet. Press them gently to form compact clusters—this prevents them from falling apart later. Work quickly while the mixture is still warm and malleable.
Let the clusters cool completely at room temperature for 15-20 minutes. They'll harden as they cool, becoming crispy on the outside while staying soft and gooey inside. If you're impatient (like me), you can speed this up by placing the baking sheet in the refrigerator for 10 minutes, but don't skip the cooling step entirely—it's what gives them that perfect texture.
🍽️ Step 5: Store and Enjoy
Once fully cooled, transfer the clusters to an airtight container. They'll keep at room temperature for 3-4 days, though I promise they won't last that long. For longer storage, freeze them for up to 3 months—just let them sit at room temperature for 10 minutes before enjoying to bring back that perfect gooey texture.
Serve these clusters warm for the ultimate experience—the contrast of the crispy exterior and melty interior is what makes them so addictive. Pair them with a cold glass of milk for that classic Rice Krispie treat vibe, or enjoy them straight from the container for a quick, satisfying snack.
Pro Tips For Making Rice Krispie Clusters
- Use Medium Heat: I learned this the hard way—too much heat turns your marshmallows into a sticky disaster before the cereal even gets involved. Keep the pot at a steady simmer, not a boil, so the butter melts smoothly and the marshmallows soften without burning.
- Toast Cereal First: Dry-toast your Rice Krispies in a separate pan for 2-3 minutes before mixing them in. This adds a subtle crunch that isn’t drowned out by the marshmallow goo later—trust me, it makes a real difference.
- Cut Marshmallows in Half: Whole marshmallows take forever to melt and often leave lumpy bits. Split them open like a book before adding them to the pot—this speeds up melting and guarantees a smoother texture.
- Salt the Butter: Skip the extra salt if your butter is already salted, but if it’s unsalted, add a pinch now—not later. The flavor gets lost once the marshmallows and cereal take over, and you’ll end up with bland clusters.
Essential equipment for this dish
Heavy-Bottomed Pot
Your 8- to 10-inch heavy-bottomed pot is the MVP here—it prevents burning while melting the marshmallows evenly. I swear by my Calphalon stainless steel pot because it distributes heat perfectly, but any enamel-coated or cast iron pot works too.
Avoid thin, cheap pots—they’ll burn your marshmallows faster than you can say "oops." 🔥
Wooden Spoon
A long wooden spoon (at least 12 inches) is essential for stirring the marshmallow-butter mix without scraping the bottom. I use a Oxo Good Grips wooden spoon—it’s sturdy, heat-resistant, and won’t leave splinters. Avoid metal spoons (they conduct heat unevenly) or plastic (they melt in hot mixtures).
Parchment Paper
Line your baking sheet with parchment paper to prevent clusters from sticking—no greasing required! I buy the half-sheet rolls from Reynolds because they’re sturdy and tear easily. Pro tip: Use a lightly greased spoon to transfer clusters if your parchment isn’t nonstick enough. This also makes cleanup a breeze.
Greased Spoon or Spatula
Coat your spoon or spatula with butter or nonstick spray before shaping clusters—this prevents them from crumbling as you transfer them to the baking sheet. I keep a silicon spatula (like OXO Good Grips) handy for this step because it’s flexible and releases clusters effortlessly.
A greased tablespoon works too if you’re in a pinch.
Air-Tight Container
Store your clusters in a glass or plastic airtight container (like Rubbermaid or Leviton) to keep them crispy for days. I avoid metal containers—they can make the clusters soggy over time.
For gifting, portion into clear cellophane bags tied with ribbon. If freezing, use quart-sized freezer bags with 1 inch of headspace for expansion.
Optional: Mixing Bowl
If you’re adding chocolate chips or extra mix-ins, a medium-sized mixing bowl (like Pyrex) comes in handy for tossing everything together before shaping. I use it to combine any leftover melted mix with dry cereal if the pot gets sticky.
A stainless steel bowl is best—it won’t absorb odors like plastic.
Nutrition facts
Frequently asked questions
Why do my Rice Krispie Clusters turn out sticky instead of crispy?
The most common reason is overmixing or not cooling them properly. Once you add the cereal, stir just until combined—overmixing makes them dense. Also, let them cool completely (15-20 minutes) before storing. If they're still sticky after cooling, they may have absorbed too much moisture; try reducing the marshmallow amount slightly next time.
Can I make these clusters without marshmallows?
Use 12 oz of dried fruit like pineapple or mango (soaked in warm water first) or substitute with 1 cup of honey mixed with 2 tbsp butter. The texture will be different but still delicious. For a vegan option, try vegan marshmallows or agave syrup instead of butter.
How do I keep clusters from sticking to the baking sheet?
Line your sheet with parchment paper and use a greased spoon or silicone spatula to shape them. For extra insurance, lightly butter the parchment before adding clusters. If they still stick, your mixture might be too wet—reduce marshmallows by 1 oz next time or let them cool longer before transferring.
What's the best way to reheat cold clusters?
Pop them in the microwave for 10-15 seconds or warm in a 200°F oven for 2-3 minutes. For even heating, place clusters in a single layer on a microwave-safe plate. Avoid high heat—they'll melt too quickly and lose their crispy texture. The goal is just enough warmth to bring back that gooey center!
Can I make these clusters ahead for a party?
Yes! They're perfect for meal prep. Make them up to 3 days ahead and store in an airtight container. For longer storage, freeze them for up to 3 months. Thaw at room temperature for 30 minutes before serving. Pro tip: Portion into individual bags for easy grab-and-go serving at parties.