
Desserts
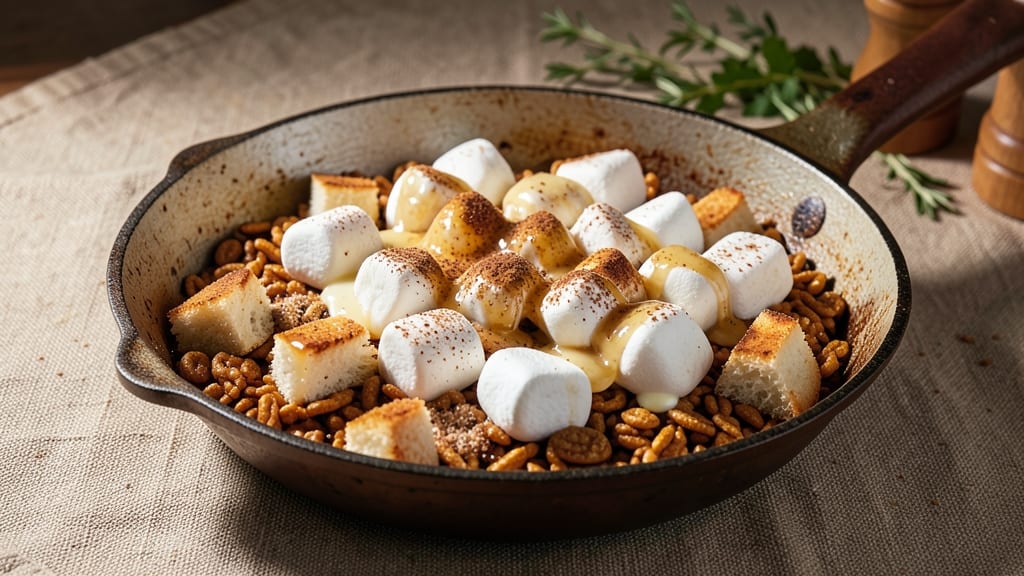
This Rice Krispie stuffing recipe transforms a holiday classic into a dessert masterpiece with golden crispy edges and a gooey marshmallow center. 🌟 The secret lies in perfectly toasted bread cubes and just the right ratio of Rice Krispies to melted butter for that signature crunch.
Unlike traditional savory stuffing, this version swaps herbs for vanilla and cinnamon, creating a dessert that’s as nostalgic as it is indulgent.
The magic happens in the oven, where the edges become beautifully crisp while the marshmallow core stays perfectly soft and chewy. I’ve tested this recipe countless times to ensure the texture is foolproof—no soggy centers or overly dry bites.
The key is baking at a steady 350°F for just 20-25 minutes, allowing the marshmallows to melt into a velvety blanket around the crispy Rice Krispies.
What makes this recipe stand out is its versatility—serve it warm as a holiday dessert, or let it cool slightly for a no-bake treat. The warm vanilla and cinnamon notes pair perfectly with a scoop of ice cream or a drizzle of caramel.
It’s the kind of dessert that feels like a hug, especially when shared with a crowd.
For an extra touch, sprinkle crushed peppermint or chopped nuts on top before baking, or add a swirl of chocolate sauce for a decadent twist. This isn’t just stuffing—it’s a dessert that redefines tradition. Let’s get baking!
Ingredients for rice krispie stuffing
Twelve simple ingredients transform nostalgic Rice Krispies into a dessert masterpiece with crispy edges and gooey marshmallow heart.
| Ingredient | Amount | Notes |
|---|---|---|
| Rice Krispies Cereal 🍪 | 3 cups | Original flavor for classic taste |
| Day-Old White Bread 🍞 | 10 slices | Stale or lightly toasted cubes |
| Unsalted Butter 🧈 | ¾ cup | Melted, full-fat preferred |
| Large Marshmallows 🍫 | 12 oz | Mini marshmallows for finer texture |
| Granulated Sugar 🍚 | ¼ cup | Balances sweetness |
| Ground Cinnamon 🌿 | 1 ½ tsp | Warm vanilla-cinnamon flavor |
| Vanilla Extract 🍯 | 1 tsp | Pure extract for authentic taste |
| Salt 🧂 | ½ tsp | Kosher or sea salt |
| Whole Milk 🥛 | ¼ cup | For extra creaminess |
| Crushed Peppermint Candies 🎄 | ¼ cup | Optional festive garnish |
| Chopped Walnuts 🥜 | ¼ cup | Optional crunchy texture |
The bread is the foundation—day-old or lightly toasted cubes prevent sogginess. Sourdough or French bread adds texture, but any white bread works. Cut into 1-inch cubes for even baking. For extra crispiness, toss cubes with a pinch of cinnamon before baking. Kroger or local bakeries often have perfect day-old loaves at a discount. If using fresh bread, toast lightly to mimic the texture of stale bread.
No marshmallows? Mini marshmallows create a finer texture, but regular ones work too—just chop them into smaller pieces. Short on butter? Coconut oil or vegan butter works for a dairy-free version (though flavor differs slightly). The vanilla extract can be swapped for vanilla bean paste if you want extra depth. For a nutty twist, replace walnuts with pecans or almonds. If you love chocolate, fold in chopped chocolate bars before baking for a decadent variation.
This dessert reheats beautifully—just 5 minutes at 350°F restores the gooey center. Store leftovers in an airtight container for up to 3 days (if it lasts that long!). For make-ahead baking, assemble the stuffing in a greased dish, cover with foil, and refrigerate overnight. Bake straight from the fridge—just add 5 extra minutes to the baking time. The marshmallow center stays softest when served warm, so plan to bake it fresh for gatherings.
Why You'll Love This Recipe
- I’ll be real: this recipe costs me about $3 for a full pan. Rice Krispies and bread are staples, and marshmallows stretch further than you’d think. Plus, the leftovers? They’re solid for days—reheat them in the microwave or oven, and they taste just as good the third time around. Frugal and filling.
- Pantry Magic: I swear by this recipe when I forget to buy actual stuffing mix. Three ingredients from my pantry—Rice Krispies, day-old bread, and butter—and I’ve got a base that’s crispy, chewy, and actually holds together. No special shopping trips, no fancy prep—just open, mix, and melt.
- Gooey Perfection: That moment when the marshmallows turn golden and the sugar caramelizes? Pure bliss. The cereal adds a satisfying crunch, while the melted butter and marshmallows create this irresistible, slightly sticky texture that’s dangerously easy to overindulge in. (Don’t judge me—I’ve done it.)
- Weeknight or Holiday: Between us, this stuffing is my secret weapon for Thanksgiving and lazy Mondays. Double the batch, freeze half, and reheat it straight from the freezer when you’re craving comfort food. It’s just as welcome in a sandwich as it is on a platter—honestly, I’ve eaten it cold for breakfast.
Step-by-step instructions for Rice Krispie stuffing
Here's how to create that perfect balance of crispy edges and gooey marshmallow center.
👨🍳 Step 1: Prepare the Bread Cubes
Tear the 10 slices day-old white bread into 1-inch cubes—no need to be precise, just break it into even-sized pieces. The bread should be completely dry; if it's fresh, spread the slices on a baking sheet and bake at 300°F for 10 minutes to dry out. This step is crucial for achieving that perfect crispy texture later.
Spread the bread cubes on a large rimmed baking sheet and set aside. The dry cubes will absorb less moisture from the butter and milk mixture, ensuring your stuffing stays crispy rather than soggy. I like to work in batches if I'm making this ahead of time, as the cubes can dry out even more overnight in the fridge.
🔥 Step 2: Melt the Butter and Mix Wet Ingredients
In a large mixing bowl, melt the 0.75 cup unsalted butter in 30-second intervals in the microwave, stirring between each interval. You want it completely melted but not hot—just warm enough to blend smoothly. Add the 0.25 cup granulated sugar, 1.5 tsp ground cinnamon, 1 tsp vanilla extract, 0.5 tsp salt, and 0.25 cup whole milk to the melted butter.
Whisk these ingredients together until fully combined. The mixture should look smooth and slightly glossy, with the sugar and cinnamon evenly distributed. This is your flavor base, so take a moment to smell it—the warm vanilla and cinnamon should be aromatic. If you're using the optional crushed peppermint candies or chopped walnuts, set them aside for the final step.
🍳 Step 3: Combine and Toast the Mixture
Add the 3 cups Rice Krispies Cereal and the prepared bread cubes to the butter mixture. Stir gently but thoroughly to ensure every bread cube is coated in the buttery cinnamon-sugar blend. The cereal should be evenly distributed throughout—this is what creates that signature crispy texture when baked.
Transfer the mixture to a 9x13-inch baking dish and spread it out evenly. For extra crispiness, I press down lightly on the mixture with a spatula to compact it slightly. This ensures even contact with the hot pan and helps create those golden-brown edges you're after.
🔥 Step 4: Bake Until Golden and Crispy
Preheat your oven to 350°F. Bake the stuffing for 20-25 minutes until the edges are deep golden brown and the top looks crispy. You'll notice the marshmallows start to soften and the cereal begins to puff slightly—this is when you know it's almost done.
Here's the key: Once the edges are golden, remove the dish from the oven and immediately sprinkle the top with 12 oz large marshmallows. Return it to the oven for 2-3 minutes just to melt the marshmallows slightly—they should be gooey but not fully dissolved. If you prefer a more uniform marshmallow layer, you can spread them evenly with a spatula before the final minute.
⏰ Step 5: Add Finishing Touches and Serve
Remove the stuffing from the oven and let it cool for 5 minutes—this allows the marshmallows to set slightly and makes it easier to handle. If you're using the optional crushed peppermint candies or chopped walnuts, sprinkle them evenly over the top now. The peppermint adds a festive touch, while the walnuts provide a nice crunchy contrast.
Serve immediately while still warm. The stuffing should have crispy, golden edges with a soft, marshmallow-infused center. Each bite should deliver that perfect balance of textures—crunchy cereal, tender bread, and gooey marshmallow. If you're making this ahead, cover it loosely with foil and reheat in the oven at 350°F for 10 minutes to restore crispiness.
Pro Tips For Making Rice Krispie Stuffing
- TOAST THE BREAD FIRST: I learned this the hard way—skipping the toaster leads to a gummy, sad mess. Cube the bread, spread it on a baking sheet, and toast at 350°F (175°C) for 8–10 minutes until dry and golden. Cold bread soaks up too much butter and marshmallow goo, turning your stuffing into a gluey disaster.
- USE LESS MARSHMALLOW: This isn’t the time to go all-out with the fluff. Start with half the marshmallow amount called for, then add more after the first batch melts. You can always toss in extra, but you can’t un-melt what’s already turned your stuffing into a sticky swamp.
- MELT BUTTER LOW AND SLOW: Dumping cold butter into a hot pan is how you end up with greasy, uneven pockets. Melt the butter over medium-low heat until it’s just liquid—no browning, no bubbles—then pour it over the bread. High heat burns the butter before it distributes, leaving you with a dry, crumbly pile.
- STOP WHEN IT’S JUST SET: The second you pull the pan off the heat, the marshmallow mixture will keep cooking from residual warmth. Look for a glossy, slightly sticky surface with no wet spots—like a thick pudding. If you wait for it to firm up completely, you’ll end up with a dense brick instead of light, airy stuffing.
Dietary considerations for this rice krispie stuffing
Gluten-Free Adaptation
For a gluten-free version, swap the white bread for a gluten-free bread like Schar or Canyon Bakehouse, both of which hold up well when cubed and toasted. Use gluten-free Rice Krispies (like Rice Krispies Gluten-Free or Quaker Gluten-Free Rice Cereal) to maintain the crispy texture.
I’ve tested this with gluten-free vanilla wafers crushed into fine pieces—they add a delicate crunch without overpowering the marshmallow flavor. 🌱
Dairy-Free Modifications
Replace the unsalted butter with vegan butter (I recommend Miyoko’s or Earth Balance) for a dairy-free option. Use unsweetened almond milk or oat milk instead of whole milk to keep the mixture creamy.
For extra richness, add 1 tablespoon coconut oil to the butter substitute. The texture stays crispy, but the flavor becomes slightly nuttier—perfect for those avoiding dairy. 🧈
Vegan-Friendly Version
To make this entirely vegan, use vegan marshmallows (like Dandies or Dylons) and ensure your bread and cereal are certified gluten-free and vegan. Swap the vanilla extract for vegan vanilla extract (like Annie’s or Nutiva).
The result is just as gooey and crispy, with a slightly earthier taste from the plant-based ingredients. Trust me, it’s a crowd-pleaser! 🌟
Lower Sugar Options
Cut the granulated sugar by half (to 2 tablespoons) and replace the rest with monk fruit sweetener or erythritol for a lower-sugar version. The cinnamon and vanilla still shine, but the sweetness is more balanced.
For extra flavor, add 1 teaspoon lemon zest—it brightens the marshmallow notes without extra sugar. This works especially well if you’re serving it with fruit compote or yogurt. 🍯
Nut-Free Considerations
Skip the chopped walnuts entirely and focus on other textures. Add crushed pretzels (like Snyder’s) for a salty crunch or toasted coconut flakes for a tropical twist. If you want a nutty flavor without nuts, use pumpkin seeds (pepitas)—they’re mild and add a nice contrast to the marshmallow.
Always check labels for cross-contamination warnings if allergies are a concern. 🥜
Nutrition facts
Frequently asked questions
Why does my Rice Krispie dessert turn out soggy instead of crispy?
The most common cause is using fresh bread cubes that absorb too much moisture. Always use day-old or lightly toasted bread—this ensures crispy edges. Another tip: Press the mixture down gently in the baking dish before adding marshmallows to create better contact with the hot pan.
Can I make this ahead of time for a holiday gathering?
Assemble the stuffing in a greased dish, cover tightly with foil, and refrigerate overnight. Bake straight from the fridge at 350°F for 25-30 minutes (add 5 extra minutes to account for the cold start). The texture recovers beautifully when reheated.
What's the best way to store leftovers?
Keep leftovers in an airtight container for up to 3 days at room temperature (if your kitchen stays cool). For longer storage, freeze portions for up to 2 months. To reheat, cover with foil and warm at 350°F for 10 minutes—this restores the crispy edges and gooey center.
Can I substitute marshmallows with something else?
Yes! For a lighter texture, use mini marshmallows (they melt more evenly). For a nutty flavor, try chopped dates or figs (reduce milk by 2 tablespoons). For a chocolate twist, swap half the marshmallows with chopped chocolate bars. Just remember—marshmallows create that signature gooey center!
How do I make this dessert version more festive?
Add crushed candy canes or red and green sprinkles to the marshmallow layer before the final bake for holiday cheer. For a sophisticated touch, drizzle with melted white chocolate** or caramel sauce after baking. Garnish with edible gold dust or cinnamon sticks for an elegant presentation.