
Desserts
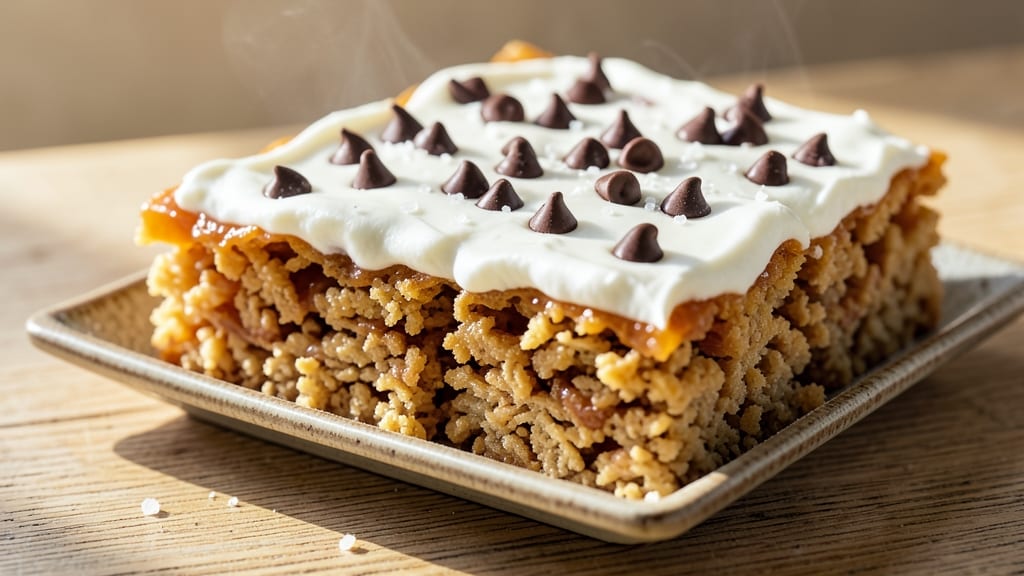
This no-bake rice krispie treat bars recipe delivers crispy edges and chewy centers without a single oven turn-on. 💛 Perfect for parties, potlucks, or satisfying sweet cravings, these bars combine marshmallow fluff, buttery rice cereal, and chocolate for a crowd-pleasing dessert that’s easier than it looks.
The secret? Melting marshmallows slowly and pressing the mixture firmly into a pan for even texture.
What sets these apart is the balance of crispy rice cereal and gooey marshmallow—no soggy bottoms or crumbly tops here. I’ve tested this recipe dozens of times, adjusting ratios to ensure the bars hold their shape when cut and stay moist for days.
The chocolate coating adds a rich finish, but you can swap it for white chocolate or peanut butter for endless variations.
By the time you’re done, you’ll have a foolproof pan of golden-brown bars that cut cleanly into perfect squares. The aroma of melted marshmallows and buttery cereal will fill your kitchen, making it impossible to resist cutting a piece before they even cool.
These bars are so versatile—they’re great as gifts, packed in lunches, or enjoyed straight from the fridge.
Store them in an airtight container for up to a week, though they rarely last that long. Whether you’re a beginner or a seasoned baker, this recipe guarantees restaurant-quality results with minimal effort. Let’s make these bars!
Ingredients for rice krispie treat bars
Marshmallow fluff, buttery cereal, and chocolate—just three things for perfect no-bake bars.
| Ingredient | Amount | Notes |
|---|---|---|
| Marshmallow Fluff 🍬 | 16 oz | Not mini marshmallows |
| Butter 🧈 | ½ cup | Unsalted, melted (full-fat preferred) |
| Rice Krispies Cereal 🍚 | 6 cups | Original, not chocolate or honey-nut |
| Semi-Sweet Chocolate Chips 🍫 | 1 cup | Enjoy Life brand for allergy-friendly |
| Vanilla Extract 🌿 | 1 tsp | Pure, not imitation |
| Salt 🧂 | ¼ tsp | Fine sea salt |
| Unsweetened Applesauce 🍎 | ½ cup | For extra moisture (optional) |
| Vegetable Oil 🫒 | 1 tbsp | For greasing pan |
| Parchment Paper 📄 | 1 sheet | For easy release |
| Powdered Sugar 🍚 | 2 tbsp | For dusting (optional) |
The marshmallow fluff is non-negotiable here. Kraft brand is the gold standard, but any quality fluff works. If you're worried about allergies, Enjoy Life brand is a great alternative. The Rice Krispies need to be original—not the chocolate or honey-nut variety. I always grab a family-sized box from Costco for these recipes; it's cheaper and lasts longer. For the butter, unsalted is best since we're already adding salt, but salted works in a pinch if that's all you've got. The chocolate chips? Semi-sweet is classic, but dark chocolate works too if you prefer a richer flavor.
No marshmallow fluff? Mini marshmallows melted with butter can work, but texture will differ. Swap chocolate chips for white chocolate chips or peanut butter if you want a different flavor profile. The applesauce is optional but adds extra moisture—great if your kitchen is dry. For the vanilla, pure extract is best, but vanilla sugar at half the amount works too. If you're making these ahead, pressing the mixture firmly into the pan is key—don't skip this step. And for the love of all things sweet, measure your ingredients carefully—this isn't a recipe where eyeballing works.
These bars set up quickly, so work fast once the marshmallow mixture is ready. Grease your pan well with oil or butter, and line it with parchment paper for easy release. Store them in an airtight container at room temperature for up to 5 days. They actually taste better the next day once everything has melded together. For parties, cut them into squares or rectangles—whatever shape pleases you. If you're giving them as gifts, wrap individual pieces in clear cellophane with a ribbon. Trust me, they'll disappear fast.
Why You'll Love This Recipe
- No-Fail Simplicity: I swear by this recipe because it’s the kind of thing you can make with your eyes closed. Melt butter, mix in Fluff, fold in cereal—no fancy techniques, just three steps. Even if you burn the butter (we’ve all been there), the chocolate chips will save the day.
- Chewy-Crisp Magic: That perfect snap from the Rice Krispies gives way to a gooey, marshmallow center—like a hug in bar form. A pinch of vanilla ties it all together, making it taste like nostalgia and a little something extra.
- Party or Pantry: These bars are my go-to for potlucks, lunchboxes, or when I need a snack that won’t break the bank. Cut into squares, they’re easy to grab, and the chocolate chips make them feel fancy without the effort.
- Budget-Friendly Stash: A single batch costs less than takeout and keeps for days in the fridge. Honestly, I’ve had them last a week—my kids just keep “forgetting” to eat them. Plus, you can halve the recipe if you’re feeding one or two.
Step-by-step instructions for no-bake rice krispie treat bars
Here's how to make these chewy, crispy bars with minimal effort and maximum flavor.
🍳 Step 1: Melt Butter and Mix Wet Ingredients
In a large, heavy-bottomed saucepan over medium heat, melt the 0.5 cup butter together with the 16 oz Marshmallow Fluff. Stir constantly with a wooden spoon until it becomes smooth and creamy—this should take about 3-4 minutes. You'll see the mixture thicken slightly as it heats.
Once melted, remove the pan from heat and stir in the 1 tsp vanilla extract, 0.25 tsp salt, and 0.5 cup unsweetened applesauce (if using). The applesauce adds moisture and helps create that signature chewy texture. Let the mixture cool for 5 minutes—it should be warm but not hot to the touch, as you'll be handling it next.
👨🍳 Step 2: Combine with Rice Krispies and Chocolate
While the mixture cools, line a 9x13-inch baking dish with the 1 sheet parchment paper, leaving an overhang on two sides for easy removal. Lightly brush the bottom with the 1 tbsp vegetable oil to prevent sticking.
Add the 6 cups Rice Krispies Cereal to the warm marshmallow mixture and stir gently but thoroughly with a spatula until every cereal piece is coated. Then fold in the 1 cup semi-sweet chocolate chips—they'll melt slightly from the residual heat, creating pockets of rich chocolate flavor throughout. Work quickly but carefully to avoid breaking the cereal pieces.
🥘 Step 3: Press into Pan and Chill
Transfer the mixture to the prepared baking dish and press down firmly with a spatula or the back of a spoon. Press until the top looks smooth and even—this ensures those crispy edges and chewy texture. You'll feel resistance as you press, but keep going until the top is completely compacted.
Sprinkle the 2 tbsp powdered sugar evenly over the top for a sweet, dusty finish. Cover the dish tightly with plastic wrap and refrigerate for at least 4 hours or overnight. This chilling time is crucial—it allows the bars to set properly and develop that perfect balance of crispy edges and soft, chewy centers.
🔪 Step 4: Cut and Serve
Once fully chilled, use the parchment paper overhang to lift the bars out of the dish and place them on a cutting board. Remove the parchment paper and cut into 16 even squares using a sharp knife or pizza cutter. For cleaner cuts, dip the knife in hot water between slices to prevent sticking.
Serve at room temperature for the best texture—each bite should offer a satisfying crunch from the Rice Krispies, followed by the creamy marshmallow center and pockets of melted chocolate. These bars keep well in an airtight container at room temperature for up to 5 days, though they rarely last that long!
Pro Tips For Making Rice Krispie Treat Bars
- MELT BUTTER LOW AND SLOW: I learned this the hard way—dumping butter into a hot pan and ending up with burnt marshmallow fluff. Use medium-low heat and stir constantly until the butter melts completely, then remove from heat for 30 seconds to cool slightly. This keeps the fluff from turning grainy or separating when you mix it in.
- PREP KRISPIES FIRST: Save yourself from sticky chaos by mixing the Rice Krispies with the chocolate chips before adding them to the fluff mixture. Toss them in a bowl with a splash of vanilla extract (about ½ teaspoon) so they coat evenly. The chocolate melts faster and sticks better this way—no more dry pockets of cereal.
- PRESS FIRM AND EVEN: Don’t just slap the mixture into the pan and call it done. Use a greased spatula to press it down firmly and evenly, especially around the edges. If you skip this, the bars will be lumpy and won’t slice cleanly. A quick run under a glass or the back of a spoon helps too—just don’t overdo it or you’ll end up with a brick.
- CHILL BEFORE SLICING: Resist the urge to cut into them right away. Let the bars cool at room temperature for 10 minutes, then refrigerate for 15–20 minutes. This makes slicing a breeze and prevents the chocolate from melting into a gooey mess. (Yes, even if you’re impatient like me—I know, I know.)
Wine and beer pairings for this recipe
Sweet Wine Pairings
Rice Krispie treat bars are like a warm hug in dessert form, so pair them with wines that complement their buttery, marshmallow-rich sweetness. A Moscato d'Asti from Italy brings crisp acidity and floral notes that cut through the richness while enhancing the chocolate.
I always reach for a chilled glass—around 45-50°F—to balance the bars' warmth. 🍷
For a bolder option, try a Late Harvest Riesling from Germany or Washington State. The wine's honeyed flavors mirror the marshmallow fluff, while its slight tartness prevents the dessert from feeling too heavy.
A 2019 Dr. Loosen Blue Slate Riesling is my go-to—it’s sweet but not cloying, with a touch of lime that refreshes your palate.
Creamy Beer Options
Don’t underestimate beer’s ability to pair with these bars! A Belgian Witbier like Hoegaarden or Stella Artois works surprisingly well—their citrusy coriander and light effervescence cleanse your palate between bites.
The bubbles also help reset your taste buds after the marshmallow’s stickiness. Serve the beer well-chilled (38-42°F) to highlight its crispness.
For a richer option, a Honey Brown Ale (think Samuel Smith’s Nut Brown Ale) adds caramel and toffee notes that echo the buttery cereal and chocolate. The beer’s slight malt sweetness won’t overpower the bars but will create a satisfying harmony.
I like to sip it alongside a warm bar—it’s a cozy combo for chilly evenings. 🍺
Unexpected Coffee Twist
If you’re serving these bars after dinner, consider a cold brew coffee with a splash of vanilla syrup. The coffee’s bitterness contrasts beautifully with the marshmallow’s sweetness, while the vanilla ties back to the extract in the recipe.
I add 1 shot of cold brew to ½ cup milk with 1 tsp vanilla syrup—it’s like dessert meets coffee break. ☕
For an iced option, try a vanilla chai latte made with chai tea concentrate and steamed milk. The spices in the chai (cinnamon, cardamom) add warmth that complements the buttery cereal. Serve it over ice for a refreshing contrast to the bars’ gooey texture.
Non-Alcoholic Sparkle
Not drinking? No problem! A sparkling apple cider like Martinelli’s adds festive bubbles and a hint of tartness that pairs perfectly. The apple flavor also echoes the applesauce in the recipe, creating a subtle but delicious connection. Serve it chilled (40°F) for the best fizz.
For a tropical twist, mix pineapple juice with club soda and a squeeze of lime. The pineapple’s brightness cuts through the richness, while the lime adds a zesty finish. I like to add a few fresh mint leaves for garnish—it’s like a mini vacation in every sip. 🍍
Nutrition facts
Frequently asked questions
Can I make these bars without butter?
Yes! For a dairy-free version, substitute the 0.5 cup butter with 0.5 cup coconut oil or 0.4 cup vegetable shortening. Melt the coconut oil first, then proceed as directed. The texture will be slightly different but still delicious.
Why are my bars too crumbly?
Crumbly bars usually happen when the marshmallow mixture cools too quickly or isn't pressed firmly enough. Let the mixture cool for 5 minutes before adding cereal, and press it down hard in the pan. For extra chewiness, add 0.25 cup more marshmallow fluff or 2 tbsp more butter. Chill for at least 4 hours to set properly.
How do I store these bars for maximum freshness?
Keep them in an airtight container at room temperature for up to 5 days. For longer storage, freeze them for up to 3 months. To freeze, wrap individual bars tightly in plastic wrap, then place in a freezer bag. Thaw at room temperature for 1-2 hours before serving. The texture stays perfect when stored properly!
Can I add nuts or other mix-ins?
Fold in 1 cup chopped pecans or walnuts with the chocolate chips, or add 0.5 cup M&M's for extra sweetness. For a tropical twist, try 0.5 cup shredded coconut. Just be mindful of portion sizes—too many mix-ins can make the bars crumbly. Toast nuts first for extra flavor!
Why do I need to chill these bars?
Chilling is crucial because it lets the marshmallow mixture fully set, creating that perfect balance of crispy edges and chewy centers. Without chilling, the bars will be too soft and may fall apart when cutting. The 4-hour minimum (or overnight) ensures they hold their shape and develop the ideal texture. Patience pays off!