
Sauces & Condiments
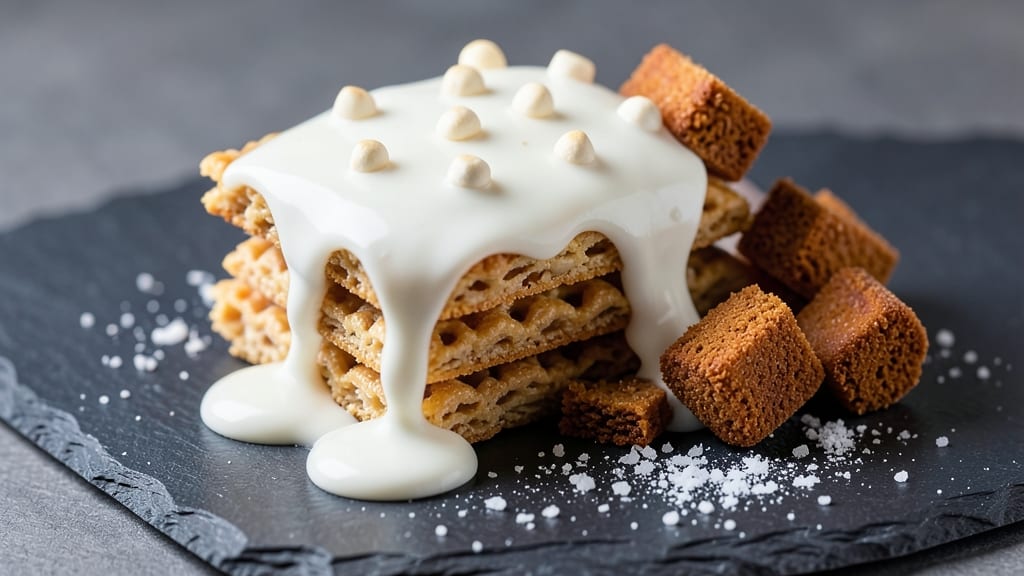
This Rice Krispie treat icing recipe transforms ordinary treats into show-stopping masterpieces with its velvety, marshmallow-infused glaze. The secret lies in balancing powdered sugar, butter, and milk to create a smooth, spreadable finish that clings beautifully to every crispy edge.
I developed this recipe after years of experimenting with store-bought icings that always left something to be desired—too thin, too thick, or lacking that signature gooey magic.
The key to success is patience and precise measurements. Melted butter and milk create the base, while powdered sugar dissolves completely for that signature smooth texture. A touch of vanilla extract elevates the flavor, making this icing more than just a topping—it becomes the star.
This recipe yields enough for a standard 9x13-inch pan of treats, with just the right consistency to drizzle, spread, or even pipe for decorative flair.
What sets this icing apart is its ability to stay glossy and spreadable without becoming sticky or grainy. The marshmallow element adds a subtle sweetness that complements the crispy treats perfectly, while the butter ensures it melts beautifully when warmed.
Whether you're serving these at a party or keeping them for a cozy night in, this icing turns every bite into an experience.
Use it immediately for the best results, or store in an airtight container for up to 3 days—though I doubt it will last that long. The combination of textures and flavors makes these treats irresistible, and this icing is the foolproof way to take them to the next level.
Ingredients for rice krispie treat icing
Seven ingredients, one showstopping glaze that turns treats into edible art.
| Ingredient | Amount | Notes |
|---|---|---|
| Powdered Sugar 🍚 | 3 cups | Sifted for smooth texture |
| Unsalted Butter 🧈 | ½ cup | Melted, not watery |
| Whole Milk 🥛 | ¼ cup | Room temperature preferred |
| Pure Vanilla Extract 🌿 | 1 tsp | High-quality, no imitation |
| Miniature Marshmallows 🍫 | ¼ cup | Finely chopped for smoothness |
| Diamond Crystal Kosher Salt 🧂 | ⅛ tsp | Fine grain preferred |
| Corn Syrup 🍯 | 1 tbsp | Light corn syrup for gloss |
The powdered sugar is non-negotiable—Domino brand is my go-to for its fine texture, but any quality powdered sugar works. Unsalted butter ensures you control the saltiness, and Land O'Lakes or Plugrá are reliable choices. For the milk, whole milk gives the best creaminess, but 2% works in a pinch. Miniature marshmallows are key for that signature gooey texture—Kraft or Jet-Puffed are widely available. If you can't find them, finely chop regular marshmallows, but expect slightly less smoothness. The vanilla extract should be pure, not imitation—Nielsen-Massey is a trusted brand for professional results.
No powdered sugar? Confectioners' sugar from a bulk bin is your best bet, but it may need sifting. Substituting granulated sugar requires 1.5 times the amount plus extra liquid to dissolve properly. Butter shortages? Coconut oil works, though the flavor shifts slightly. Short on milk? Heavy cream thinned with water mimics the richness. For a dairy-free version, coconut milk replaces whole milk, though the texture will be slightly lighter. The corn syrup is optional but adds that signature gloss—Karo is the standard brand, but any light corn syrup suffices.
This icing is best used immediately for maximum gloss and spreadability. For short-term storage, transfer to an airtight container and refrigerate for up to 3 days. Reheat gently in the microwave for 10-15 seconds to restore its silky texture. Freezing isn't recommended—it can become grainy. If making ahead, prepare the icing and store the ingredients separately, then combine just before use. The marshmallows will soften slightly, so chop them extra fine if prepping early.
Why You'll Love This Recipe
- Three-Ingredient Magic: I swear by this combo—just butter, powdered sugar, and milk. No fancy gadgets, no waiting for dough to rise, just melt, mix, and go. Honestly, it’s the kind of recipe that makes me feel like I’ve outsmarted Pinterest.
- Crispy-Creamy Bliss: That first bite where the marshmallows melt into gooey perfection while the edges stay just firm enough? It’s like dessert nirvana. The vanilla ties it all together without overpowering—simple, but ridiculously satisfying.
- Party in a Bowl: Between us, this icing is my go-to for last-minute desserts. Drizzle it over cupcakes, fold it into ice cream, or slather it on top of Rice Krispie treats—suddenly, you’ve got a showstopper that costs less than takeout. (Yes, even on a Tuesday night.)
- No-Waste Wonder: Make a double batch and store it in the fridge for up to a week. It’s my secret weapon for when kids beg for sweets but I’m too tired to bake. Plus, the ingredients are cheap—you’ll have leftovers before you realize you’ve used them all.
Step-by-step instructions for marshmallow-melty Rice Krispie treat glaze
Transform ordinary Rice Krispie treats into showstopping delights with this ultra-gooey, marshmallow-infused glaze.
Melt Butter and Corn Syrup for the Base
In a medium saucepan, combine the 0.5 cup unsalted butter and 1 tablespoon corn syrup over medium-low heat. Let the mixture melt completely, stirring occasionally with a silicone spatula. The butter should transform from solid to a smooth, liquid state with no visible lumps—this ensures a glossy, even glaze.
Watch for small bubbles forming around the edges of the pan; this indicates the mixture is ready to proceed. Remove the pan from heat immediately once fully melted to prevent overheating, which could alter the flavor. The residual heat will keep it warm while you prepare the remaining ingredients.
Whisk in Powdered Sugar and Milk for Smoothness
Return the saucepan to low heat and gradually whisk in the 3 cups powdered sugar in a slow, steady stream. This prevents clumping and creates a silky texture. Once fully incorporated, remove the pan from heat and let it cool for 2 minutes to prevent sudden temperature spikes when adding the 0.25 cup whole milk.
After cooling, whisk in the milk and 1 teaspoon pure vanilla extract until completely smooth. The mixture should resemble thick, glossy syrup. If it appears grainy, strain it through a fine-mesh sieve into a clean bowl to remove any residual sugar granules. This step guarantees a velvety finish on your treats.
Incorporate Marshmallows for Gooey Perfection
Add the 0.25 cup finely chopped miniature marshmallows to the warm mixture and stir vigorously with a wooden spoon. The heat will begin to melt the marshmallows almost immediately, creating a thick, ribbon-like consistency. Work quickly to distribute them evenly—this is where the magic happens.
If the glaze thickens too much, add 1-2 teaspoons of hot water to loosen it. The ideal texture should coat the back of a spoon but still drip slowly. Sprinkle in the 0.125 teaspoon diamond crystal kosher salt and stir once more. The salt enhances the sweetness and balances the richness of the butter and marshmallows.
Cool and Adjust Consistency
Transfer the glaze to a heatproof bowl and let it cool at room temperature for 10-15 minutes, stirring occasionally. The mixture will thicken as it cools—this is normal. If it becomes too stiff to drizzle, gently reheat it in 10-second bursts in the microwave, stirring between each burst, until it reaches a smooth, pourable consistency.
For a glossy finish, drizzle the glaze over your Rice Krispie treats immediately after cooling. The warmth of the treats will help the glaze set quickly, creating that signature gooey texture. If any glaze hardens before use, warm it briefly in the microwave and stir until smooth again.
Pro Tips For Making Rice Krispie Treat Icing
- Melt Butter Slowly: Heat the butter in a saucepan over medium-low until it’s just liquid—no browning, no bubbles. I learned this the hard way: rushing it turns the icing grainy later, and you’ll end up sifting powdered sugar like you’re playing a game of exasperation.
- Sift Sugar Twice: Dump the powdered sugar into a sifter and give it two good shakes over the warm butter-milk mixture. The first pass won’t catch all the lumps, and I’ve seen clumps the size of pebbles ruin an otherwise perfect batch. Trust me, your future self will notice.
- Stop When It’s Thick: Stir the icing constantly for the last 2–3 minutes until it coats the back of a spoon but doesn’t drip. Overcooking turns it gluey, and you’ll be scraping it off the pan like it’s a crime scene. Aim for a consistency where it holds shape but still flows smoothly.
- Chill the Icing: Let the icing sit for 10 minutes before dipping the marshmallows—no peeking. The heat from the marshmallows will melt it faster than you can say “disaster,” and you’ll end up with a sad, soupy mess instead of crispy squares. Patience here makes all the difference.
Troubleshooting this recipe
Grainy Texture Fix
If your icing turns grainy during preparation, strain it immediately through a fine-mesh sieve into a clean bowl. This removes any undissolved powdered sugar granules that can make the glaze rough.
For extra smoothness, whisk the mixture vigorously for 1-2 minutes over low heat after adding milk—this helps dissolve any lingering sugar crystals. I’ve found that using Domino brand powdered sugar (sifted) reduces graininess more effectively than store-brand alternatives. 💫
Thickening Too Fast
When the glaze thickens prematurely, don’t panic—just reheat it gently. Place the bowl in a larger pan of simmering water (double boiler method) for 30-45 seconds while stirring constantly. This restores its pourable consistency without scrambling the marshmallows.
If it’s still too stiff, add ½ teaspoon hot water at a time until it reaches a smooth, ribbon-like texture. Overheating is the real enemy here, so keep the heat minimal.
Sticky or Clumpy Icing
Clumpy icing usually means the butter wasn’t melted enough or the powdered sugar wasn’t incorporated properly. To fix it, place the bowl over low heat again and whisk vigorously until fully smooth. If it’s sticky, let it cool slightly—this often resolves the issue as the mixture sets.
For future batches, ensure the butter is completely melted (no lumps) and whisk in the sugar gradually over low heat to prevent clumping. A silicone spatula helps scrape the sides for even mixing.
Marshmallow Separation
If the marshmallows separate or sink to the bottom, the glaze was likely too cool when added. To prevent this, warm the mixture to 110-115°F (just below a simmer) before stirring in the chopped marshmallows. If separation occurs, reheat the glaze gently and whisk until fully combined.
For extra insurance, chop the marshmallows into pea-sized pieces before adding—they’ll melt more evenly. I’ve had the best results with Kraft Jet-Puffed marshmallows, as they dissolve smoothly.
Dull or Non-Glossy Finish
A dull glaze often means insufficient corn syrup or overheating. To restore shine, whisk in 1 teaspoon light corn syrup (like Karo) and reheat briefly in 10-second microwave bursts, stirring between each.
For a glossy finish on the treats, drizzle the glaze when it’s still slightly warm—this helps it set smoothly. If the treats absorb the glaze too quickly, chill them for 10 minutes in the freezer before applying the icing for better adhesion.
Storage Issues
If your stored icing hardens or becomes grainy after refrigeration, revive it by microwaving in 5-second intervals while stirring. For long-term storage, divide the icing into small airtight containers (like Rubbermaid silicone lids) to prevent moisture loss. If it separates, whisk in 1 teaspoon warm water to restore consistency.
I’ve found that preparing the icing fresh yields the best results, but with proper storage, it stays usable for up to 3 days in the fridge. 💡
Nutrition facts
Frequently asked questions
Can I make this icing without corn syrup?
Yes, but the texture will be slightly less glossy. Replace the 1 tablespoon corn syrup with 1 tablespoon honey or agave nectar for a natural alternative. For a neutral substitute, use 1 tablespoon additional milk—just be prepared for a matte finish. The corn syrup helps create that signature shine, but the icing will still taste delicious!
Why did my icing turn out too thin?
Thin icing usually happens when too much liquid (milk, water) is added or the butter wasn't fully melted. To fix it, let the icing cool slightly, then reheat in 10-second microwave bursts while stirring. For future batches, ensure the butter is completely melted and measure liquids precisely. If it's still too runny, chill the treats for 10 minutes before drizzling—they'll absorb less!
Can I use regular marshmallows instead of miniatures?
Chop ½ cup regular marshmallows into pea-sized pieces for a similar effect. Miniatures melt more evenly, but regular marshmallows work well too. For extra smoothness, pulse them in a food processor before adding. Just be prepared for slightly larger pockets of gooeyness in your treats!
How do I store leftover icing?
Transfer to an airtight container and refrigerate for up to 3 days. To use, microwave in 5-second bursts while stirring until smooth. For longer storage, freeze in 1-tablespoon portions—thaw in the fridge overnight. The texture may change slightly after freezing, but it's still edible. Fresh icing always tastes best, though!
Can I color this icing for special occasions?
Yes! Use gel food coloring (liquid can make it too thin). Add ½ teaspoon at a time to the warm mixture, stirring well. For pastel shades, use ¼ teaspoon. Start with a small amount—you can always add more, but you can't remove excess color. Let the icing cool before applying to prevent bleeding into the treats.