
Desserts
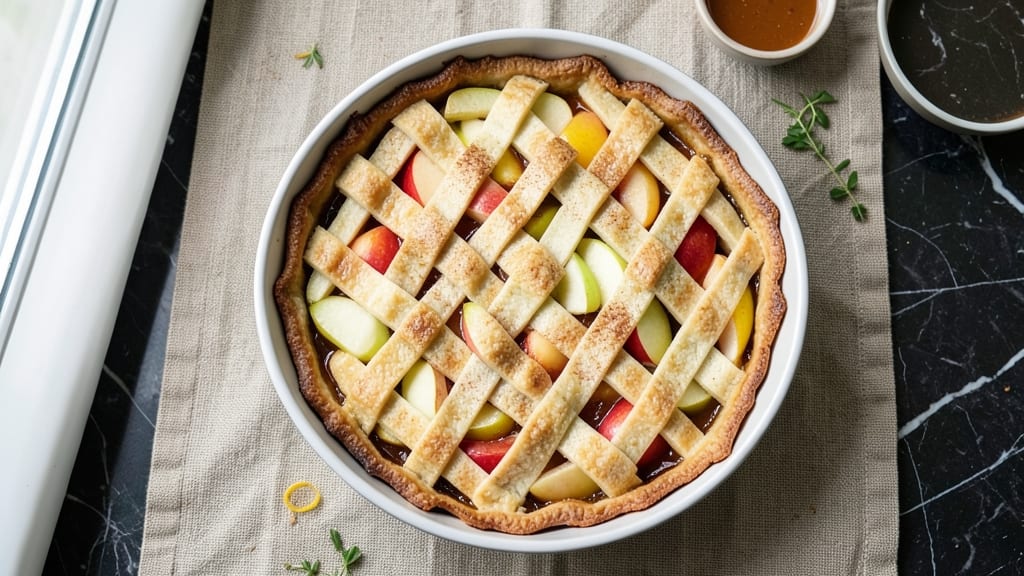
This springform apple pie recipe delivers the perfect balance of flaky crust and spiced apple filling without the fuss of traditional pie pans. The secret lies in a sturdy springform base that holds its shape while creating a golden, caramelized crust that's crisp on the edges and tender underneath. I've perfected this technique over years of baking, ensuring every slice is as impressive as it is delicious.
The filling starts with a mix of tart and sweet apples—Granny Smiths for structure and Honeycrisp for natural sweetness—tossed with cinnamon, nutmeg, and just enough sugar to let the fruit's flavors shine.
A touch of lemon juice brightens the mixture, while a cornstarch slurry thickens it into a perfect, bubbling consistency that stays moist even after baking. The crust, whether homemade or store-bought, gets a blind-bake for extra crispiness, preventing a soggy bottom.
What you'll end up with is a pie that looks like it came from a bakery—golden crust, fragrant spiced filling, and a lattice top that adds visual appeal without sacrificing texture. The springform design makes slicing effortless, and the removable sides allow for easy serving straight from the pan.
This recipe is designed to impress, whether you're baking for a holiday gathering or simply craving a classic dessert.
Ready in about 1 hour 15 minutes (including prep and baking), this pie keeps well for up to 3 days, making it ideal for meal prep or gifting. The filling can even be made ahead and refrigerated, so you can focus on assembling and baking when you're ready.
Here's how to create a showstopper apple pie with minimal stress.
Ingredients for springform apple pie
Golden crust and spiced filling start with these 14 essential ingredients—nothing fancy, just perfect pie components.
| Ingredient | Amount | Notes |
|---|---|---|
| Granny Smith Apples 🍎 | 2 lb | Peeled, cored, sliced into 1/4-inch pieces |
| Honeycrisp Apples 🍎 | 2 lb | Peeled, cored, sliced into 1/4-inch pieces |
| All-Purpose Flour 🌾 | 2 ½ cups | For pie crust (plus extra for dusting) |
| Unsalted Butter 🧈 | 1 cup | Cold, cubed (2 tbsp per crust layer) |
| Granulated Sugar 🍚 | ¾ cup | For filling (plus 2 tbsp for sprinkling) |
| Light Brown Sugar 🍚 | ¼ cup | Packed (for filling) |
| Ground Cinnamon 🌿 | 2 tbsp | Plus 1 tsp for sprinkling |
| Ground Nutmeg 🌿 | ½ tsp | Freshly grated preferred |
| Lemon Juice 🍋 | 2 tbsp | Freshly squeezed |
| Cornstarch 🌾 | 2 tbsp | For slurry |
| Salt 🧂 | ½ tsp | Fine sea salt |
| Springform Pan 🍰 | 1 whole | 9-inch, removable sides |
| Heavy Cream 🥛 | ¼ cup | Optional for brushing crust |
| Turbinado Sugar 🍚 | 2 tbsp | For sprinkling on crust |
The apples are the heart of this pie. Granny Smiths bring tartness to balance the sweetness of Honeycrisp, but any mix of tart and sweet apples works—Fuji or Gala in a pinch. Slice them uniformly for even baking. For the crust, King Arthur flour or your store's best all-purpose works, but avoid pre-mixed crusts—they lack the flakiness you're aiming for. The butter should be cold enough to hold its shape when pressed between fingers. If it's too soft, chill it for 20 minutes before rolling.
No Granny Smiths? McIntosh or Braeburn are great substitutes. Want to skip the cornstarch? All-purpose flour works at the same amount, though it may thicken slightly more. The lemon juice can be bottled, but freshly squeezed adds brightness. For a lattice top, use strips cut from the same dough—no need for store-bought lattice kits. If your apples are extra juicy, reduce the sugar by 1 tbsp to balance the natural sweetness. The nutmeg can be pre-ground, but freshly grated has more depth—worth the extra minute if you've got a microplane.
Prevent soggy bottoms by blind-baking the crust for 15 minutes before adding filling. Store the assembled pie at room temperature for up to 2 days, or refrigerate for 3-4 days. Reheat slices in a 350°F oven for 5-10 minutes to restore crispness. The filling can be made 1 day ahead—just refrigerate it covered. Freeze the whole pie (unbaked) for up to 2 months by wrapping tightly in plastic wrap and foil. For serving, slice straight from the springform pan—no fuss, no mess.
Why You'll Love This Recipe
- No-Fuss Assembly: I swear, this pie comes together faster than my coffee order at the drive-thru. Just slice the apples—no peeling required—and toss them into the crust. The springform pan makes it idiot-proof; no crimping edges or worrying about a lattice falling apart.
- Tart-Sweet Magic: That Granny Smith-Honeycrisp combo? Chef’s kiss. The Grannies keep it bright and crisp, while the Honeycrisp adds just enough natural sweetness to make the whole thing sing—no extra sugar needed (though I’ll admit, the crust’s buttery flakiness does deserve a little extra).
- Weeknight or Company: Honestly, this pie works for both. Need a last-minute dessert for your book club? Done. Want to impress your in-laws? Also done. The springform pan lets you serve slices straight from the oven, so no awkward pie servers or crumbs everywhere.
- Leftovers? More Like Leftovers: Between us, this pie’s so good you’ll make it twice. The first time, you’ll eat half before it even cools. The second time? It’s for the freezer—because nothing beats pulling out a warm slice on a lazy afternoon. And since you’re using pantry staples, it won’t break the bank.
Step-by-step instructions for springform apple pie
Here's how to create a showstopping apple pie with a flaky crust and perfectly spiced filling—no messy lattice required.
Prepare the Apple Filling
In a large bowl, combine the peeled and sliced 2 lb Granny Smith apples and 2 lb Honeycrisp apples. Add the 0.75 cup granulated sugar, 0.25 cup packed light brown sugar, 2 tbsp ground cinnamon, 0.5 tsp ground nutmeg, 0.5 tsp salt, and 2 tbsp freshly squeezed lemon juice. Toss gently until every slice is evenly coated.
Next, whisk together the 2 tbsp cornstarch and remaining 1 tbsp granulated sugar in a small bowl. Sprinkle this mixture over the apples and toss again until fully distributed. The cornstarch will help thicken the filling and prevent a watery pie. Let the mixture sit for 10 minutes while you prepare the crust—this allows the flavors to meld and the apples to release some juice.
Make the Pie Crust
In a food processor, pulse the 2.5 cups all-purpose flour and 0.5 tsp salt until combined. Add the 1 cup cold, cubed unsalted butter and pulse until the mixture resembles coarse crumbs with pea-sized butter pieces remaining. Sprinkle 2-3 tablespoons of ice water and pulse just until the dough comes together when pressed.
Turn the dough out onto a lightly floured surface and divide it into two equal portions. Roll one portion into a 12-inch circle (about 1/8-inch thick) to fit your 9-inch springform pan. Transfer the rolled dough to the pan and press it gently into the bottom and up the sides. Chill in the freezer for 15 minutes while you prepare the second crust layer.
Assemble the Pie
Roll out the second portion of dough to the same 12-inch circle. Place it over the prepared pan, pressing the edges together to seal. Trim any excess dough with a sharp knife. Cut a few small slits in the top crust to allow steam to escape—this prevents a soggy bottom.
Pour the prepared apple filling into the crust, mounding it slightly in the center. Brush the top crust with 0.25 cup heavy cream (if using) for a golden finish. Sprinkle evenly with 2 tbsp turbinado sugar and 1 tsp ground cinnamon for extra flavor and color. The sugar will caramelize beautifully during baking.
Bake to Perfection
Preheat your oven to 375°F. Place the assembled pie on a parchment-lined baking sheet to catch any drips. Bake for 50-60 minutes until the crust is deep golden brown and the filling is bubbling at the edges. The pie is done when the crust is firm to the touch and the filling has thickened.
Remove the pie from the oven and let it cool on a wire rack for at least 2 hours before slicing. This resting time allows the filling to set properly and prevents a runny pie. The aroma alone will have your kitchen smelling like autumn—worth every minute of waiting!
Pro Tips For Making Springform Apple Pie
- Preheat with the pie plate: Preheat your oven with the springform pan already inside—this guarantees the crust won’t shrink when it hits the heat. I learned this the hard way when my first attempt puffed up like a sad soufflé.
- Peel apples halfway: Leave the bottoms of your Granny Smiths and Honeycrisps unpeeled—they hold the fruit together better and add texture. Just slice off the toughest parts near the core, and you’ll avoid a mushy filling.
- Chill the dough before rolling: Cold butter in the crust means flakier layers, but don’t skip letting the dough rest in the fridge for 30 minutes first. I used to rush it, and the pie crust always ended up tough—like eating a cracker instead of dessert.
- Weigh the butter: Use a scale for the butter—300g (or 2½ sticks) is the sweet spot for a rich but not greasy crust. Packing it by volume leads to uneven layers, and trust me, you’ll taste the difference.
Make-ahead tips for this springform apple pie
Filling Prep Ahead
The apple filling is the star of this pie, and it actually tastes better the next day! I like to make it 1-2 days ahead and store it in an airtight container in the fridge.
The flavors deepen as the spices meld, and the apples soften slightly—perfect for a more tender texture. When ready to bake, simply pour it straight from the fridge into your crust. No need to thaw or adjust anything. 🥗
Crust Make-Ahead
For a stress-free baking day, prepare both crust layers up to 3 days in advance. Wrap them tightly in plastic wrap and refrigerate. When you're ready to assemble, roll out the chilled dough directly from the fridge—no thawing needed.
The cold dough is easier to handle and prevents shrinking. I often make extra crust and freeze it for future pies. Just thaw overnight in the fridge before using. ❄️
Assembled Pie Storage
Once your pie is fully cooled, store it at room temperature for up to 2 days in an airtight container. For longer storage, refrigerate for 3-4 days—just reheat slices in a 350°F oven for 5-10 minutes to restore crispness.
The springform pan makes it easy to transport whole pies for potlucks or gifts. I've even wrapped cooled pies in parchment and twine for presentation—looks like it came from a bakery! 🍰
Freezer-Friendly
You can freeze this pie in two ways: unbaked or baked. For unbaked pies, assemble completely, wrap tightly in plastic wrap, then foil, and freeze for up to 2 months. Bake straight from frozen, adding 15-20 minutes to the cooking time.
For baked pies, cool completely, slice, and freeze individual portions on a tray before transferring to a freezer bag. Reheat slices in the oven for best results. 🧊
Time-Saving Tips
Skip the homemade crust if you're short on time—I use Pillsbury Grand Crust for a reliable shortcut. Just press it into the pan and blind-bake as directed. For the filling, use pre-sliced apples from the produce section to save 15-20 minutes of prep.
And if you're really pressed, make the filling the night before and refrigerate it—just toss it with the cornstarch slurry right before baking. 💡
Gift-Worthy Packaging
When gifting this pie, let it cool completely, then wrap it in parchment paper and secure with twine. Add a sprig of fresh rosemary or a cinnamon stick for a rustic touch. I like to include a small card with serving suggestions—like pairing with vanilla ice cream or whipped cream.
The springform pan makes it easy to transport whole pies without worrying about broken crusts. Perfect for holidays or teacher appreciation week! 🎁
Nutrition facts
Frequently asked questions
Why use a springform pan for apple pie instead of a traditional pie dish?
The springform pan's removable sides make slicing effortless and prevent messy crumbs. It also creates a sturdy base that holds its shape during baking, especially with thick fillings. Plus, the sides help contain juicy apple mixtures without overflowing—ideal for pies with high moisture content.
Can I substitute store-bought crust for the homemade version?
For convenience, use Pillsbury Grand Crust or similar brands. Press it into the pan and blind-bake for 15 minutes at 375°F before adding filling. Just avoid pre-made crusts with too much oil—they can make the crust soggy.
How do I prevent a soggy bottom crust?
Blind-bake the bottom crust for 15 minutes before adding filling. Sprinkle a thin layer of dried breadcrumbs or crushed cookies between crust layers for extra insurance. Also, let the pie cool completely before slicing—this helps the filling set properly.
What's the best way to store leftover apple pie?
Keep it at room temperature for up to 2 days in an airtight container. For longer storage, refrigerate for 3-4 days. To refresh slices, reheat in a 350°F oven for 5-10 minutes until warm. The springform pan makes transporting whole pies easy for potlucks!
Can I make this pie ahead of time?
Yes! Prepare the filling 1-2 days ahead and store it refrigerated. Assemble the pie up to 24 hours before baking—just refrigerate until ready to bake. For freezer-friendly pies, assemble completely (unbaked), wrap tightly, and freeze for up to 2 months. Add 15-20 minutes to baking time from frozen.